Fig. 1
An articular cartilage lesion at the chondral labral junction (arrow). The overall size of the lesion was decreased by the rim trimming

Fig. 2
After debridement of deficient labrum, a border of healthy native labrum (arrow) is the starting point for anchoring the graft
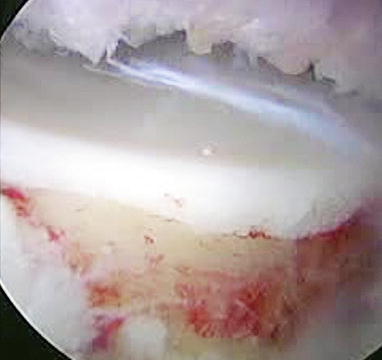
Fig. 3
Prepared rim for labral reconstruction. With no labrum the rim trimming can be done with increased precision
Autograft Technique
Upon completion of the diagnostic arthroscopy and confirmation that the labrum is not repairable, the remnant labrum is resected, the acetabular rim is prepared with a mechanical burr, and the defect site is measured. The graft is harvested with the leg in extension through a longitudinal incision centered over the greater trochanter. A graft, measuring approximately 60 mm by 15 mm, is harvested from the central and posterior third of the iliotibial band. The length of the graft is determined by the size of the defect. Unless tension is seen in the iliotibial band, the defect is typically closed. A suture anchor is placed at the anterior-most aspect of the defect. The graft is tubularized and advanced into the joint through the midanterior portal (Fig. 4). A suture anchor is then placed at the posterior aspect of the defect and the graft is secured. Suture anchors are then place along the graft to ensure stability and apposition of the graft (Fig. 5). Sutures can be looped around the graft or passed through the graft. Sutures looped through the graft tend to evert the labrum and sutures passed through the labrum tend to invert it. Using a combination of these sutures to manage the position of the graft results in better restoration of the suction seal. Traction is released and a dynamic exam is performed to ensure the suction seal has been restored. The dynamic exam should include moving the hip through full range of motion to ensure adequate seal (Fig. 6). If the graft appears unstable, additional suture anchors can be placed.
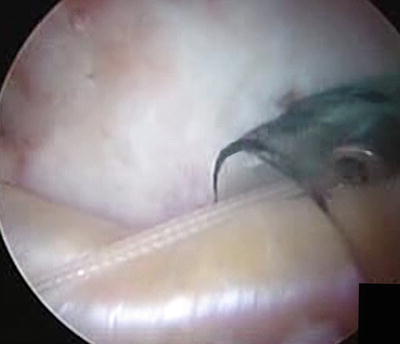
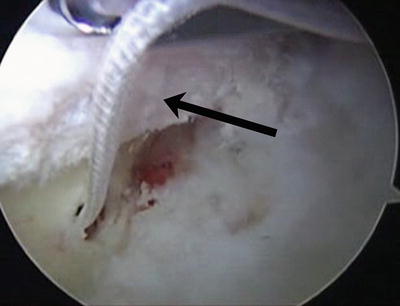
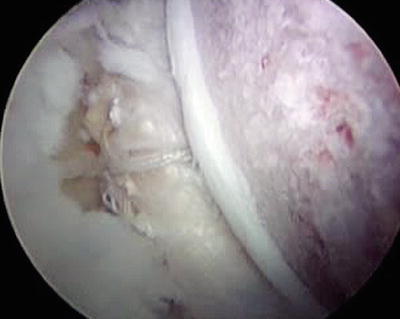
Fig. 4
The tubularized autograft coming into the joint through the midanterior portal
Fig. 5
Suture anchors placed along the acetabular rim to secure graft in place
Fig. 6
Arthroscopic view of the dynamic exam. The labral autograft recreates the seal with the femoral head
Allograft Technique (Carreira Shuttle Technique)
For this allograft technique, an accessory distal portal is created for the shuttling of allograft tissue and for anteromedial anchor placement. The fascia lata is tubularized on a back table using a baseball stitch with 2-0 Vicryl (Fig. 7).
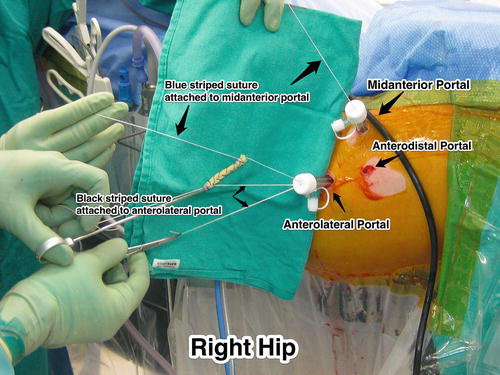
Fig. 7
Setup for the insertion of the labral allograft
Key steps:
1.
 Neuromuscular Hip Disorders: Focus on Cerebral Palsy
 Femoral Deformities: Varus, Valgus, Retroversion, and Anteversion
 Surgical Technique: Arthroscopic Labral Management
 Surgical Technique: Endoscopic Gluteus Medius Repair
 Subspine Impingement and Surgical Technique
 Atraumatic Instability and Surgical Technique


A percutaneous anchor is placed through the accessory distal portal (ADP) at the anteromedial extent of the labrum reconstruction. This anchor is placed with a striped suture to allow for measuring of the length of the defect once the second anchor has been placed.
Related posts:
Neuromuscular Hip Disorders: Focus on Cerebral Palsy
Femoral Deformities: Varus, Valgus, Retroversion, and Anteversion
Surgical Technique: Arthroscopic Labral Management
Surgical Technique: Endoscopic Gluteus Medius Repair
Subspine Impingement and Surgical Technique
Atraumatic Instability and Surgical Technique
Stay updated, free articles. Join our Telegram channel
Full access? Get Clinical Tree
