Closing Wedge Proximal Tibial Osteotomy
Patient Presentation and Symptoms
Degenerative arthritis of the medial compartment of the knee is a common disease. Patients present with pain over the medial compartment that occurs with activity. They commonly have had a previous medial meniscectomy. The knee pain is usually relieved with rest and is characteristic of a mechanical type of pain. In younger patients, closing wedge osteotomy of the tibia relieves this pain.1–5
Indications
The indications for the procedure include medial compartment pain in a radiographically abnormal knee. The pathology is demonstrated on weight-bearing x-rays, which document a varus position of the knee with a narrowed medial compartment joint space. Optimally, the patient should be young and have good-quality bone. The prerequisites for osteotomy include range of motion over 90 degrees, muscle strength greater than grade 3, preserved cartilage space in the opposite compartment, good ligament stability, and excellent bone quality. Another indication for this procedure is the anterior cruciate ligament (ACL)-deficient knee with medial joint line inclination.
Contraindications
Contraindications for the operation include significant pain, which is present at rest as well as during activity. This is one hallmark of an inflammatory type of arthropathy, which cannot be treated predictably with osteotomy. Active infection is also a contraindication for surgery.6
Physical Examination
In the typical patient with degenerative disease, examination may show a mild effusion with intact ligaments on manual stress testing. The varus alignment is visually apparent with the patient standing. The patient’s gait may have a varus thrust.
Preoperative Planning
For preoperative planning, an anteroposterior (AP) weight-bearing radiograph of the lower extremity is imperative. The x-ray film should show the hip, knee, and ankle on one view. This allows the surgeon to draw the mechanical axis of the femur (center of femoral head to center of knee) and of the tibia. The angle formed by these two lines can be measured and the amount of correction determined. If the correction is more than 15 degrees, a different type of osteotomy should be planned.7–10
In the preoperative planning, it is important to anticipate overcorrection of the extremity in a valgus position. Normally 3 degrees of overcorrection is selected. For example, in a normal lower extremity the mechanical axis of the femur aligns with or is parallel to the axis of the tibia. Therefore, if in an abnormal knee, the mechanical axis of the femur is in a varus position relative to the mechanical axis of the tibia by 6 degrees, a 9-degree closing-wedge osteotomy would be performed to allow the knee to be valgus alignment postoperatively. This over-correction transfers stresses to the intact lateral compart-ment.10,11
Special Instruments
Special instruments have been developed that allow the surgeon to accurately perform the operation. Use of these instruments is mandatory so that over- or undercorrection is eliminated and excellent bone surfaces are prepared, which, when accurately opposed and stabilized, heal quickly. These instruments include guides for performing the osteotomy as well as implants and instruments for internal fixation of the osteotomy.
Anesthesia
In the operating room adequate regional or general anesthesia is established.
Patient and Equipment Positions
The patient is positioned on an extension of the operating table that is radiolucent, allowing fluoroscopic imaging of the hip and knee. A radiopaque marker is placed using fluoroscopic guidance over the center of the femoral head based on an AP radiograph. An easily accessible and appropriate marker is an electrocardiogram (ECG) electrode. This metal bump is easily palpated after draping the leg. Thus, during the surgical procedure, the center of the hip can be accurately located and the extremity’s mechanical axis from the center of the hip to the center of the ankle established. After performing the osteotomy, the surgeon will know whether the mechanical axis goes through the lateral compartment of the knee by obtaining an AP radiograph using a fluoroscope centered on the knee. Appropriate positioning of the patient is important so that nothing obstructs the radiographic imaging of either the hip or the knee. After the patient is positioned so that these x-rays are obtained, a tourniquet is placed on the proximal thigh and the knee is prepped and draped to establish a sterile field.
Surgical Procedure
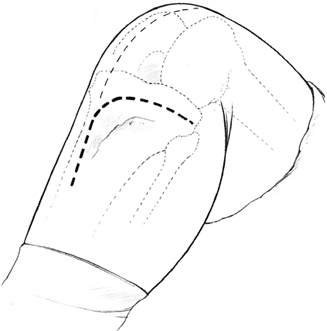
Perioperative prophylactic antibiotics are used. Anticoagulation is also used to prevent deep venous thrombosis and pulmonary embolism. With the patient supine on the operating table, two surgical incisions are outlined. The first incision that is drawn is the one that would be used to perform a total knee arthroplasty. This incision is drawn on the skin so that the surgeon will recognize where future operative intervention could occur. Then, an inverted L-shaped incision for the osteotomy is made beginning at the tibial tubercle and extending the total knee incision distally on the anterior aspect of the leg (Fig. 54–1). The lateral limb of the incision is made from the tibial tubercle and extended back to the fibular head. The musculature from the upper part of the anterolateral compartment is reflected subperiosteally off of the tibia and fibula (Fig. 54–2). The patellar tendon is retracted and protected. The iliotibial band insertion is reflected proximally off the distal half of Gerdy’s tubercle. The final portion of the surgical exposure is to remove the proximal and medial one-third of the fibular head at the tibiofibular joint. The rest of the proximal tibiofibular ligaments are divided so that the proximal fibula can ride proximally later in the operation. A retractor is then placed subperiosteally around the posterior aspect of the knee to protect the neurovascular bundle. Extreme care is taken not to have pressure on the peroneal nerve or to retract the proximal fibula excessively, as this can damage the nerve and result in a peroneal nerve palsy.
The medial and lateral joint spaces are identified with Keith needles, and then using a pin placement guide, a calibrated proximal pin is inserted 1 1/2 to 2 cm distal to the joint (Fig. 54–3). This is inserted parallel with the joint. The pin traverses the proximal tibia and stops at the medial tibia cortex. This position is documented using the fluoroscope. In smaller patients, a 1.5-cm proximal bone fragment is desired. In larger patients, a 2-cm distance from the joint line to the upper pin is appropriate. After the calibrated proximal pin is inserted, the osteotomy guide is set for performing the osteotomy based on the preoperative calculation (Figs. 54–4 and 54–5). The guide is secured at the reference point on the pin. A second distal pin is inserted until the point of the pin reaches medial cortex. This pin position is set by the guide to leave a 5-mm medial bone bridge after the osteotomy wedge is removed. A fluoroscope is then used again to check placement of the proximal and distal pins. These two pins define the osteotomy and will control the saw cuts made on the tibia. Their position should be exactly where the osteotomy should be and the appropriate medial bridge of bone should remain. After the first two pins are acceptable, an additional two proximal and one distal pins are inserted. The final position of the cutting guides and pins is checked with the fluoroscope. The pins are broken off at the notch on the pins and the angle guide removed. The pins then allow insertion of proximal and distal saw guides. They stabilize the guides. The initial two pins prevent the saw from diverting from its path across the tibia as the correct size of wedge is resected. The surgeon protects the soft tissues anteriorly and posteriorly as the saw guides are used to resect the wedge of bone from the tibia. At this point, the surgeon can view the medial side of the tibia through the osteotomy (Fig. 54–6). The medial cortex should be intact. The surgeon should check to make sure that the posterior medial cortex itself has been removed over to the medial aspect of the tibia. If there is a connecting area of posterior cortex, it will prevent closure of the osteotomy. The medial hinge intact at this point should not measure more than 5 mm. If an excessive amount of bone is left intact on the medial side, a fracture into the medial joint space can occur. With the osteotomy completed, the distal pins are removed. An osteotomy plate is placed over the two proximal pins (Fig. 54–7). The plate is selected to make sure the offset is appropriate to allow closure of the osteotomy. The two proximal pins have predrilled holes for screws. They are removed one at a time and replaced with 6.5mm cancellous screws, which go all the way across the proximal fragment to the medial side. Then with the knee in extension, the osteotomy compression device is placed adjacent to the tibial shaft and fixed there with a pin. The osteotomy is now closed very slowly. As resistance is encountered, the surgeon should pause for 1 to 2 minutes in between sequential compressions. This allows the medial wedge of cancellous bone to slowly compress and the hinge to stay intact medially.
With the osteotomy completely closed and while the compression device is still holding the osteotomy secure, the mechanical axis of the leg can be checked. The easiest way to check the mechanical axis is to locate the ECG electrode that was placed over the center of the hip. With the hip and knee in full extension, the electrocautery wire cord is stretched tight from the center of the hip to the center of the ankle. At the knee this wire should pass slightly through the lateral compartment. Its position can be determined fluoroscopically. The optimal location for the wire is just lateral to the lateral tibial spine. If the mechanical axis is still too far medial, a recutting guide exists that allows the removal of an additional 3 degrees of bone from the distal fragment. This cutting guide allows new pins to be inserted, and these pins then stabilize the same cutting block that was used initially. This facilitates an accurate 3-degree additional correction of alignment. If this second cutting were to be necessary, the mechanical axis should be rechecked prior to final fixation.
Related posts:

Stay updated, free articles. Join our Telegram channel

Full access? Get Clinical Tree


