Shoulder
John William Sperling
ANTERIOR SUPERIOR APPROACH FOR ROTATOR CUFF REPAIR
Indications
Acromioplasty
Rotator cuff repair
Position
The patient is carefully positioned in the beach chair position. The waist should be in approximately 45 degrees of flexion and the knees in 30 degrees of flexion. The table may be slightly rolled away from the surgical shoulder.
Landmarks
One should palpate the posterior scapular spine, the lateral border of the acromion, the anterior border of the acromion, and the anterior portion of the clavicle and coracoid. These should be marked out with a marking pen (Fig. 5-1). If one is performing arthroscopy prior to an open procedure, one may wish to mark out the standard anterior incision and attempt to place the anterior portal in line with this future incision.
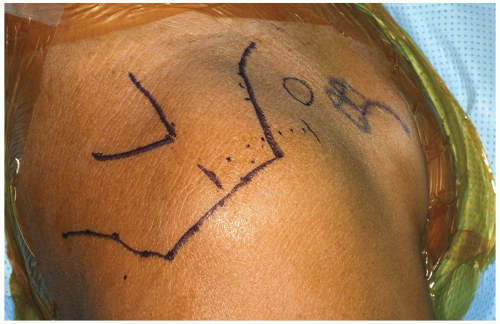 FIGURE 5-1 The landmarks on the shoulder are carefully identified and outlined. A 4 to 5 cm incision is marked out on the shoulder parallel to the lateral border of the acromion. |
TECHNIQUE
Incision: there is significant variability in the skin incision used for an anterior superior approach to the shoulder including oblique incisions, horizontal incisions, as well as vertical incisions. It is based on the individual preference of the surgeon which incision to use.
An incision is made over the superior aspect of the shoulder parallel with the lateral border of the acromion in line with Langer’s lines. The length of the skin incision is typically about 4 to 5 cm in length. The skin is incised as well as the fat. Skin flaps are carefully created and mobilized.
The deltoid muscle is clearly identified. There is significant variability among surgeons in regard to the manner with which they prefer to take down the deltoid (Fig. 5-2). In this example, the deltoid is taken down off the anterior aspect of the acromion with full thickness sleeves (Fig. 5-3). It is critical to carefully include both the deep and superficial fascia of the deltoid when this is performed. The surgeon then has the option of splitting the deltoid in line with the fibers starting from the acromioclavicular (AC) joint anteriorly for approximately 3 to 4 cm, or the surgeon has the option of extending the deltoid detachment posteriorly over the lateral border of the acromion. The extent of the deltoid detachment over the lateral border of the acromion can be modified based on the size of the rotator cuff tear. One must be careful to avoid splitting the deltoid more than several centimeters from the acromial border to protect the axillary nerve. The area where the proximal deltoid split is made can be marked with a retention stitch (Fig. 5-4). An additional stitch is placed distally in the deltoid split to prevent propagation (Fig. 5-5).
An acromioplasty may then be performed based on surgeon preference (Fig. 5-6). Retention stitches are then placed in the rotator cuff tear (Fig. 5-7). The rotator cuff repair can then be performed (Fig. 5-8).
For closure, a meticulous repair of the deltoid is required. At the end of the procedure, the deltoid is repaired back in a tendon-to-tendon as well as a tendon-to-bone manner (Figs. 5-9, 5-10 and 5-11). Drill holes are placed through the acromion with tendon-to-bone stitches. Additionally, the split within the deltoid itself is repaired with side-to-side stitches. Complications in this approach may be related to deltoid dehiscence postoperatively.
Pearls/Pitfalls: A meticulous and strong repair of the deltoid is essential to avoid postoperative dehiscence. It is critical to carefully identify both the deep and superficial deltoid fascia layers during the exposure and repair.
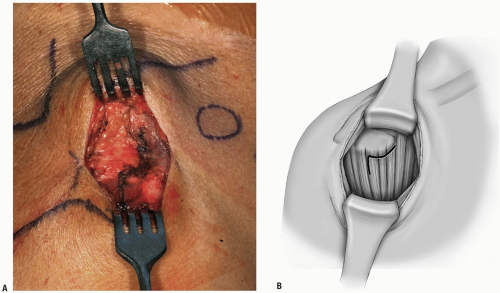 FIGURE 5-2 A,B: The area of deltoid to be taken off of the acromion is outlined. |
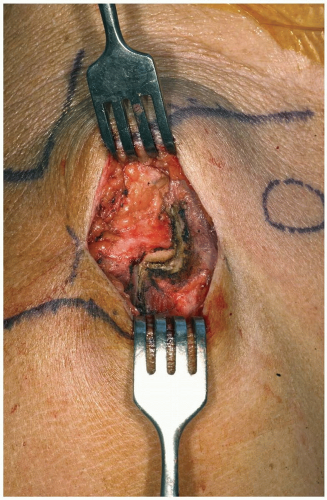 FIGURE 5-3 Full thickness flaps of the deltoid are taken down. |
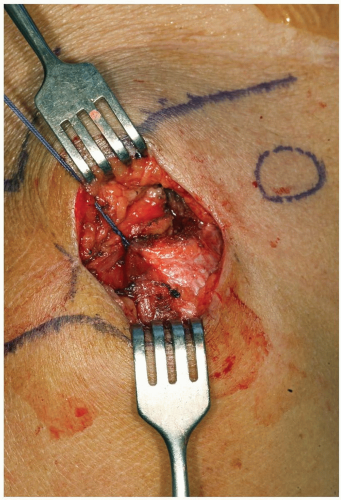 FIGURE 5-4 A marking stitch is placed in the corner of the deltoid to assist in later repair and ensure proper alignment of the deltoid at the time of repair. |
 FIGURE 5-5 A stitch is placed in the deltoid split distally to prevent propagation. |
 FIGURE 5-6 An acromioplasty may be performed. |
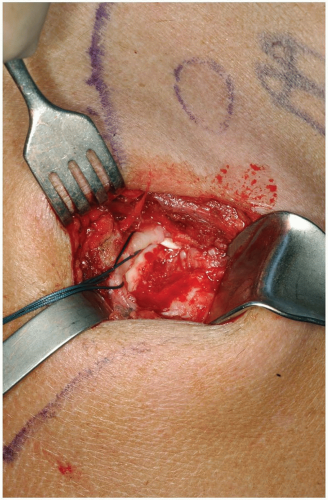 FIGURE 5-7 The rotator cuff tear is identified and retention stitches are placed. |
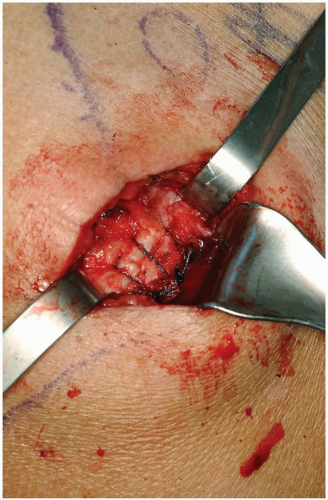 FIGURE 5-8 Rotator cuff repair is performed. |
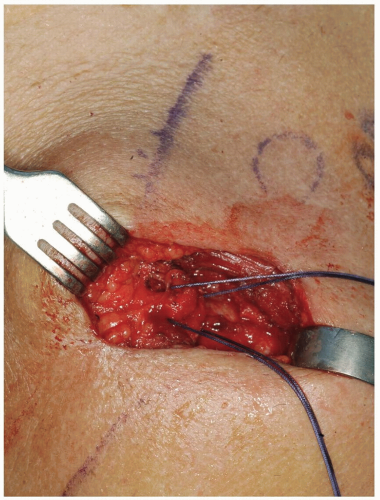 FIGURE 5-9 Drill holes can be placed in the acromion for deltoid repair. |
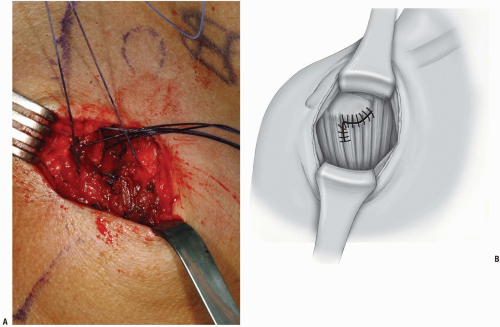 FIGURE 5-10 The corner of the deltoid is sutured back to its anatomic location. |
 FIGURE 5-11 Final deltoid repair. |
HORIZONTAL INCISION FOR CLAVICLE FRACTURES AND NONUNIONS
Indication
Clavicle fracture or nonunion.
Positioning
The patient is placed on the operating room table in the beach chair position. The entire upper extremity is sterilely prepped and draped in the usual manner. The endotracheal tube is positioned to the opposite corner of the mouth. A rolled up towel may also be placed at the medial border of the scapula to make the clavicle more readily accessible.
Technique
Incision: the incision runs parallel to Langer’s line along the inferior border of the clavicle overlying the fracture nonunion (Fig. 5-12). The incision is placed inferiorly so that the scar will not lie directly on top of the instrumentation. The skin is incised as well as the fat. It should be done with great care and caution to carefully identify any supraclavicular nerves (Fig. 5-13). These should be carefully preserved. The fascia of the overlying trapezius and the deltoid is carefully identified and incised. Sutures are placed on the fascial ends for later reattachment.
Additionally during the course of the procedure, one must be very diligent that the neurovascular structures are present on the undersurface of the clavicle.
The fracture is then identified and reduced (Fig. 5-14). Internal fixation may be performed based on surgeon preference (Fig. 5-15)Related posts:

Stay updated, free articles. Join our Telegram channel

Full access? Get Clinical Tree


