Lumbar Spine
PART 1. Anterior Exposure of the Lumbar Spine
Paul M. Huddleston
Scott Zietlow
Jason C. Eck
Orthopedic surgeons developed and refined the anterior lumbar exposures early in the 20th century for the treatment of tuberculous spinal conditions and as a method to treat spondylolisthesis (1,2). The anterior lumbar anatomy is complex; as a result, many of these techniques have been developed and performed in close cooperation with General Surgery specialists. This collaboration should continue. During routine exposures, an additional set of seasoned hands will facilitate speeding the case to completion. For more difficult and complex exposures, the same hands may very well mean the difference between a serious but transient intraoperative complication or lasting morbidity and death. Regardless of the difficulty of the case, “the best interest of the patient is the only interest to be considered” (3).
ANTERIOR PARAMEDIAN RETROPERITONEAL LUMBAR EXPOSURE
Indications
Biopsy
Arthroplasty
Arthrodesis
Position
The patient should be placed in the supine position on an operative frame or table that will allow intraoperative x-ray or fluoroscopy in two planes. The use of a bolster under the lower back will accentuate lumbar lordosis and facilitate exposure of the anterior lumbosacral junction. If the patient is obese, the table may be placed in a Trendelenburg position and tape placed upon the upper abdomen and the pannus retracted cranially. The upper extremities are placed on well-padded arm boards in a “90-90” position. The head is secured in a neutral position. All bony prominences are padded. All monitoring lines and catheters are safely secured.
Landmarks
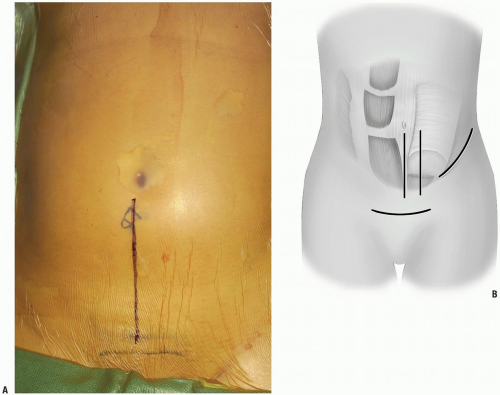
Lines are drawn overlying from below the umbilicus heading inferiorly towards the pubic bones and symphysis (Fig. 14-1A). The symphysis will signify the lower limit of the possible skin and muscle dissection.
Equipment
A minimum of two large bore peripheral IVs should be placed. Additional monitoring with central venous and peripheral arterial lines is used as necessary. The use of headlamp illumination and operative loupes is left to the discretion of the surgeon but is recommended. A bipolar cautery, in addition to a monopolar, should be available for controlling hemostasis near and around the neural elements. If intraoperative neuromonitoring is used, then leads are placed in the lower extremity prior to the prep and drape. Intraoperative x-rays of fluoroscopy will aid in the identification of operative levels and verify the location of any implants placed. Self-retaining abdominal retractors may be used but the authors prefer handheld retractors if available, as these tend to be easier on the tissues.
Technique
Incision: to access the lower three levels of the lumbar spine or in patients with a large abdomen, a midline incision is ideal. For visualization of the lowest lumbar level or when cosmesis is an issue, a low transverse incision is preferred. Alternatively, a paramedian longitudinal incision may be placed directly over the rectus abdinus to minimize the development of dead space above the fascia and subsequent possible wound infection (Fig. 14-1B).
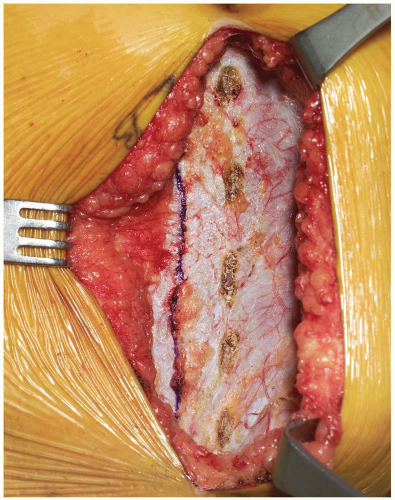
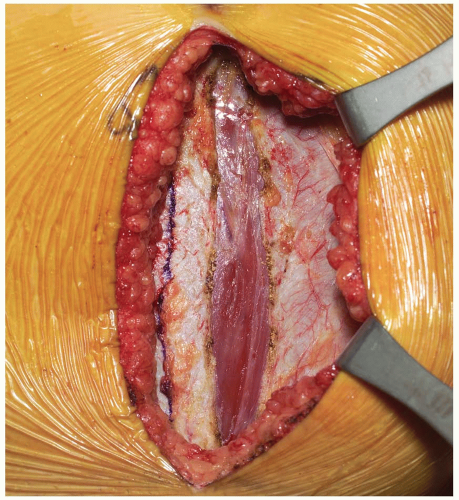
Dissection progresses through the skin and subcutaneous tissue levels to the fascia. A small skin flap is then elevated over the left abdominal region to provide access to the anterior rectus sheath (Fig. 14-2). The midline is identified and the fascia is divided over the left rectus muscle (Fig. 14-3). The muscle is dissected from its medial fascial border and the various perforating vessels are ligated, divided, and cauterized as needed (Fig. 14-4).
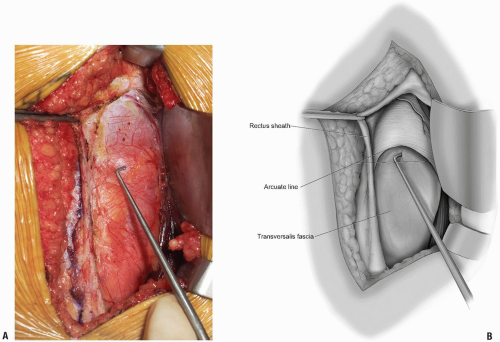
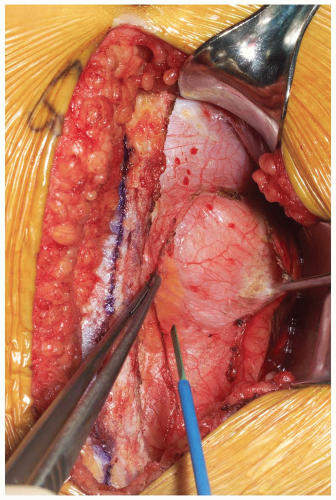
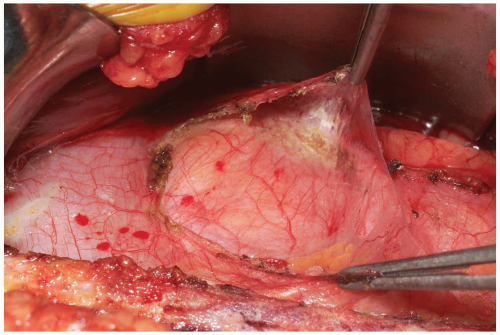
The posterior rectus fascia is visualized and the arcuate line identified (Fig. 14-5). Using surgical forceps to elevate the posterior rectus fascia, a small incision is made through this using an electrocautery or knife (Fig. 14-6). Care is taken not to incise the peritoneum and abdominal viscera. Development of this potential space allows access anterior to the peritoneum through to the retroperitoneal space (Fig. 14-7). This is a critical portion of the surgical approach and the surgeon must be confident they are in the correct tissue plane to avoid injury to the abdominal contents and/or damage to the lateral abdominal lumbar neurovascular structures.
The dissection is developed laterally towards the retroperitoneal space. This can be performed by manual blunt dissection, using a “sponge-on-a-stick” if necessary. Peritoneal tears, if encountered, should be repaired with an absorbable suture on a tapered needle as they are recognized. The abdominal structures are then mobilized from patient’s left to right direction within the abdominal cavity.
As the retroperitoneal dissection progresses laterally, retroperitoneal fat may be encountered as well as the round ligament or vas deferens. If necessary, the round ligament may be divided to assist in mobilization (Fig. 14-8). The blunt dissection should continue cranial to these structures. If the patient has a larger body habitus and/or the exposure is difficult, the posterior rectus sheath can be divided cranially in a “north to northeast” fashion. This need not be repaired upon subsequent closure and facilitates more generous mobilization of the abdominal contents and/or visualization of the mid to upper lumbar spine if necessary.
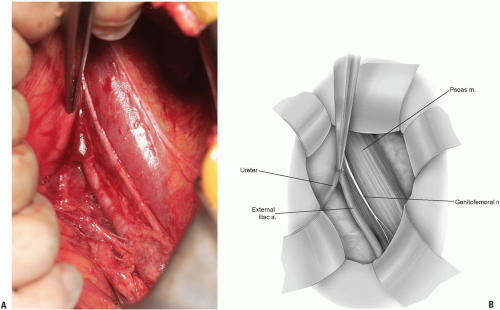
Care is taken to identify the ureter (Fig. 14-9). This will be seen as a small, white structure within the retroperitoneum. This can be identified by very carefully observing its peristalsis or gently inducing or testing for the peristalsis by compression with a small forceps.
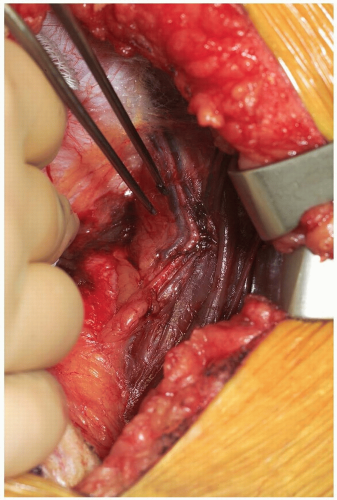
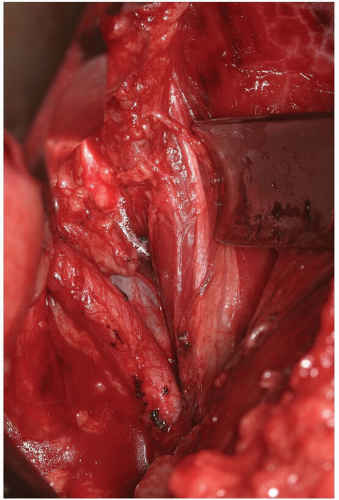
The iliopsoas becomes visible within the field and the anterior neural structures upon it can be appreciated (Fig. 14-10). Care again should be taken not to damage these with electrocautery, or pressure from surgical retractors.
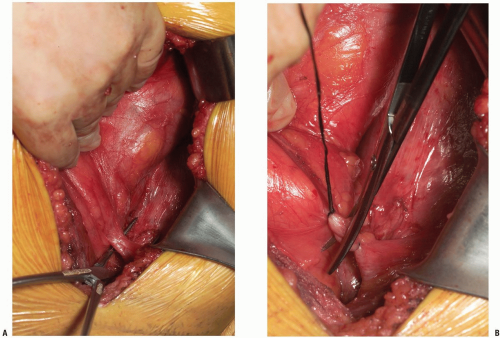
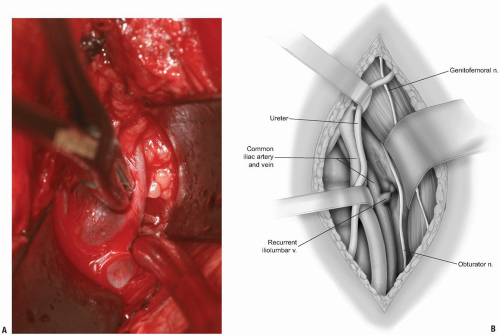
If exposure to the upper lumbar spine is necessary, exploration and mobilization of the external iliac vein and artery will be necessary to identify and ligate the ascending or recurrent iliolumbar vein (Fig. 14-11). These vessels appear as short, medium, or multiple lateral insertions into the common iliac vein from a cranial direction. These branches are deep within the abdomen near the pelvic brim where visibility is poor. They should be doubly ligated prior to be being divided (Fig. 14-12). The obturator nerve and lumbosacral trunk are especially at risk in the area below the recurrent iliolumbar vessels over the lateral aspect of the sacrum (Fig. 14-13).
The sympathetic chain is most easily moved laterally, away from the midline. This is most easily accomplished by blunt dissection with a small sponge. Large branches of the sympathetic chain may be ligated and divided with any attendant vessels if necessary.
To access the lumbosacral junction, below the confluence of the common iliac veins, the middle sacral artery and veins should be identified and ligated (Fig. 14-14). Divide the hypogastric plexus in a vertical fashion with a sharp blade and use a small sponge to blunt dissect the filmy, plexus laterally towards the iliac vessels. Careful placement of self-retaining or handheld retractors will protect the great vessels and allow clear visualization of the disc space (Fig. 14-15).
Following the operative procedure, a final sponge and needle count is performed. The fascial layer is closed in a watertight fashion using a running suture. The subcutaneous layer is repaired and the skin approximated. In the presence of a large dead space, the use of a suprafascial drain is optional.
Stay updated, free articles. Join our Telegram channel

Full access? Get Clinical Tree


