Chapter 5 Osteochondral Mosaicplasty
Surgical Principles and Objective
Indications
Contraindications
Patient Information
Preoperative Workup
Surgical Technique)
The following explanations relate to the figures identified.
Step 1
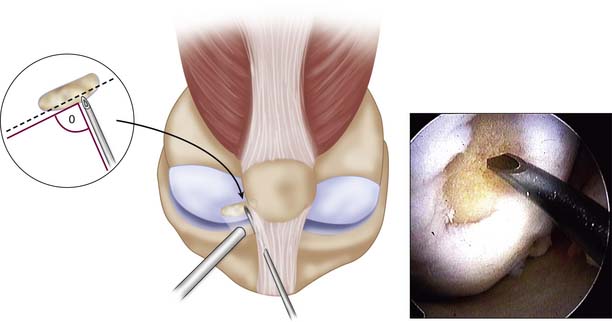
An arthroscopy is performed to examine the intraarticular conditions. The type, site, and size of the defect is determined, and the quality of other chondral surfaces as well as donor site availability are checked (Fig. 5-1).
Patellotrochlear and tibial lesions always require an open procedure.
Use a 1.2-mm K-wire or 18-gauge spinal needle initially to locate the portal sites.
Step 2
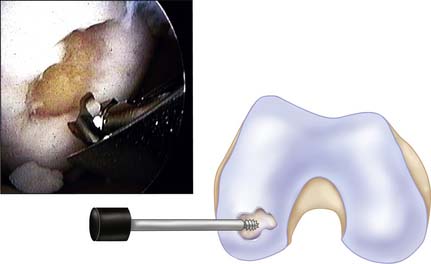
Use a full-radius resector or curette and a knife blade to bring the edges of the defect back to good hyaline cartilage at a right angle (Fig. 5-2).
Clean the base of the lesion with an arthroscopic burr or half-round rasp to viable subchondral bone. Abrasion arthroplasty of the defect site promotes fibrocartilage grouting from the bony base.
Step 3
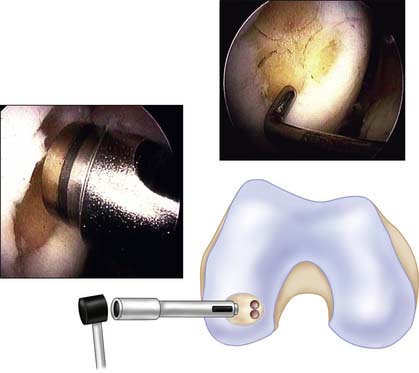
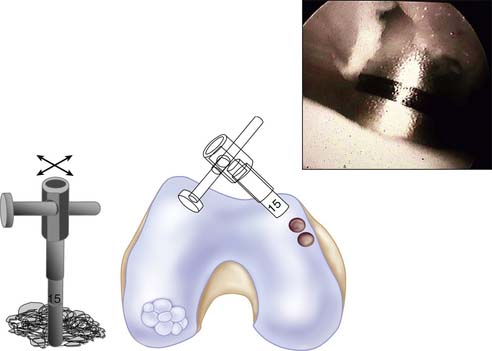
Because tapping the cutting edge of the guide into the bony base and removing it can mark the defect site, use the drill guide to determine the number and size (2.7, 3.5, 4.5, 6.5, and 8.5 mm in diameter) of grafts needed (Fig. 5-3).
Step 4
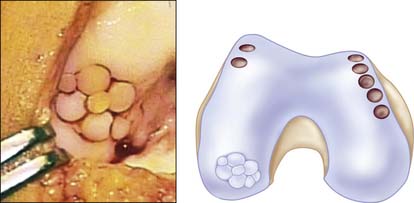
Filling of the defect by same-sized contacting rings allows a filling rate of about 70% to 80%, but use of additional sizes to cover the dead spaces and cutting the grafts into each other can improve the coverage up to 90% to 100% (Fig. 5-4).
Step 5
The medial femoral condyle periphery of the patellofemoral joint above the line of the notch is the most preferred harvest site (Fig. 5-5).
In case of arthroscopic mosaicplasty, the medial patellofemoral periphery has easier access than the lateral one as fluid distension can promote lateral positioning of the patella and may provide easier perpendicular positioning for the harvesting chisel.
Stay updated, free articles. Join our Telegram channel

Full access? Get Clinical Tree


