FIGURE 6.8 Lateral aspect of right shoulder (red arrow indicates path of the needle). (From Tank PW, Gest TR. Lippincott Williams & Wilkins Atlas of Anatomy. Philadelphia, PA: Lippincott Williams & Wilkins, 2009.)

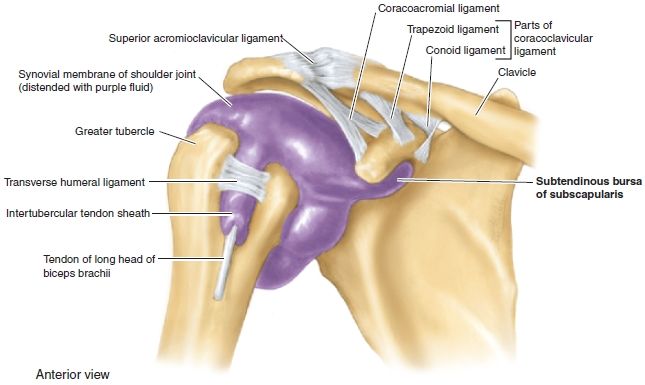
FIGURE 6.9 Right glenohumeral joint capsule. (From Tank PW, Gest TR. Lippincott Williams & Wilkins Atlas of Anatomy. Philadelphia, PA: Lippincott Williams & Wilkins, 2009.)
PATIENT POSITION
- Sitting or supine on the examination table.
- The patient’s hands are folded in his or her lap with fingers interlaced.
- This allows consistency of positioning of the shoulder so that the landmarks do not change from the time that they are identified and marked until the time of injection.
- Rotate the patient’s head away from the side that is being injected. This minimizes anxiety and pain perception.
LANDMARKS
1. With the patient seated on the examination table, the clinician stands lateral and anterior to the affected shoulder.
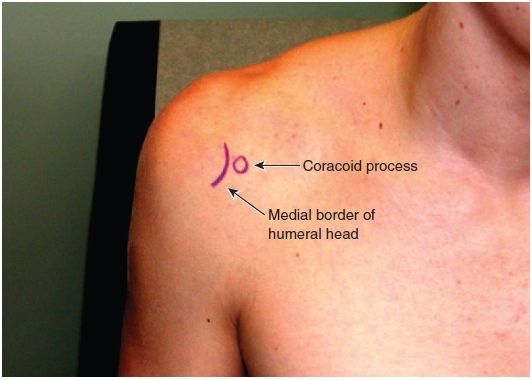
2. Identify the coracoid process. This is the hard and somewhat tender knob of bone immediately medial to the humeral head.
3. The injection point is 1 cm lateral to the coracoid process.
4. At that site, press firmly on the skin with the retracted tip of a ballpoint pen. This indention represents the entry point for the needle.
5. Find the lateral edge of the acromion, and mark it with an ink pen.
6. Palpate the posterior edge of the acromion and mark that.
7. Having identified the posterior lateral corner of the acromion, drop a vertical line down from that point and mark a spot 2 cm below the posterior lateral corner. This will be the target for the tip of the needle (Fig. 6.10).
8. Once the landmarks are identified, the patient should not move the shoulder or arm.

FIGURE 6.10 Anterior right shoulder landmarks.


