FIGURE 6.36 Right wrist cross-section at the level of the distal radioulnar joint. (From Tank PW, Gest TR. Lippincott Williams & Wilkins Atlas of Anatomy. Philadelphia, PA: Lippincott Williams & Wilkins, 2009.)
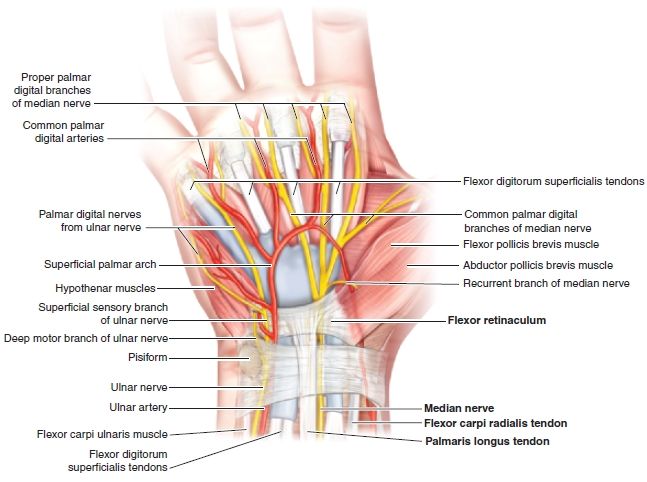
FIGURE 6.37 Right wrist—volar aspect.
PATIENT POSITION
- Supine on the examination table with the head of the bed elevated 30 degrees.
- The elbow is slightly flexed with the wrist in supination.
- The wrist is then positioned in slight hyperextension with the placement of chucks pads or towels underneath the supinated wrist.
- Rotate the patient’s head away from the side that is being injected. This minimizes anxiety and pain perception.
LANDMARKS
1. With the patient supine on the examination table, the clinician stands lateral to the affected wrist.
2. Identify and mark the distal palmar crease as shown (Fig. 6.38).
3. Identify and mark the intersection of the palmaris longus tendon with the distal palmar crease (Fig. 6.39).
4. Mark a spot 1 cm proximal and 1 cm ulnar to this intersection.
5. At that site, press firmly with the retracted tip of a ballpoint pen. This indention represents the entry point for the needle.
6. After the landmarks are identified, the patient should not move the wrist.
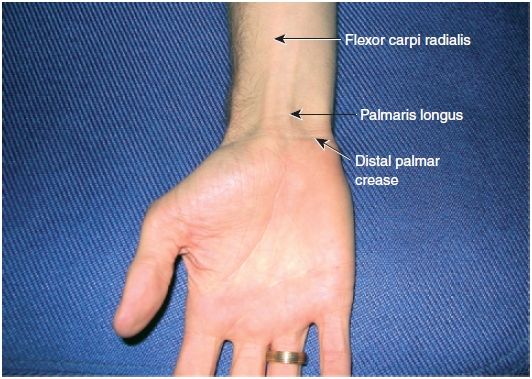
FIGURE 6.38 Right carpal tunnel injection surface anatomy.


