Hintegra Implant: Features, Technique, and Results
Alastair Younger
INTRODUCTION
The Hintegra implant, designed by a group of surgeons in Europe in the 1990s, is used in total ankle arthroplasty (TAA). Its origins start with the concepts established by the Scandinavian total ankle replacement (STAR) system, and it has gone through three generations since its inception.
Like the STAR, the Hintegra has a three-component mobilebearing design. It has a number of design changes distinct from the STAR, based largely on the cadaver work performed by Dr. Beat Hinterman.
The features include a flat-plate tibial component, which does not violate the distal tibia; an anterior flange for screw insertion instead of two fixation barrels as in the STAR; a left and a right component; a contoured talar component wider laterally and narrower medially, fixed via two vertical plugs instead of a keel; a polyethylene insert made of industry standard polyethylene held with two rails on the medial and lateral sides of the talar component instead of a central rail.
Similar to the STAR, the Hintegra has a smooth surface inferior to the talar component; a cobalt chrome-bearing surface with a titanium plasma spray ingrowth surface coated with hydroxyapatite; a medial and lateral wall on the talar component; and the same metal-bearing surface and ingrowth surface on the talar component.
The mobile-bearing polyethylene insert in the earlier designs was made to a standard higher than that of the STAR and therefore is less likely to break.
The three generations of the Hintegra have subtle differences but are important to understand as their survivorships have been different. In the original and the second-generation designs, the talar component was stabilized only by screws. In the third-generation design, it was stabilized by pegs, which seem to have reduced the rate of aseptic loosening. The firstand second-generation designs differed by the addition of hydroxyapatite on the ingrowth surface.
INDICATIONS
TAA is indicated in patients with end-stage ankle arthritis. However, some patients are more suitable than others because of the limited life span of an ankle joint replacement. The age of patients considered for ankle replacement should be more than 55. However, in some cases of extensive hindfoot arthritis, the risk of aseptic loosening has to be offset against the benefit of a total ankle replacement (TAR) combined with hindfoot fusions to preserve some motion. Therefore, the primary indication for TAA in our hands is the prevention of loss of motion in patients with extensive hindfoot arthritis after prior fusions, rheumatoid arthritis, or trauma.
Patients with isolated ankle arthritis seem to do as well with a fusion or a replacement, so the risks and benefits of both need to be reviewed with the patient and the decision made by the patient.
Patients with soft tissue contractures or other bony deformities are also candidates for TAR, provided the surrounding deformities can be corrected either by a preceding surgery or during the TAA itself. Therefore, a tibial osteotomy, medial or lateral malleolar osteotomy, calcaneal osteotomy, triple arthrodesis, midfoot fusion, heel cord lengthening, or other soft tissue releases may need to be performed at the same time.
The Hintegra is best suited for primary cases or in revision cases with minimal bone loss. No stemmed revision component currently exists for the Hintegra replacement, but an augmented talus and augmented tibial component do exist. Therefore, revisions with a Hintegra replacement need to have a stable flat cut with minimal bone loss. We have successfully revised other stemmed tibial component designs to Hintegra replacements.
CONTRAINDICATIONS
Relative contraindications are younger patients who may be better suited to an ankle fusion because of the risk of aseptic loosening in time. Patients with risk factors for wound healing are better managed with a fusion, and ideally an arthroscopic fusion. Risk factors for wound breakdown include smoking, rheumatoid arthritis, diabetes, and peripheral vascular disease.
Patients with severely limited motion are unlikely to gain much motion and may be better served by a fusion.1 Patients with a poor soft tissue envelope after trauma may fair poorly after surgery because of both loss of motion and wound breakdown resulting in commensal infection, and should be considered for fusion.
Patients with multiple previous procedures are at risk of loss of motion and skin breakdown from the previous incisions.
Absolute contraindications include patients with Charcot arthropathy, poorly controlled diabetes, active infection in the ankle, severe bone loss, and avascular necrosis.
Patients with more extensive bone loss, such as after an Agility ankle replacement, may be best managed by a stemmed component such as an INBONE prosthesis.
PREOPERATIVE PREPARATION
At the time of consent, the surgeon should have a clear understanding of the patient’s restrictions caused by the ankle arthritis and correctly inform the patient regarding the risks and benefits of TAR, the recovery time, and the commitment required to get a good result. Patients will need to return for follow-up regularly to ensure that wound healing is progressing appropriately and that remobilization is supervised.
The surgeon should understand the local anatomy and any deficits that may affect the outcome of the ankle replacement. Apart from plain x-ray, a computed tomography (CT) scan is useful in assessing surrounding joint arthritis, in combination with physical examination to determine whether other hindfoot joints may be arthritic, symptomatic, or potentially symptomatic.
Prior to undertaking the Hintegra replacement, a surgeon should complete cadaver training, be familiar with the steps of the replacement (including the jigs and equipment such as saws), and train with an expert to ensure that the potential pitfalls encountered during the replacement, such as ligament balancing, can be managed. Complications such as periarticular fracture are more common in patients undergoing surgery by inexperienced surgeons.2,3
PREOPERATIVE PLANNING
It is worthwhile to template the replacement prior to surgery to ensure that the components can be correctly placed. On the consent, it is wise to include all potential ancillary procedures required to ensure that the ligaments are balanced, symptomatic joints outside the ankle are fused, and the foot is correctly aligned with the floor in both the hindfoot and the forefoot.
Additional procedures on the consent include fusions, osteotomies, tendon transfers, ligament reconstruction or releases, and soft tissue releases.
Fusions may include triple arthrodesis or subtalar fusion, navicular cuneiform fusion to correct the forefoot alignment, tarsometatarsal fusion, or interphalangeal fusion to correct forefoot deformities.
Osteotomies may include tibial, medial malleolar, lateral malleolar, calcaneal, midfoot, or metatarsal osteotomy.
Ligament releases may include a deltoid release at the ankle or talonavicular joint.
Ligament repair may include the deltoid ligament (rare) or the lateral collateral ligaments (common).
Soft tissue releases may include the Achilles tendon (either open or percutaneous), or other structures in the back of the ankle such as the posterior capsule, posterior deltoid, the flexor retinaculum, or the fascial planes in the deep compartment.
Tendon transfers may include flexor hallucis longus (FHL) for peroneal deficiency or extensor hallucis longus for tibialis anterior deficiency.
Despite this planning, the surgeon may find that additional procedures not on the consent may have to be performed depending upon the correction achieved to ensure that at the end of the procedure the ankle and foot are correctly aligned and the ligaments correctly balanced.
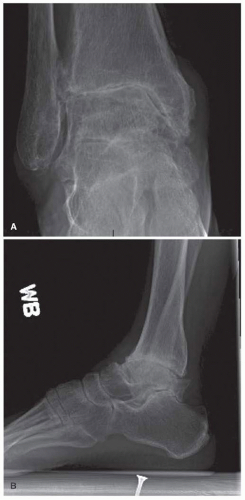
Standing anterior-posterior (AP) and lateral views should be obtained prior to surgery (Fig. 6.1). If there are any issues with regard to bone stock, a CT scan is also helpful.
CONCEPTS
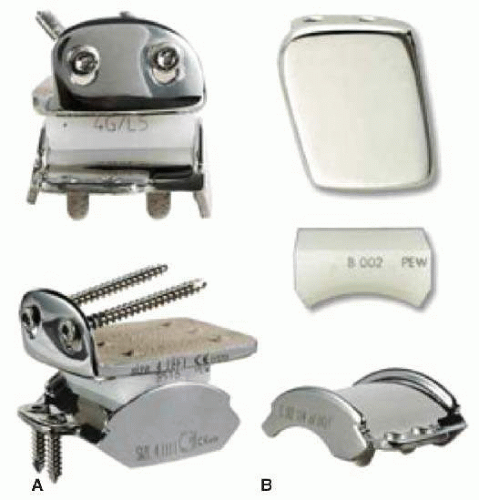
The Hintegra total ankle is a mobile-bearing one, with cobalt chrome as the bearing surface (Fig. 6.2A). A revision prosthesis without a stem but with buildup in the tibial and talar sides also exists (Fig. 6.2B). The unique design feature is a cone shape to the talar component, matching the normal anatomy of the talus. The polyethylene insert is contained by two rails on the medial and lateral sides opposed to the central ridge of the STAR. The ingrowth surface contains titanium plasma spray with hydroxyapatite and is different from that of the first two generations of the Hintegra, which had cobalt chrome with a likely higher revision rate. The third generation had fixation pegs on the talus as opposed to screw fixation for the first and second generations.
Hinterman studied the anatomy of the ankle and published his results. The Hintegra is designed not to violate the distal tibial cortex.
Following are the essential features of an ankle replacement design:
|
STEPWISE TECHNIQUE (VIDEO 6.1)
After initiating anesthesia, a time-out is performed, the equipment checked, and the prosthesis availability (including revision components if required) confirmed. Additional equipment for the associated procedures, such as large or small fragment sets or periarticular plate sets, bone graft, or bone graft substitute, may be required.
Appropriate antibiotic prophylaxis is given.
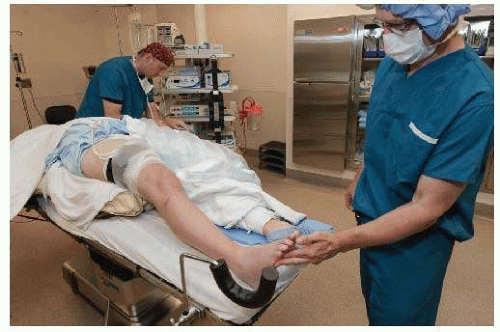
The patient is positioned with the operative hip elevated to allow access to the ankle in the correct orientation (Fig. 6.3). A thigh tourniquet used as a calf tourniquet will not allow appropriate access.
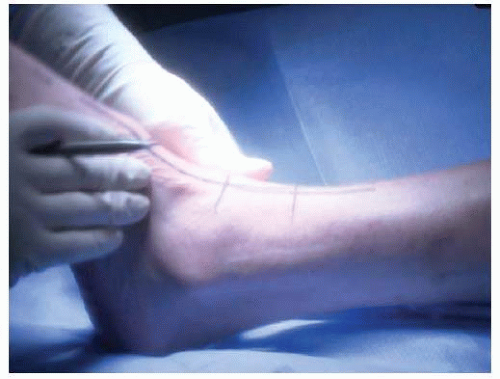
The incisions are marked on the skin to allow the total ankle and ancillary procedures to be performed with the largest skin bridges and the least amount of dissection (Fig. 6.4). Older incisions may compromise the location of the anterior incision.
The second metatarsal shaft, as well as the tibial tubercle, is marked on the foot to assist in assessing rotational alignment.
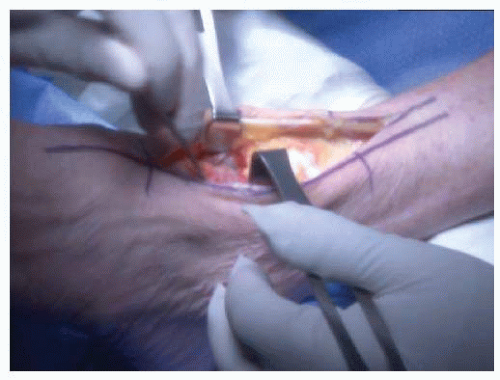
The ankle is approached via a direct anterior approach. Proximal dissection is required to allow placement of the jig. Distal dissection to the talonavicular joint is required to access the medial and lateral gutters. The branches of the superficial branch of the peroneal nerve are preserved as best as possible. The extensor retinaculum is incised in a step-cut manner to allow full repair at the end of the procedure. The slips of the retinaculum between the tendon sheaths are incised as required. The deep peroneal nerve, anterior tibial artery, and associated veins are identified and retracted laterally proximally in the wound. The dissection is carried distally into the ankle and the diseased joint confirmed.
Prior to performing the total ankle, I prefer to perform a tibial osteotomy if required, or debride any joints required for fusion to prevent intraoperative periarticular fractures.
Any osteophytes compromising the access or motion of the joint are removed (Fig. 6.5). These may be on the distal tibia anteriorly, on the neck of the talus, or in the medial and lateral gutters. The talar neck osteophytes may compromise jig placement, and the medial and lateral gutter osteophytes may compromise ankle dorsiflexion if not removed.
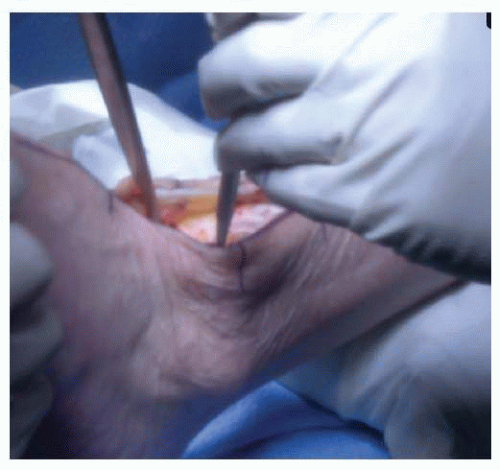
The rotation of the joint is assessed using a blunt instrument placed down the medial and lateral gutters (Fig. 6.6). This will ensure that the tibial jig is placed centrally between the gutters and correctly rotated for internal and external rotations.
To access the lateral gutter, the proximal wound may need to be released and soft tissue dissection performed on the tibia and talus.
An assessment of tension of the medial and lateral structures should be performed at this time. It is rare not to perform an additional procedure to balance the ligaments. This may include a lateral ligament reconstruction or repair, a fibular shortening osteotomy, a medial malleolar osteotomy, or a deltoid ligament release. I have gone away from ligament releases and prefer osteotomies, as will be discussed in the “Pearls and Pitfalls” section.
The tibial jig is placed using a clamp on the proximal tibia (Fig. 6.7). The long axis is aligned parallel with the tibia in the AP and lateral planes. This will ensure that the distal tibial cut will be correctly aligned in flexion and extension as well as in varus and valgus. With the two blunt instruments in the medial and lateral gutters, the jig is placed centrally for medial and lateral translations and internal and external rotations. The first pin is then placed into the distal end of the tibial jig to transfix it, and rotation confirmed against the position of the tibial tubercle and forefoot (Figs. 6.8 and 6.9).
Adjustments exist for internal and external rotations on the jig, as well as for proximal and distal alignments. Using the C-arm and a saw blade, the correct level for the distal tibial cut is confirmed (Figs. 6.10 and 6.11). The distal tibial cut has a 5° anterior slope; this may require a change in the amount of bone removed. My personal preference is to alter the anterior slope to minimize the resection performed. If there is bone loss on either the medial or the lateral side of the ankle, I prefer to keep as much bone as possible bringing the cut to the level of the defect, and adjusting the ligaments separately.
Stay updated, free articles. Join our Telegram channel

Full access? Get Clinical Tree


