Chapter 42 Bone-Patellar Tendon-Bone Autograft Anterior Cruciate Ligament Reconstruction
Advantages of and Contraindications to Bone-Patellar Tendon-Bone Autograft Procedures
Although general indications for anterior cruciate ligament (ACL) reconstruction are discussed elsewhere in this text, it is important to review advantages and disadvantages of patellar tendon autograft reconstruction. Numerous systematic reviews published since 2000 have shown that both bone-patellar tendon-bone (BTB) autograft and three- or four-strand hamstring grafts (HGs) produce reliable ACL reconstruction results with few clinical outcome differences between the two.* A recent systematic review of the one- versus two-incision BTB autograft technique has shown no reproducible difference in pain medication requirement, rehabilitation time, laxity, or other outcome measure.11
Advantages
Contraindications
Surgical Technique
Graft Procurement
The transverse fascia (peritenon) is divided longitudinally in the center of the patellar tendon from the superior pole of the patella distal to the tibial tubercle. Based on surgeon preference, this layer may or may not be closed after harvest. Dissection should be carried medially and laterally to expose the central portion of the patellar tendon (15 to 20 mm). If peritenon closure in not planned, it is important to avoid dissecting too far medially or laterally, which could cause fat pad herniation. The width of the tendon is measured with the knee flexed 90 degrees. The maximum width of BTB graft is one third of the entire width of the patellar tendon. A 10-mm graft is standard in our practice because a typical patellar tendon measures 30 mm in width. For a 27-mm tendon, most would harvest a 9-mm graft and adjust tunnel size accordingly. Some authors have recommended avoidance of patellar tendon harvest in patients with a tendon width of less than 25 mm4; however, as little as 14 mm of patellar tendon following harvest has been left, without subsequent patellar tendon rupture.23
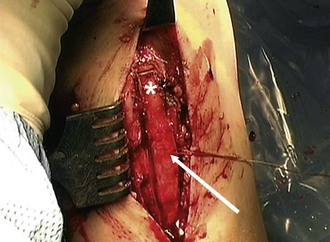
Following determination of tendon width and desired graft size, harvest begins. The tendinous portion of the graft is divided first. A scalpel is used with the knee flexed to 90 degrees to put tension on the patellar tendon. Once the tendon is divided, the surgeon can mark the size of the anticipated rectangular bone blocks with electrocautery (Fig. 42-1). Bone plugs are generally between 20 and 25 mm in length and the same width as the graft. However, the length of the patellar block is adjusted to preserve a minimum of 1 cm of intact proximal patellar bone to avoid patellar fracture.
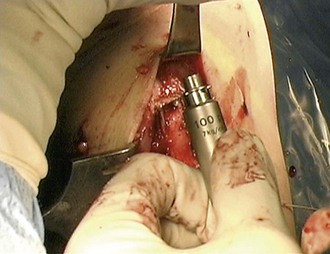
Harvesting the patellar block should proceed with careful attention to detail to avoid iatrogenic compression injury of patellar or trochlear articular cartilage, because the knee is in flexion during harvest. This goal is accomplished through the use of an oscillating saw with a narrow blade. Cuts should begin distally, extending just through the anterior cortex of the patella to avoid injury to the deep surface. As the cuts are extended proximally, they should not exceed a depth of 6 to 7 mm. The cuts should be angled toward the center of the patella so that the resulting bone block is trapezoidal. Thickness of the cortex varies by patient age and size and should be anticipated by the surgeon. Next, the proximal horizontal cut is completed, with care taken not to extend the cut more medially or laterally than the respective vertical limbs. Failure to make the cuts square (“T-ing” the cuts) leads to stress risers and potential postoperative fracture (Fig. 42-2).
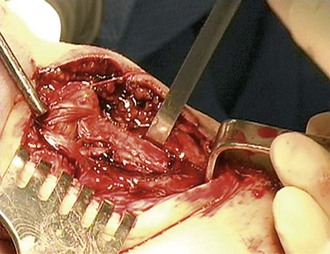
After the saw cuts are completed, a  -inch osteotome is gently tapped into the horizontal cut and two-finger pressure is used to elevate the block (Fig. 42-3). If only two-finger pressure is used, the bone block will not fracture. Work with osteochondral autografts has demonstrated that the vigorous tapping to insert plugs can generate chondrocyte death.28 These data suggest avoidance of vigorous tapping on the patella during graft harvest.
The tibial cut can be completed with an oscillating saw or osteotome because there is no articular cartilage to injure with compression. Our preferred technique is to use  -inch osteotomes for the vertical cuts and
  -inch osteotomes for the distal horizontal cut (Fig. 42-4). When harvesting the tibial bone block, care must be taken to ensure that the proximal end is at the insertion of the patellar tendon into bone, not the proximal end of the tibia. If the surgeon does not carefully visualize this point, a shorter than desired bone block can inadvertently be harvested. Again, two-finger pressure is used with an osteotome to lever the block out, avoiding bone block fracture. The shape of this bone block is generally more triangular than the patellar block to avoid damage to remaining tibial attachments.
Graft Preparation
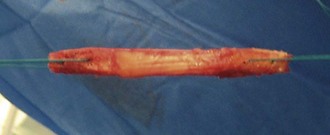
To pass the graft, the surgeon will need to place holes in the patellar and tibial bone block for sutures. If one is using a suture that could be cut by metallic screws or the metal taps required for bioabsorbable screws, one should consider placing the suture tunnels perpendicular to one another so that one will remain intact, even if the other is cut. The use of the newer, high-strength polyethylene sutures, which are not easily cut with any of the taps, allows placement of both tunnels in the same direction, usually straight through the cortex. The size of the hole in the bone should be just large enough to pass the metal needle of the suture through it and no larger to minimize stress risers in the graft. Once the graft is appropriately sized and the surgeon’s suture of choice is placed into the two bone blocks, the graft is rinsed with saline and placed in a moist saline-soaked sponge until needed (Fig. 42-5).
Notch Preparation and Consideration of Notchplasty
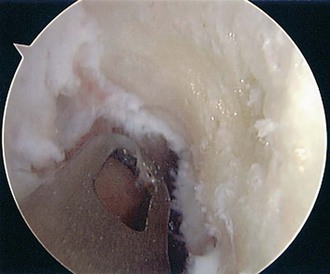
Significant disagreement exists among surgeons regarding the need to débride ACL remnant from the lateral wall of the notch, the need for and degree of notchplasty, and the amount of Hoffa’s fat pad that should be excised. Sufficient ACL tissue and fat pad should be débrided for the surgeon to visualize appropriate entry points for the femoral and tibial tunnels accurately (Fig. 42-6). Some surgeons prefer to preserve residual ACL stump to aid in graft placement, whereas others débride all ACL tissue and rely on other landmarks. One must then ensure that the notch is wide enough to avoid graft impingement at any point of knee motion. A good rule of thumb is to be certain that one can easily place a 5.5-mm burr between the lateral wall of the notch and posterior cruciate ligament (PCL), with a few millimeters on either side. If the notch is too narrow for this maneuver to be performed, notchplasty should be considered. Notchplasty is generally performed anteriorly to posteriorly using a burr. The need for further notchplasty should be rechecked later in the procedure, after the graft passer is placed through the tunnels. One should ensure that the graft passer slides easily without impingement through the full normal range of knee motion. Any impingement should be adjusted by further notchplasty.
Tunnel Preparation
Tibial Tunnel
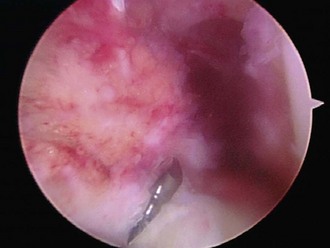
Our standard technique is to set the tibial targeting guide at an angle of 50 to 55 degrees, placed at the posterior edge of the anterior lateral meniscus centered halfway between the PCL and lateral wall of the notch (Fig. 42-7). Care should be taken when drilling this guide pin to make sure that the starting point is sufficiently distal on the tibia to leave a sufficient anterior bone bridge. The tunnel is generally placed at about the level of the tibial tubercle. Placing the starting point too far medially will result in damage to the pes anserine tendons or medial collateral ligament, whereas starting too far laterally could damage the patellar tendon insertion.
Stay updated, free articles. Join our Telegram channel

Full access? Get Clinical Tree


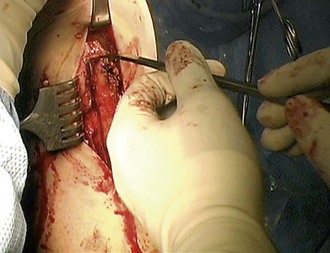
 -inch osteotome is used in the transverse cut to free the bone block from its bed. Only two-finger pressure should be used to avoid bone block fracture.