CHAPTER 9 Working with Shiatsu 3
A trip around the body
Shiatsu has evolved into a variety of systems of subtle energetics, but in many of these forms some of the original freshness and vigor of its former incarnation as ‘folk medicine’ have been lost. While recognizing its potential for treatment on the many different levels of Ki and as a vehicle for a developed understanding of East Asian medicine, let us not forget that Shiatsu is also a superb form of bodywork. We can apply Shiatsu techniques very effectively without diagnosing or treating a single meridian or tsubo, and indeed this is the way that Shiatsu was originally taught and practiced at a folk level in Japan. Bearing this in mind, let us take a trip around the body, exploring the different techniques that can be used for the various body areas, and also exploring the functional significance of each body area in all its aspects, structural, physiological and ‘energetic’.
Framework for the Shiatsu Session
Shiatsu is traditionally given in four positions, prone (face down), supine (face up), side and sitting, and it is advisable to be familiar with a basic framework of treatment for each position. For example, if we start from a Hara diagnosis in the supine position we can then treat each leg and foot in turn before returning to the Hara and then up each side of the torso, possibly including the chest, to each arm and hand in turn, ending behind the receiver’s head for treating the upper chest, neck, face and head. This is a possible routine – you will make up your own frameworks as your preferences dictate, and possibly vary them according to the diagnosis or the receiver’s needs.
The Back of the Torso
Structure, function and significance of the back
The torso and back can be divided up into three areas corresponding to the Three Burning Spaces (see p. 118), and any disharmony within one of the Burning Spaces, broadly speaking, is likely to resonate with the relevant area of the back. We can therefore expect the upper back to reflect the functions of respiration and circulation, and the narrow band at the level of the bottom of the shoulder blades corresponds with the diaphragm. Below this, the mid-back is linked to the digestive function, while from the waist downwards the corresponding functions are those of reproduction and elimination. In the Chinese tradition, the lower back and the Hara (lower abdomen) together hold the Essence, the foundation of our constitution, and it is considered important to keep the lower back warm, strong and supple.
Working on the back in the prone position
This palm pressure can be applied in the form of ‘crawling’, which is very relaxing for both giver and receiver and is an ideal way to get acquainted with the back. Don’t use knees for crawling on your receiver, but crawl with your hands relaxed on your receiver’s back and your knees on the floor, moving you where you want to go. You can cover the whole back in this way if you keep your pressure perpendicular to the slopes and curves of the sides of the back and behind the shoulders.
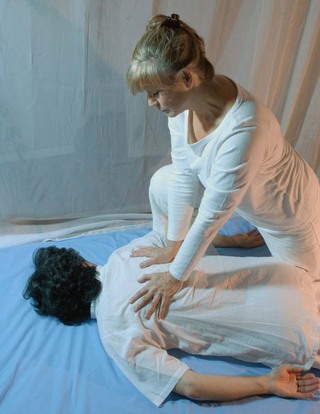
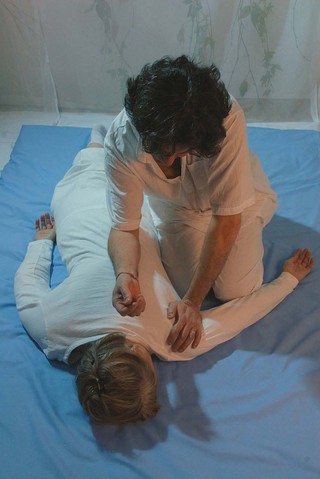
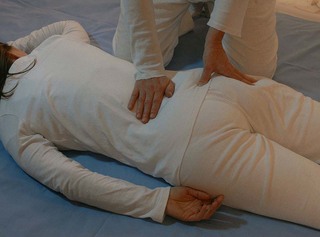
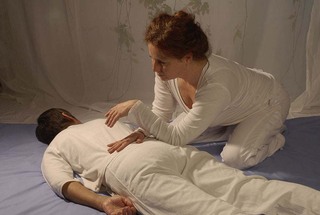
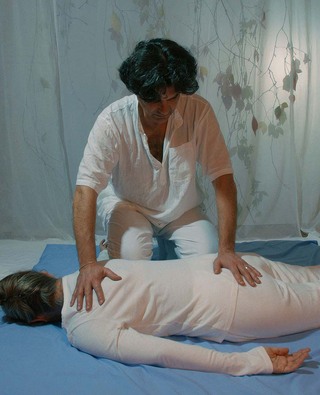
You can also apply palm pressure to both sides of the back at once, leaning in then moving both hands down and leaning your weight forward once again, covering the whole back in this way (Fig. 9.1). For some receivers this is a great way of increasing the breath capacity, if you encourage them to breathe out as you bring your weight forward. It may be too heavy for some, however, and should rarely be applied with full weight on the lumbar area by any but the lightest of givers.
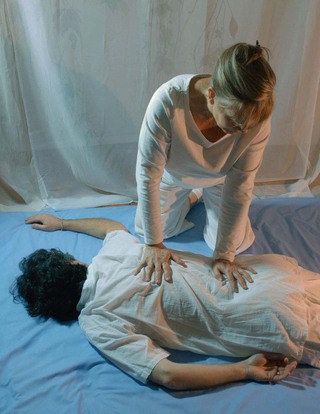
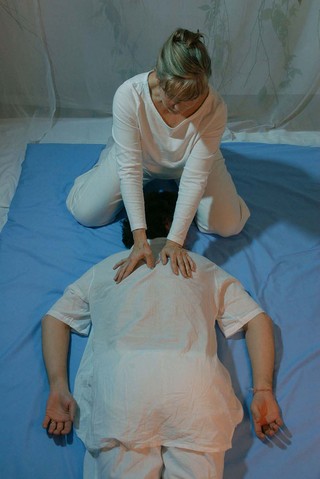
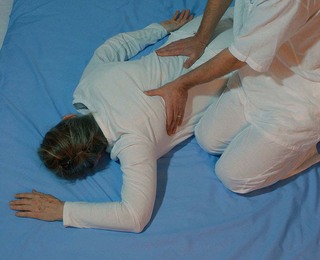
![]() You can also keep a ‘mother’ hand at the top of the back, lightly spanning the spine, while you palm down the near side of the back (Fig. 9.2), or the ‘mother’ hand can be on the sacrum while you move up the back. Either of these methods is useful in different circumstances, so it is a good idea to practice till you are equally proficient in both.
You can also keep a ‘mother’ hand at the top of the back, lightly spanning the spine, while you palm down the near side of the back (Fig. 9.2), or the ‘mother’ hand can be on the sacrum while you move up the back. Either of these methods is useful in different circumstances, so it is a good idea to practice till you are equally proficient in both.
![]() You can use your elbows ‘free-style’, as if crawling with them, finding comfortable places to rest the weight of your upper body. Let yourself relax and take your time, aware of the different degrees of comfort and well-being that different places on the receiver’s back offer you. This is delightful and healing to receive in proportion to the comfort and delight of the giver and it is very easy to do, a good technique for when you are tired.
You can use your elbows ‘free-style’, as if crawling with them, finding comfortable places to rest the weight of your upper body. Let yourself relax and take your time, aware of the different degrees of comfort and well-being that different places on the receiver’s back offer you. This is delightful and healing to receive in proportion to the comfort and delight of the giver and it is very easy to do, a good technique for when you are tired.
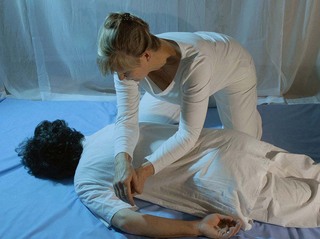
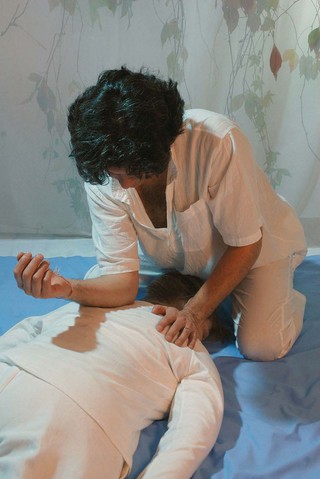
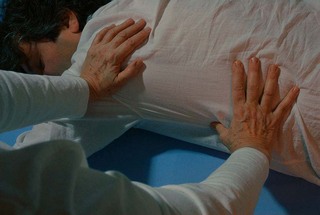
You can use a ‘mother elbow’ on a particularly empty-feeling spot, or one where you yourself enjoy resting, while the other elbow either applies pressure up a relevant meridian or explores for places which feel related to the ‘mother elbow’ (Fig. 9.3).
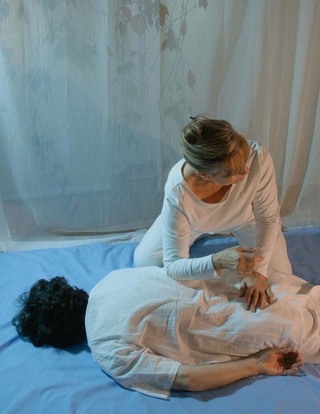
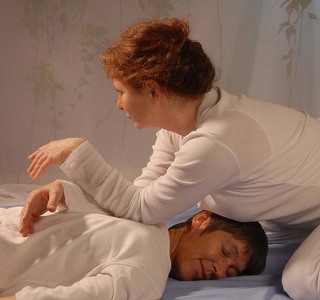
![]() You can support your weight on a ‘mother hand’, perhaps on the sacrum or the back of the shoulder, while you apply your body weight to a meridian through your elbow (Fig. 9.4).
You can support your weight on a ‘mother hand’, perhaps on the sacrum or the back of the shoulder, while you apply your body weight to a meridian through your elbow (Fig. 9.4).
![]() If you face your receiver’s head and kneel seiza, you can support yourself with a ‘mother hand’ on a comfortable handhold such as the shoulder blade. This makes it easy to recline sideways on to your nearside elbow, having made sure that it is nestling in a hollow and not balanced on a bone or tight muscle. Alternatively, by angling your elbow backwards you can penetrate and release the area between the iliac crest and the small of the back. Both techniques are best performed on the side of the back nearest to you (Fig. 9.5).
If you face your receiver’s head and kneel seiza, you can support yourself with a ‘mother hand’ on a comfortable handhold such as the shoulder blade. This makes it easy to recline sideways on to your nearside elbow, having made sure that it is nestling in a hollow and not balanced on a bone or tight muscle. Alternatively, by angling your elbow backwards you can penetrate and release the area between the iliac crest and the small of the back. Both techniques are best performed on the side of the back nearest to you (Fig. 9.5).
Working on the upper back in the prone position
![]() Thumbing is a technique best used to focus on certain points on the back, such as the points next to the spine or the Yu points (see p. 176), which may require precise pressure into a specifically angled tsubo. You can use your thumbs on one side of the spine with a mother hand, as shown (Fig. 9.6), or with both thumbs at once down both sides of the spine.
Thumbing is a technique best used to focus on certain points on the back, such as the points next to the spine or the Yu points (see p. 176), which may require precise pressure into a specifically angled tsubo. You can use your thumbs on one side of the spine with a mother hand, as shown (Fig. 9.6), or with both thumbs at once down both sides of the spine.
![]() Elbows are ideal for working on the area between the shoulder blades. You can use both elbows together, ‘walking’ down either side of the spine with them, or use one elbow at a time, supporting yourself with a mother hand on the other side of the receiver’s upper back, so that your elbow pressure can be as light or deep as is comfortable for the receiver (Figs 9.7 & 9.8).
Elbows are ideal for working on the area between the shoulder blades. You can use both elbows together, ‘walking’ down either side of the spine with them, or use one elbow at a time, supporting yourself with a mother hand on the other side of the receiver’s upper back, so that your elbow pressure can be as light or deep as is comfortable for the receiver (Figs 9.7 & 9.8).
Working on the back in the side position
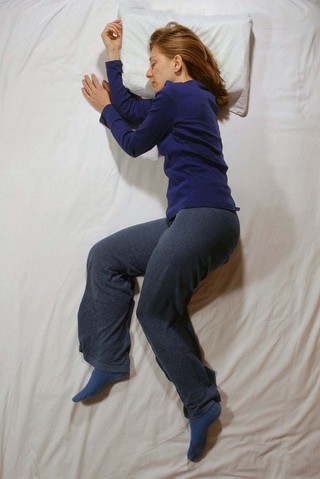
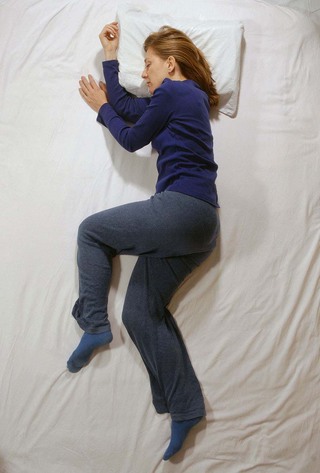
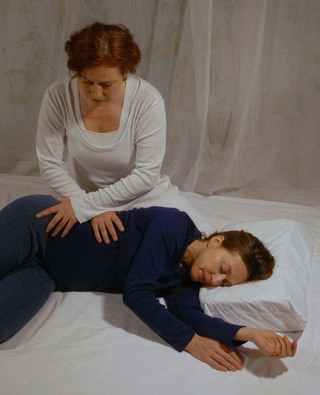
On the minus side, some receivers are unstable in this position and need propping up. Traditionally, the body is stabilized via the leg position. Either of the two methods shown below (Figs 9.9 & 9.10) will work with most receivers, but some may require extra support from pillows and bolsters.
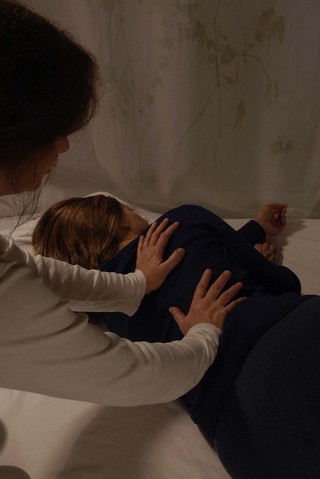
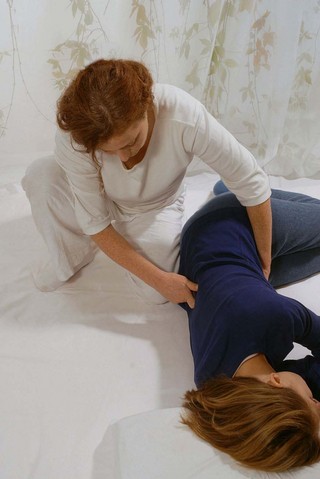
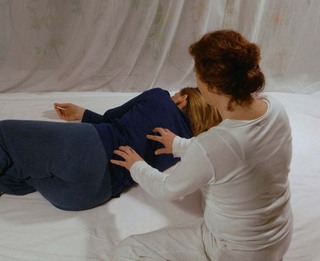
![]() Palm pressure can be applied from two positions. In the simplest, facing the receiver’s back, we must keep our center of gravity low and the receiver must be in a stable enough position that we do not push them over with our pressure. The mother hand can be either on the upper back or the sacrum, depending on whether we want to take Ki up or down (or on how we ourselves are most comfortable, always an important consideration); it can be lying just above the spinal column or across it (but should not be exerting pressure directly on the spine, cup the palm slightly to avoid direct pressure on the vertebrae). The other hand palms along the back, starting beside the mother hand and moving away from it (Fig. 9.11). You can cover the traditional Bladder meridian with the Yu points, or Masunaga’s Bladder, Kidney, Small Intestine and Triple Heater meridians in this way.
Palm pressure can be applied from two positions. In the simplest, facing the receiver’s back, we must keep our center of gravity low and the receiver must be in a stable enough position that we do not push them over with our pressure. The mother hand can be either on the upper back or the sacrum, depending on whether we want to take Ki up or down (or on how we ourselves are most comfortable, always an important consideration); it can be lying just above the spinal column or across it (but should not be exerting pressure directly on the spine, cup the palm slightly to avoid direct pressure on the vertebrae). The other hand palms along the back, starting beside the mother hand and moving away from it (Fig. 9.11). You can cover the traditional Bladder meridian with the Yu points, or Masunaga’s Bladder, Kidney, Small Intestine and Triple Heater meridians in this way.
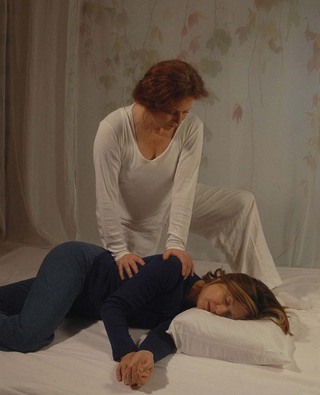
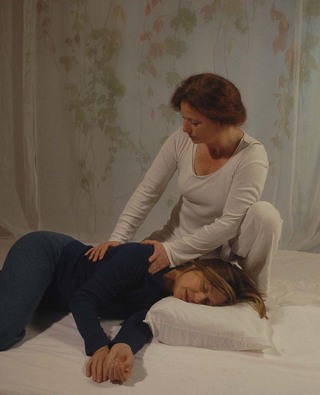
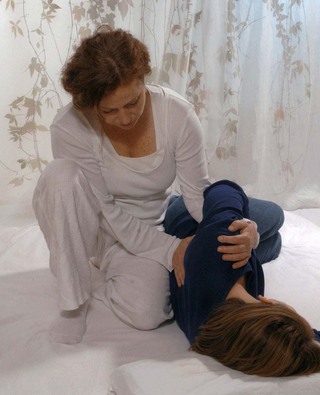
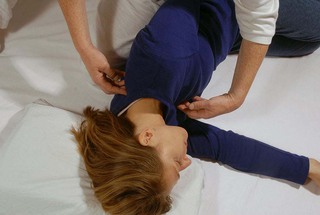
In the second method we adopt the classical Japanese posture for treating in side position; namely, kneeling in seiza facing the receiver’s head, thus supporting the receiver’s torso with the side of our hip and thigh as in Fig. 9.14. This is not as immobile a position as it seems, since with only moderate flexibility one can rise up into the lunge position to work on the receiver’s head, neck and arms (Fig. 9.12). Shifting our weight even further allows us to angle our pressure in from behind the receiver’s head or to stretch the arm (Fig. 9.13).
Sitting in this position, therefore, we are able to palm up or down the spine, or any of the meridians of the back, with our nearside arm curled under the receiver’s armpit to rest on the top of her shoulder, which supports and braces her body against our pressure (Fig. 9.14).
We can also use our fingertips to penetrate into the chest while the fingertips of the other hand explore to find connecting places in the upper back (Fig. 9.15). This is a very penetrative technique if we choose spots which resonate together and imagine our fingers going right through the receiver’s torso to meet in the middle. If preferred, a palm can support the chest, but some of the penetrative effect is lost.
Similarly deep work can be done if we support the receiver’s Hara with the palm of the nearside hand and work with a modified ‘Dragon’s Mouth’ (see p. 56) spanning the receiver’s spine, so that our index knuckle is below the spine and our thumb above it; with this double penetration we can work both of the grooves alongside the spine simultaneously, working upwards from the sacrum so as to keep an energetic connection with the receiver’s Hara (Fig. 9.16).
You can also use a fingertip to penetrate the points between the vertebrae, while you keep a ‘mother hand’ gently supporting the front of the receiver’s body or curled around the shoulder (Fig. 9.17). Make sure that the pressure is enough to be felt by the receiver, yet not forceful. This is where Ki penetration, rather than surface pressure, is important.
Fingertip pressure down the back in side position
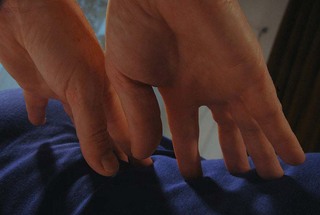
Use your fingertips as if you were playing an imaginary chord on the keyboard of the receiver’s back; the fingertips are separate, not clumped together, each fingertip feeling for a place where it can penetrate and contact the Ki of the line next to the spine. Usually the middle finger will have to bend slightly in order to keep level with your index finger, but otherwise your fingers are straight, and the receiver should feel a good penetration (Fig. 9.18).
With the fingertips of your other hand, work down the groove next to the spine, finding places where you feel a connection with the mother hand at the top. It is important to keep your fingertips aligned with your hand and arm, and to use your body weight and Hara. In order not to push the receiver off balance, use your imagination and intention to send your fingertips through to the front of the body. When you have completed one trip down the spine, move your mother hand down to another comfortable place further down the back and repeat the process (Fig. 9.19).
Working on the back in sitting position
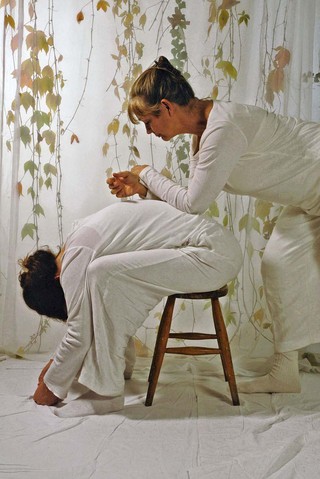
We can achieve this by allowing the receiver to lean her elbows on a table in front of her, or if she is flexible enough, to drop her body forward to lie over her own knees so that we can apply body weight to her back (Fig. 9.20).
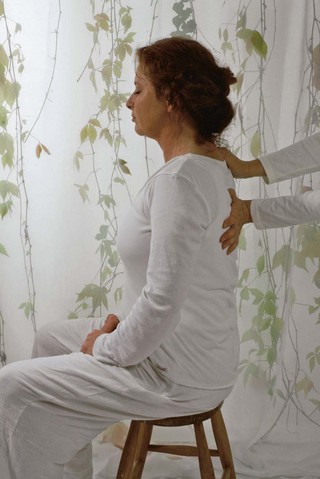
It is a shame, though, to limit the flexibility of the sitting position in this way, and we should allow at least some time to work with the receiver unsupported, except for a steadying hand on one shoulder while our other hand works down the back with palm, thumb, knuckle or modified Dragon’s Mouth either side of the spine (Fig. 9.21).
Fingertips into back and chest together
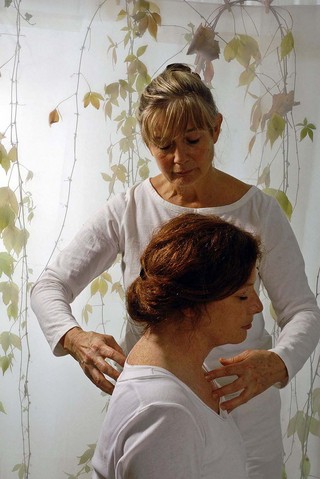
The sitting position also allows us to penetrate the receiver’s back and front at the same time for greater effectiveness (Fig. 9.22). If we stand or kneel at the receiver’s side we can place the fingertips of one hand into the intercostal spaces along one of the back meridians, such as Bladder, and those of the other along one of the meridians of the front such as Kidney. Via the natural relationship between the two hands, we are able to direct our fingertips towards each other without force but with good penetration and depth, as if in imagination our fingertips were meeting deep inside the receiver.
Working on the back in the supine position
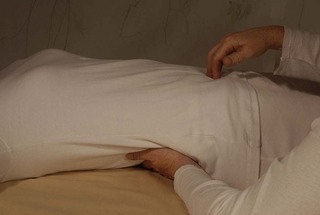
The other area is the lower back, where finding points of deepest penetration with a hand under the receiver’s body can complete a connection with the upper hand as it penetrates empty points on the Hara, or lower abdomen. This technique can be very useful for lower backache due to Kidney deficiency (Fig. 9.23).
The Sacrum
Structure, function and significance of the sacrum
The sacrum is the foundation of the upright posture of the back, and connects the spinal column with the pivotal hinge of the hips. It was the strength of the sacrum which first enabled primeval man to stand upright and enjoy the free use of his hands, an evolutionary leap which started human history.
Working on the sacrum in the prone position
Thumb pressure
1. Working unilaterally (Fig. 9.24), first on one side of the sacrum and then on the other, as a continuation of the work down one side of the spine. (The best place for the mother hand when you work this way is in the lumbar area of the back.) This can be particularly useful in correcting a rotated sacrum if you concentrate on the ‘empty’ side of the sacrum first. (Remember to ask for feedback from your receiver and work with a degree of pressure that feels comfortable to him/her, as a misaligned sacrum can feel tender and fragile.)
2. ![]() Working bilaterally, in other words with both thumbs at once, one on each side of the sacrum. This can be a good technique for the constant dull ache of deficient Kidney/Bladder Ki, as it stimulates the Yu points in the hollows of the sacrum. This technique is illustrated on p. 183. Once again, however, it is a technique which needs to be sensitively used, as it can have an analgesic effect and your receiver may ask for very deep pressure for the temporary pain relief; pressure which may in the long run make the situation worse by inflaming the tissues. Make sure, therefore, that you remain aware, penetrate the points gradually and ‘listen’ to whether you are encountering the Ki and it feels good to you (see p. 42).
Working bilaterally, in other words with both thumbs at once, one on each side of the sacrum. This can be a good technique for the constant dull ache of deficient Kidney/Bladder Ki, as it stimulates the Yu points in the hollows of the sacrum. This technique is illustrated on p. 183. Once again, however, it is a technique which needs to be sensitively used, as it can have an analgesic effect and your receiver may ask for very deep pressure for the temporary pain relief; pressure which may in the long run make the situation worse by inflaming the tissues. Make sure, therefore, that you remain aware, penetrate the points gradually and ‘listen’ to whether you are encountering the Ki and it feels good to you (see p. 42).
The Hips
Working on the hips in the prone position
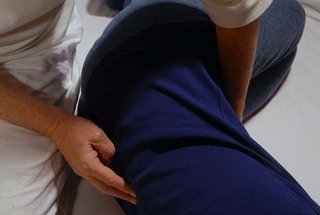
![]() Palming and elbowing the meridian lines down the hips with a mother hand on the lumbar area is a universally acceptable way to treat the hips and buttocks, if we lean comfortably, with the elbow carrying the weight only of the upper body (Fig. 9.25). A mother hand on the lumbar area allows us to connect the hips with the central ‘treasure-house’ of the Ming-Men area (see p. 121). When addressing the point GB30 in the depression in the center of the hip, we can try different angles until our elbow sinks in to the most comfortable one.
Palming and elbowing the meridian lines down the hips with a mother hand on the lumbar area is a universally acceptable way to treat the hips and buttocks, if we lean comfortably, with the elbow carrying the weight only of the upper body (Fig. 9.25). A mother hand on the lumbar area allows us to connect the hips with the central ‘treasure-house’ of the Ming-Men area (see p. 121). When addressing the point GB30 in the depression in the center of the hip, we can try different angles until our elbow sinks in to the most comfortable one.
Working on the hips in the side position
Fingertips can be used to great effect in the side position, not for treating the meridians of the buttocks but for penetrating into the soft tissue in front of the hip bone, while your mother hand rests on the receiver’s sacrum (Fig. 9.26). This area makes potent connections with the internal musculature of the pelvis, and is effective in the treatment of a variety of disorders relating to the lower back, abdomen and hips.
Working on the hips in the supine position
![]() This same area mentioned above, the front of the hips, can also be treated effectively by palm pressure in the supine position. Leaning on the front of the hips, even down to the front of the thigh, addresses several important meridians and can be very beneficial for gynecological as well as hip and lower back problems. Try letting your thumbs seek out the soft tissue area in front of the hip bone while your palms apply pressure to the bone itself (Fig. 9.27).
This same area mentioned above, the front of the hips, can also be treated effectively by palm pressure in the supine position. Leaning on the front of the hips, even down to the front of the thigh, addresses several important meridians and can be very beneficial for gynecological as well as hip and lower back problems. Try letting your thumbs seek out the soft tissue area in front of the hip bone while your palms apply pressure to the bone itself (Fig. 9.27).
Hip rotations
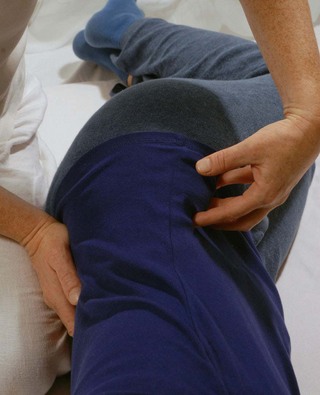
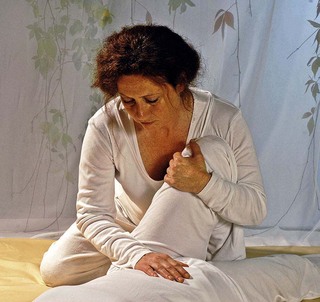
This is a good preliminary before working on the receiver’s legs. With a mother hand on the Hara, place a hand under the knee of the leg nearest to you and raise it to a bent position. Facing the receiver’s upper body, move your own body forward to support her bent knee with the front of your shoulder, keeping your arm loosely around the knee. (Because your shoulder is supporting the knee, you don’t need to clutch it.) Now, by circling your own body around you will be taking the receiver’s bent leg in a circle, rotating the hip joint (Fig. 9.28). Keep listening to the mother hand on the Hara, and tuning in to the smoothness or otherwise of the joint rotation. Your movements can be relatively small, so don’t tire yourself with a big rotation. The more you tune in, the more powerful the movement will be.
The Sides of the Torso
Working on the sides of the torso in the prone position
Balancing yourself with both hands on your receiver’s back, squat on your haunches and tip forward on to the balls of your feet. Move closer or further away from your receiver, depending on your leg length, until your knees can nudge gently into the side of your receiver’s torso while you remain comfortably upright (Fig. 9.29). Do not kneel on your receiver; your entire weight is on the balls of your feet at all times. Tipping your weight just a little further forward will increase the pressure – keep it steady by means of your hands on the back.
Palm pressure is also useful on the sides of the torso (Fig. 9.30). With a mother hand on the lumbar area or sacrum, palm up the side of the body nearest you. Remember to mold your hand to the contours under it, and try not to compress the body; imagine space under the ribs and allow yourself to feel the resilience of the movement of your receiver’s breath.
Thumb pressure can be used on the meridians of the side accessible in the prone position –GB and the Triple Heater extension (Fig. 9.31). Facing your receiver like a pianist at the keyboard, keep a mother hand either on the shoulder or hip area, and feel for the spaces between the ribs before you lean in, in order to avoid pressing directly on a rib. You will need to keep your center of gravity low by spreading your knees apart and ‘keeping weight underside’.
Working on the sides of the torso in the side position
The side position is the most popular for treating the meridians of the sides of the body, but it has one main disadvantage, namely that the giver’s upright position encourages use of body weight to the point that it is easy to forget about our Ki connection and simply compress the receiver’s ribs.
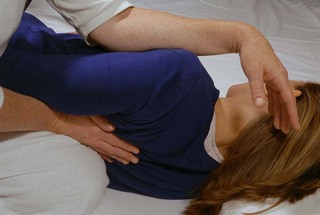
![]() We should therefore take care to ‘listen’ with a mother hand on the receiver’s shoulder or hip while palming or thumbing this important area, still keeping the upright position that allows us to use the weight of our upper body. The soft tissue area at the waist between the ribcage and the hip bone is a particularly important place to treat, both in terms of musculature and the meridians that rotate the torso; it often needs to be stretched open before it is treated with more detailed meridian work (Fig. 9.32).
We should therefore take care to ‘listen’ with a mother hand on the receiver’s shoulder or hip while palming or thumbing this important area, still keeping the upright position that allows us to use the weight of our upper body. The soft tissue area at the waist between the ribcage and the hip bone is a particularly important place to treat, both in terms of musculature and the meridians that rotate the torso; it often needs to be stretched open before it is treated with more detailed meridian work (Fig. 9.32).
Working with the elbows on the sides of the torso gives us the opportunity of lowering our center of gravity, coming closer to the receiver and ‘listening’ deeply into the receiver’s torso via a mother hand on her back (Fig. 9.33). This works particularly well with the Zen Shiatsu Large Intestine meridian extension, and you can angle your elbow downward under the hip bone when you reach its ‘crossover point’ at the waist.
Working on the sides of the torso in the supine position
Palming up from the waist
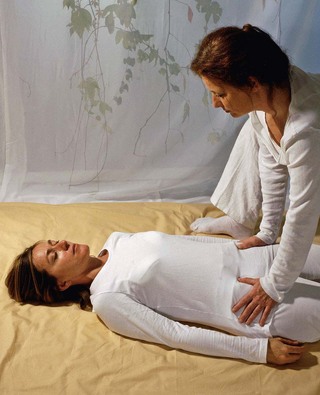
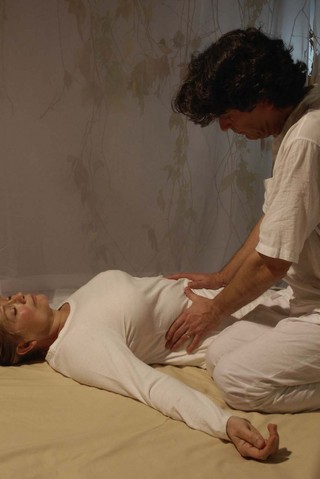
![]() With a mother hand on the upper abdomen or navel area, we can palm up the sides of the torso, molding the working hand to the contours of the body, and ending by leaning on the front of the receiver’s shoulder, stretching it upward slightly (Fig. 9.34).
With a mother hand on the upper abdomen or navel area, we can palm up the sides of the torso, molding the working hand to the contours of the body, and ending by leaning on the front of the receiver’s shoulder, stretching it upward slightly (Fig. 9.34).
Stay updated, free articles. Join our Telegram channel

Full access? Get Clinical Tree


