CHAPTER 38 Humeral Stem Removal and Glenoid Exposure
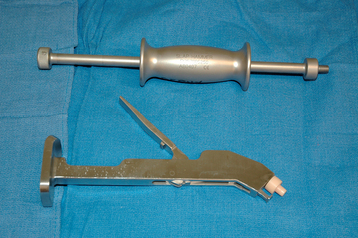
Humeral stem removal can be simple or one of the most difficult and time-consuming aspects of revision shoulder arthroplasty. Preoperative planning becomes very important in facilitating removal of the humeral stem during revision shoulder arthroplasty. Whereas relatively smooth press-fit humeral stems may be easy to remove, extensively porous-coated stems can be especially difficult to extract, particularly when they have been inserted with bone cement. Identification of the brand and type of implant used in the primary shoulder arthroplasty by radiographs or the primary arthroplasty operative report (or both) allows the surgeon to have an instrument set available to assist in extraction of the humeral implant (Fig. 38-1). Controlled extraction of the humeral implant, even if a humeral osteotomy is required, is certainly preferable to an intraoperative fracture of the proximal humerus caused by ill-fated attempts at extracting a well-fixated humeral stem without performing an osteotomy.
Once the humeral stem is removed, glenoid exposure proceeds in much the same manner as for primary shoulder arthroplasty (see Chapter 10). This chapter details our techniques for humeral stem removal and glenoid exposure during revision shoulder arthroplasty.
TECHNIQUE FOR HUMERAL STEM REMOVAL
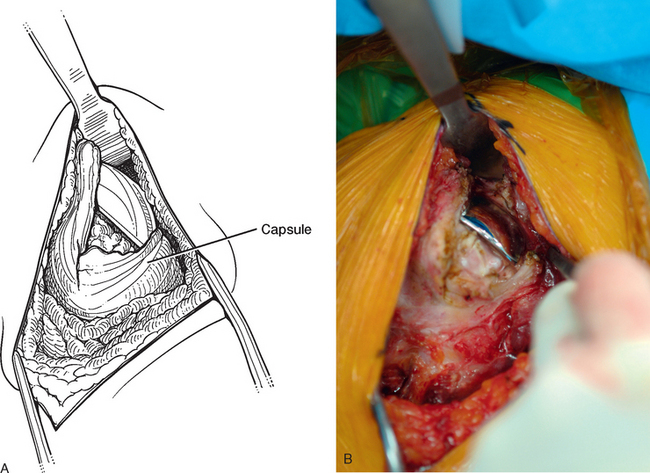
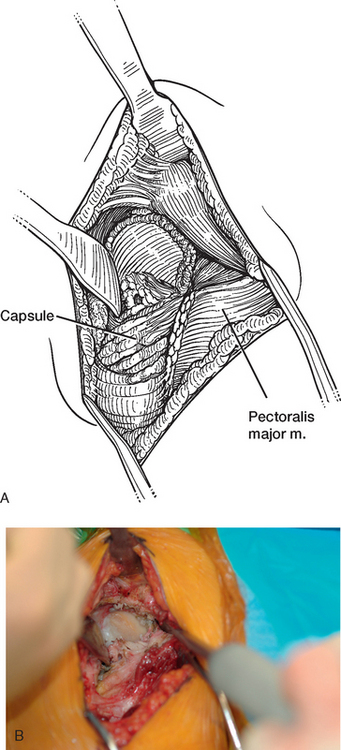
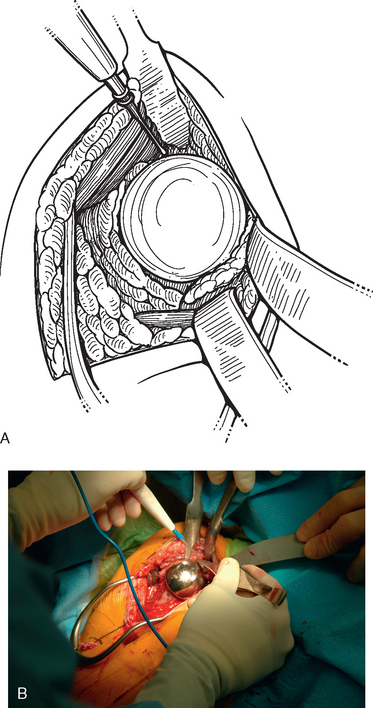
Tenotomy of the subscapularis with subsequent release of the superior, middle, and inferior glenohumeral ligaments (see Chapters 9 and 37) is performed if the subscapularis is intact. If the subscapularis is absent, any subscapularis bursa is excised to expose the anterior aspect of the humeral head component (Fig. 38-2). A humeral head retractor is placed for retraction of the proximal humerus posteriorly (Fig. 38-3). If this provides sufficient visualization of the anterior glenoid and inferior capsule, inferior capsular release is performed, as described in the following section on glenoid exposure. Frequently, because of its size, however, the humeral implant sufficiently hinders glenoid visualization to prevent inferior capsular release. In these cases it is necessary to remove the humeral stem before proceeding with glenoid exposure.
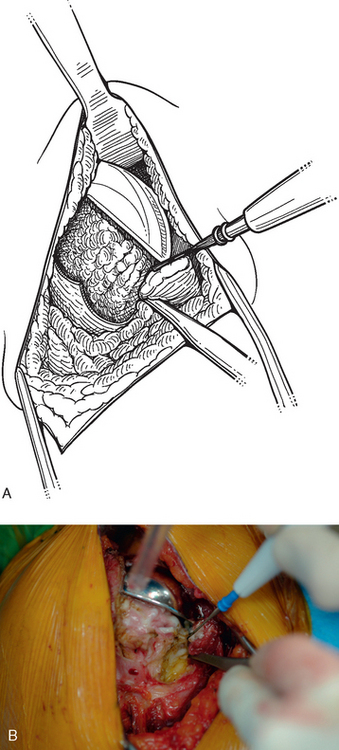
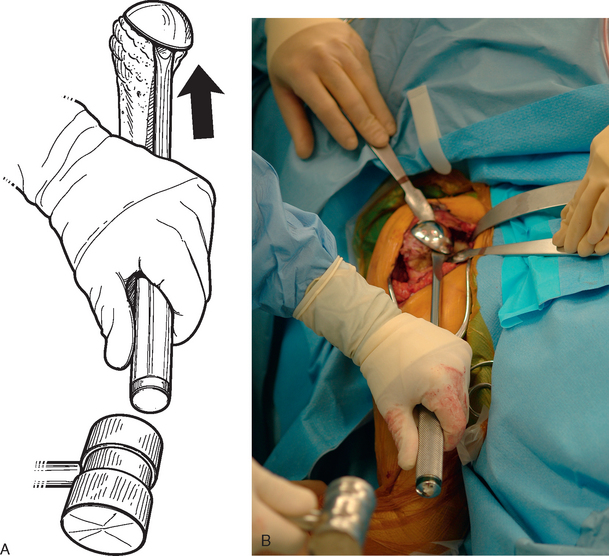
The proximal humerus must be dislocated before attempts at removal of the humeral stem. The dislocation must be done with great care to avoid humeral injury. Frequently, capsular stiffness prevents dislocation by simple external rotation and extension of the arm. If this maneuver is not initially successful, a humeral-based inferior capsular release is performed (Fig. 38-4). Progressive release of the inferior medial capsule from the humerus with the needle tip electrocautery allows dislocation of the proximal humerus. Care must be taken to keep the electrocautery in contact with the humerus to avoid injury to the axillary nerve. Dislocation maneuvers must be done slowly and with great care in revision cases to prevent humeral fracture because the humerus is often osteopenic and compromised (Fig. 38-5).
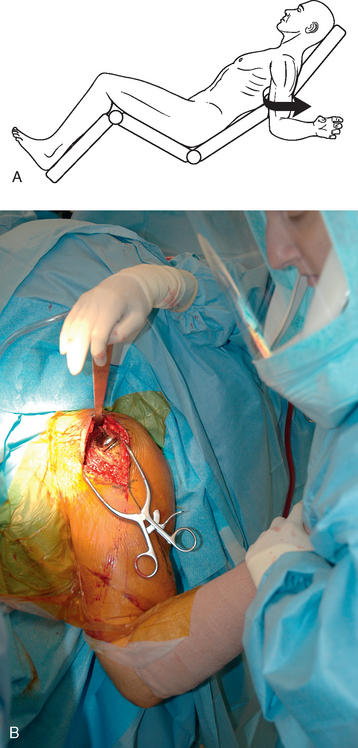
Figure 38-5 A and B, Gentle dislocation maneuver consisting of external rotation and extension of the arm.
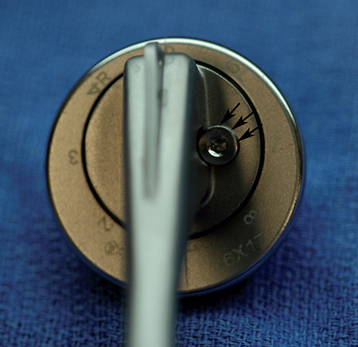
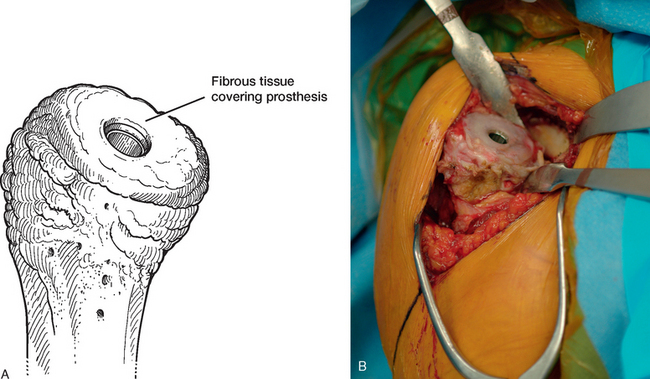
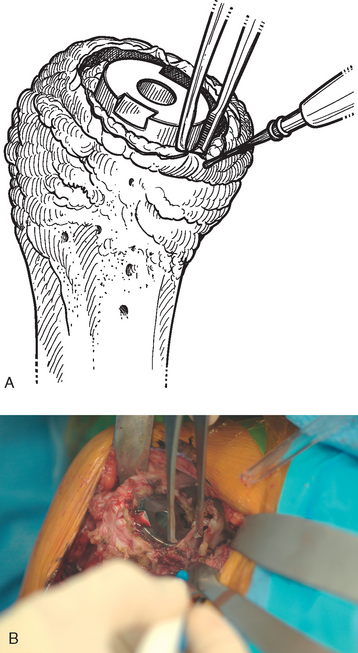
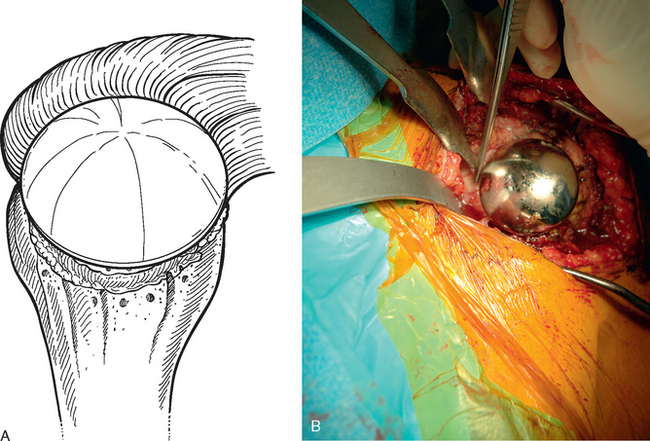
Once the humerus has been dislocated, the humeral head portion of the arthroplasty is circumferentially exposed by removing any fibrous tissue at its margins with the needle tip electrocautery (Fig. 38-6). Nearly all implants currently encountered during revision surgery have a modular head fixed onto a stem via a Morse taper mechanism. It is important, however, for a surgeon unfamiliar with the type of implant being removed to obtain any information available about the implant from the manufacturer. The surgeon must discover whether the implant is modular or mono-block and whether any accessory mechanisms have been used to fix the humeral head to the stem portion of the component (i.e., a threaded screw was used to further secure the Morse taper in some early modular designs; Fig. 38-7). If the humeral component is modular with only Morse taper fixation of the humeral head portion to the stem portion of the component, the humeral head is usually easily removed by disimpacting the humeral head from the stem with a Cobb elevator at the inferior aspect of the humeral head component (Fig. 38-8). Often, fibrous tissue covers the proximal aspect of the stem portion of the component (Fig. 38-9). This fibrous tissue is completely removed with the needle tip electrocautery to delineate the peripheral proximal portion of the stem circumferentially (Fig. 38-10). The condition of the superior and posterior rotator cuff tendons can be evaluated at this point (Fig. 38-11).
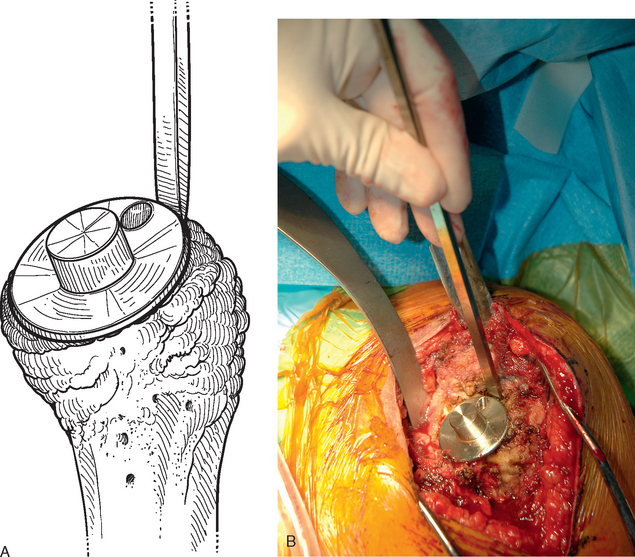
After all soft tissue has been released peripherally from the proximal aspect of the stem portion of the implant, the extraction device specific for the implant, if available, is attached (Fig. 38-12). Attempts are made with the extraction device (generally with an attached slap hammer). If attempts to extract the implant are initially unsuccessful, the extraction device is removed and small, thin osteotomes are used to delicately separate the proximal humerus from the proximal aspect of the humeral implant (Fig. 38-13). The extraction device is reattached and additional attempts are made to remove the humeral component. If these attempts are unsuccessful, a humeral osteotomy is performed for removal of the humeral implant (see later).
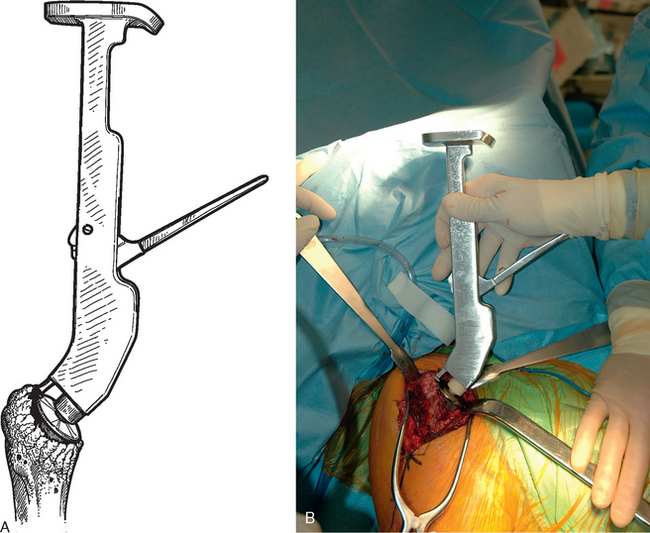
Figure 38-12 A and B, Attachment of an extraction device to the stem portion of the primary humeral stem.
Stay updated, free articles. Join our Telegram channel

Full access? Get Clinical Tree


