CHAPTER 27 Glenoid Exposure
The technique for glenoid exposure is no less important for implantation of a reverse prosthesis than in cases of unconstrained total shoulder arthroplasty. In fact, certain aspects of reverse prosthesis cases may make glenoid exposure more difficult than in cases of unconstrained total shoulder arthroplasty. First, static subluxation of the proximal humerus may increase the difficulty of proximal humeral retraction during glenoid exposure. Second, as detailed in Chapter 28, a smaller volume of proximal humerus is resected during humeral preparation than in cases of unconstrained shoulder arthroplasty, thus making retraction of the proximal humerus during glenoid exposure more difficult.
TECHNIQUE FOR GLENOID EXPOSURE
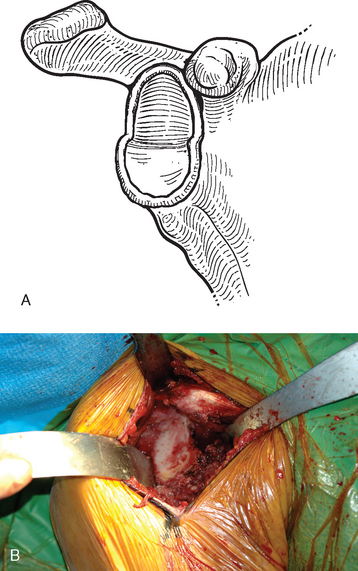
After the subscapularis, if present, is retracted medially with a small glenoid rim retractor, attention is turned to glenoid exposure. Any remaining labrum is excised from the base of the coracoid process and the exposure extended inferiorly to the 5 o’clock position in a right shoulder (7 o’clock in a left shoulder) with the needle tip electrocautery. This allows identification of the osseous anterior margin of the glenoid, as well as inspection of the superior aspect of the glenoid for evidence of erosion (Fig. 27-1). The tip of the electrocautery is used to release the inferior capsule directly off the rim of the glenoid bone, stopping initially at the 6 o’clock position (Fig. 27-2). To prevent damage to the axillary nerve, the tip of the electrocautery must be kept in contact with the glenoid bone. This release is extended sufficiently medially to completely transect the capsule and expose the muscular fibers of the triceps inserting on the inferior osseous glenoid. Adequacy of glenoid exposure is then evaluated by having an assistant provide maximal retraction on the proximal humerus and verifying complete neuromuscular paralysis with the anesthesiologist or nurse anesthetist (Fig. 27-3). An adequate release is accomplished if the surgeon believes that glenoid reaming and implantation of the reverse glenoid component would be possible after minimal humeral head resection. If exposure is thought to be adequate, no further capsular release is performed. If the release is thought to be insufficient, capsular transection is continued around to the 7 o’clock position in a right shoulder (5 o’clock position in a left shoulder) and the exposure is re-evaluated. The process is repeated until the release is considered adequate. This stepwise progression helps prevent too large a release, which could potentially lead to prosthetic instability.
Stay updated, free articles. Join our Telegram channel

Full access? Get Clinical Tree


