CHAPTER 12 Glenoid Component
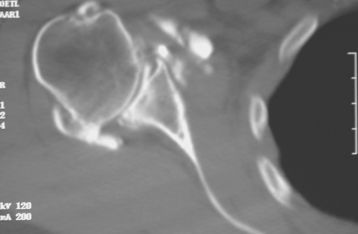
Historically, the glenoid component has been the “weak link” of shoulder replacement. In addition to being the most difficult part of the surgical procedure, the glenoid component is the most likely site of component failure, which has led many surgeons to avoid glenoid resurfacing in nearly all cases. Fortunately, glenoid component materials and designs have improved greatly, as have techniques for implantation of glenoid components. Problems with the glenoid component are becoming less common, perhaps leading more surgeons to consider glenoid resurfacing in more cases. As detailed in Chapter 6, we prefer to implant a glenoid component in most nonfracture indications for unconstrained shoulder arthroplasty because of results superior to those of hemiarthroplasty in most diagnoses. The main contraindication to glenoid resurfacing in patients with a competent rotator cuff is insufficient glenoid bone to support implantation of a glenoid component. Such cases are readily identifiable with preoperative imaging studies (Fig. 12-1).
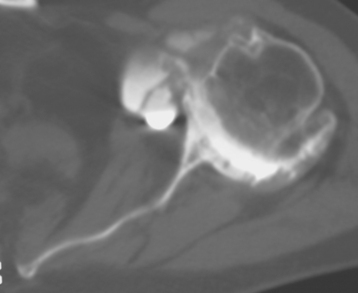
Figure 12-1 Case involving insufficient glenoid bone stock to allow implantation of a glenoid component.
The steps involved in implantation of the glenoid component include obtaining glenoid exposure (detailed in Chapter 10), reaming the glenoid surface, selecting the size of glenoid component to be implanted, selecting the type of glenoid component to be implanted, preparing the native glenoid bone for implantation of the glenoid component, and final implantation of the glenoid component. Each facet of this process is detailed in this chapter.
REAMING THE GLENOID SURFACE
Reaming the glenoid surface serves two purposes: first, it provides a congruent surface that matches the apposing surface of the implant by removing any remaining cartilage and smoothing the osseous surface, and second, it corrects any deformity caused by bony wear, as identified on preoperative imaging (Fig. 12-2). If no deformity is present, “light” reaming is performed. In patients with posterior glenoid wear, however, the anterior portion of the glenoid should be preferentially reamed to correct the deformity.
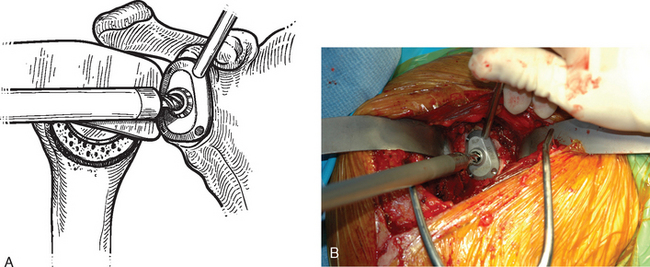
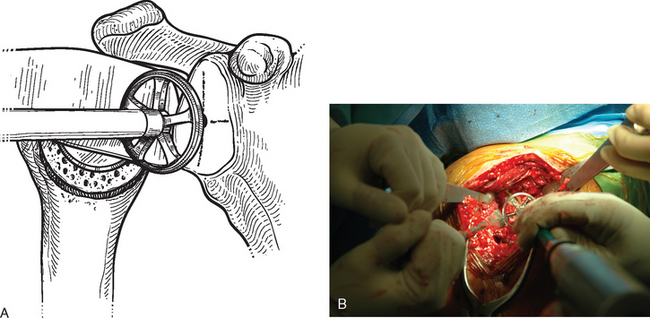
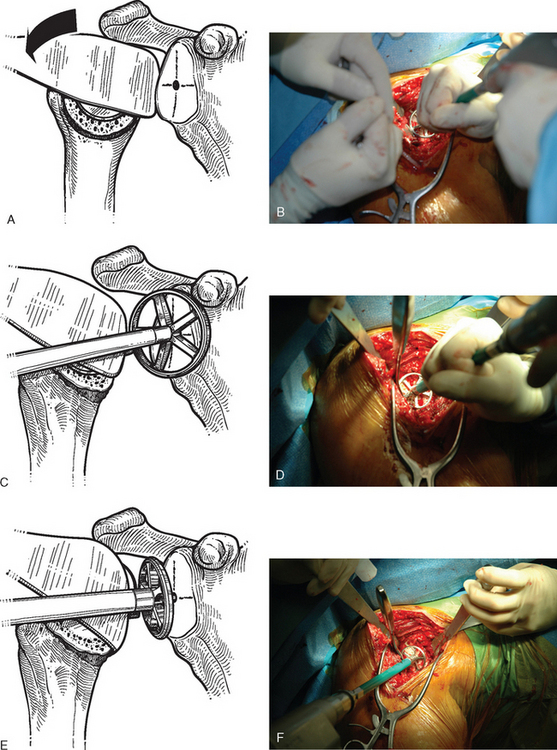
After humeral preparation and insertion of the humeral cut protector (Chapter 11), the humeral head retractor is replaced to retract the proximal humerus posteriorly and expose the glenoid (Fig. 12-3). It is helpful to mark the center point of the glenoid with an electrocautery. It is also important to realize that with severe deformity or biconcavity, the center point will change (the new center point is posterior to the original center point after “reaming away” a portion of the anterior glenoid) by preferentially reaming the anterior glenoid, and this should be considered when identifying the center point. A guide with a stop is used when drilling a pilot hole through the center point of the glenoid (Fig. 12-4). The tip of a reamer of the appropriate glenoid size (see the next section) is introduced into the pilot hole (Fig. 12-5). Introduction of the reamer is usually the most difficult part of glenoid resurfacing. A few techniques are helpful when performing this portion of the procedure in exceptionally stiff shoulders. We first confirm with the anesthesiologist that the patient is adequately relaxed with paralytic agents. We then determine which posterior glenoid retractor yields the best exposure. We start with the Trillat humeral head retractor. If this proves inadequate, we will also try a Fukada humeral head retractor, a large glenoid rim retractor, or one or more Hohmann retractors (these retractors are shown in Chapter 3). Many times it is necessary for the assistant retracting the humeral head to perform a maneuver with the humeral head retractor to facilitate insertion of the reamer. This is done by first forcefully retracting posteriorly and then relaxing the retractor to allow clearance of the posterior aspect of the reamer. The retractor can be left in place in a relaxed position during the actual reaming. This technique is illustrated in Figure 12-6. Rarely, despite the use of these techniques for exposure of the glenoid and insertion of the reamer, it may not be possible to insert the reamer tip into the pilot hole. In this scenario we remove the humeral head retractor completely and insert a laminar spreader between the glenoid and humerus. One limb of the laminar spreader is placed at the most superior aspect of the glenoid surface, and the other limb is placed on the cut surface of the proximal humerus. The laminar spreader is opened to distract the glenohumeral joint and retract the humerus laterally. This technique allows insertion of the glenoid reamer by eliminating obstruction of the reamer by the posterior humeral head retractor (Fig. 12-7). By using these techniques sequentially, we have yet to perform a shoulder arthroplasty in which we were unable to resurface the glenoid because of inadequate exposure.
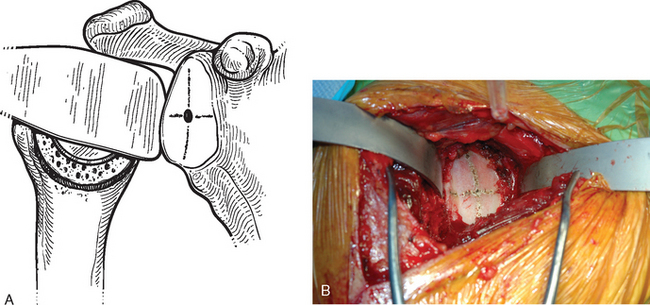
Figure 12-3 Glenoid exposure. The center point of the glenoid has been marked with the electrocautery.
Stay updated, free articles. Join our Telegram channel

Full access? Get Clinical Tree


