(1)
Générale de Santé Hopital privé de, l’Estuaire, Le Havre, France
5.1 Before the Surgical Arthroscopy
We will now move onto the surgical arthroscopy. When seen on videos or performed by trained surgeons, it appears easy. But as always, beware of what appears simple.
Windsurfing, kitesurfing, music, tennis, and golf are examples of activities that when performed by regulars appear simple, but behind this simplicity hides a great deal of work. Surgery is no exception to this rule. Before completing this step, you must train with modesty.
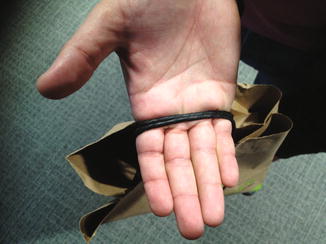
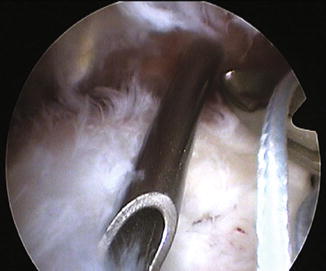
The commonest blockage is the execution of arthroscopic knots.
If they slide, the simplest is the Laurent Lafosse knot (easy knot!); it never sticks, and you must choose the traction strand or post on which the suture is sliding (Figs. 5.1, 5.2, and 5.3).
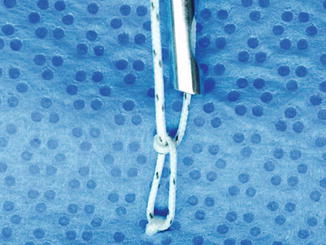
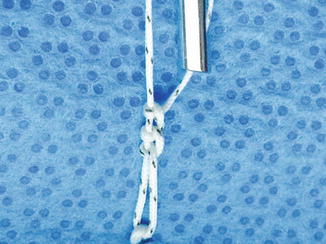
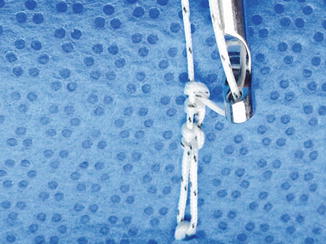
Fig. 5.1
Fig. 5.2
Fig. 5.3
It begins with three half hitches in the same direction, keeping the post properly taut.
The fourth half hitch is then reversed, and the fifth is made like the first three (Figs. 5.4 and 5.5).
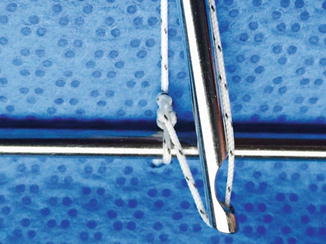
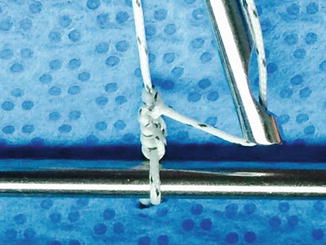
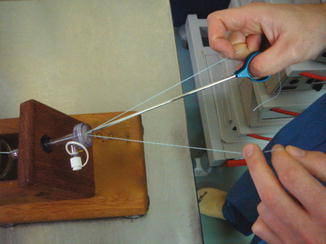
Fig. 5.4
Fig. 5.5
Fig. 5.6
Note that the knot must go beyond the knot for the locking.
But beware; when the sutures do not slide, they must be done half hitch by half hitch.
You must not perform your first knots on a patient but on a test bench.
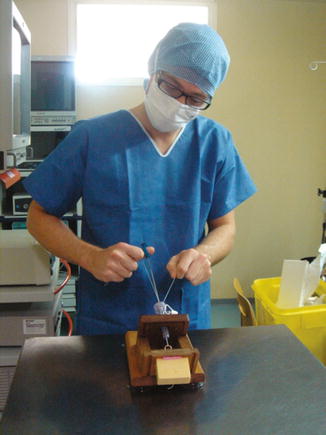
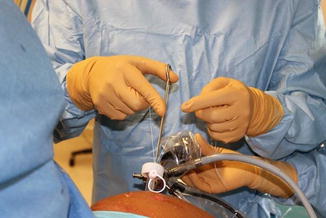
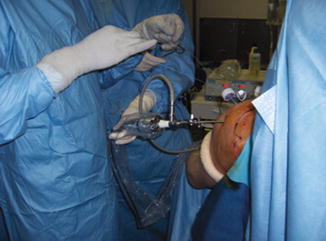
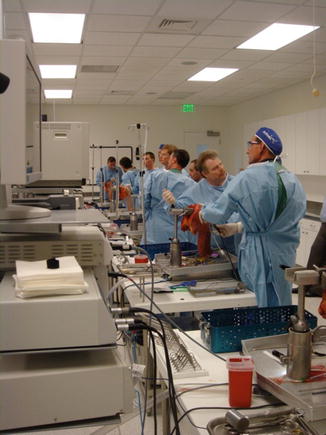
Fig. 5.7
Fig. 5.8
Fig. 5.9
Fig. 5.10
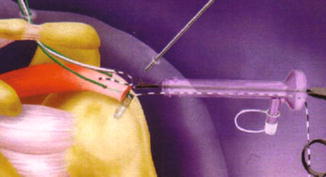
This procedure requiring both hands and the handling of sutures requires some learning. Take a good look at the photo that shows how to block the sutures with your fingers (Figs. 5.6, 5.7, and 5.8).
Note that during this phase, both hands are occupied, so you need to have trained the instrumentalist on how to operate the camera.
Ballet on three hands and learning: while we’re doing the knot, the instrumentalist is doing the filming!
Courses on corpses are useful steps before moving onto our patients (Figs. 5.9 and 5.10).
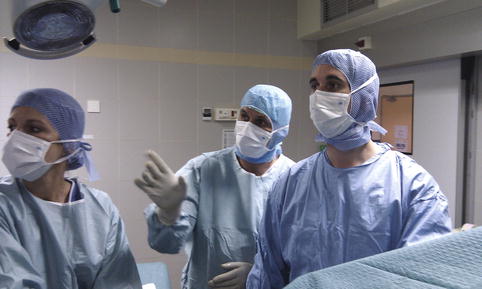
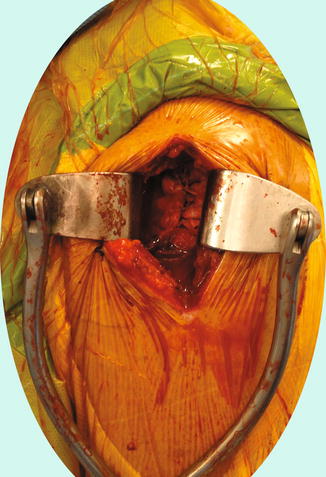
Fig. 5.11
Fig. 5.12
You must always think about these patients of the learning curve and always give oneself a solution to fall back on in case of problem, or beyond a certain surgery time. The surgical approach for a cuff is performed by using what we have seen during the arthroscopy. In general, it is sufficient to enlarge the instrumental approach on both sides, in order to finish with open procedure. The patient won’t blame you if they have been forewarned, and that also allows them to understand the reason for the difficulty. In passing a palpation of the acromioplasty enables us to progress (Fig. 5.12).
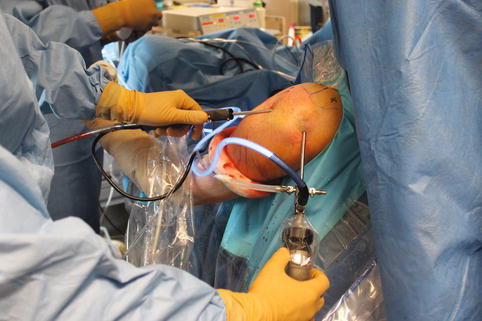
Fig. 5.14
5.2 The Rotator Cuff
Repair of the rotator cuff is the queen of all surgical arthroscopy indications.
It is sometimes difficult to see the rotator cuff and especially to assess its size and shape.
The scope must overhang the lesion. Like for drawing a country on a map, the satellite must be plumb. Changing the posterior optical portal for a lateral portal also allows an improved assessment of the posterior edge of the cuff, which is often delaminated. Similarly, a tear considered to be C-shaped when we leave the scope by posterior approach is in fact V-shaped, when the scope is laterally placed.
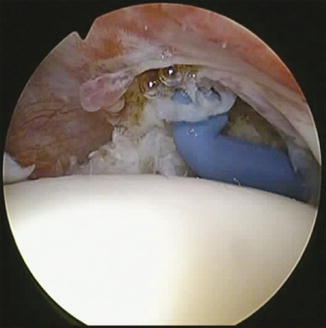
The discovery of the tear is performed in intra-articular (Fig. 5.13); we thus confirm the transfixing character; the scope is then subacromially passed after the bursectomy (Figs. 5.14 and 5.15).
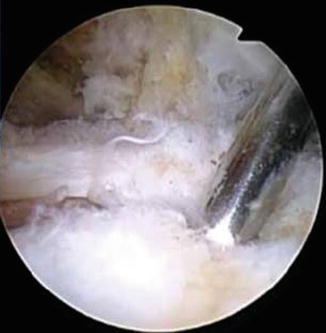

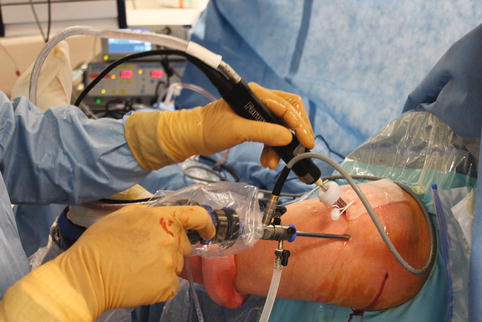
Fig. 5.15
Fig. 5.16
Fig. 5.17
This vision is misleading. The scope is not above the lesion; very often, this gives an overly optimistic vision. Too often we have the impression of a C-shaped tear that will be easy to close, and in addition, we do not see the posterior edge of the tear clearly.
Like a satellite over a country, the scope must be laterally moved (Figs. 5.16, 5.17, and 5.18).
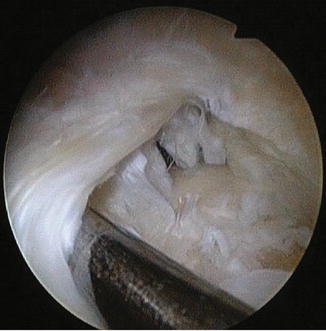
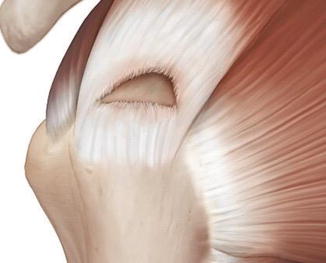
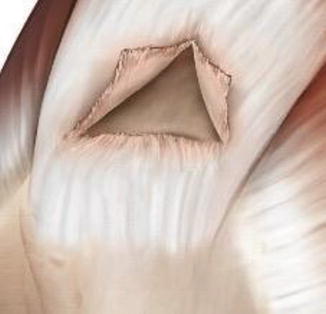
Fig. 5.18
Fig. 5.19
Fig. 5.20
Indeed, the vision of the tear that we see on the screen is actually a representation. This is a projection of a rotator cuff, which is a sphere portion, onto a flat screen.
Remaining with the posterior approach, we would undoubtedly not see the delamination of the posterior layer. In this case, due to ignorance, we run a significant risk of only closing the superficial layer.
Despite the analysis of the shape, certain tears are sometimes difficult to close.
The drawings are always a bit theoretical; don’t neglect wear, which is why to close some tears trade-offs must often be made. The key is to always close without tension. For this, dynamic analysis is fundamental; it is performed using a grasper. It is by making these dynamic maneuvers that we understand the tear’s shape. So it consists of an L-shaped tear when the gentle traction on an angle allows the tear to be completely closed without tension. Without this dynamic analysis, it is impossible to diagnose these L-shaped tears. That is why they are never described by radiologists (Figs. 5.19, 5.20, 5.21, and 5.22).
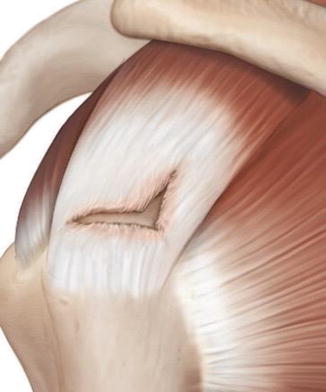
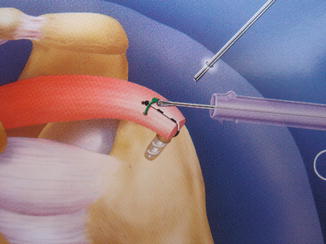
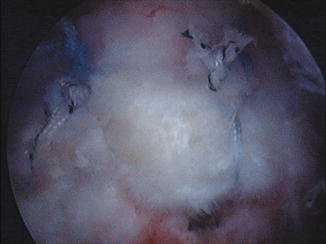
Fig. 5.21
Fig. 5.22
Fig. 5.23
Fig. 5.24
Theory: the C, the V, the L, practice, etc. wear and its trade-offs
Whatever the technique used, the next stage is the acromioplasty and the section of the LAC, if it is necessary.
Note
If the tear is not repairable, it is better to leave the LAC in place; it sometimes allows the patient an anterior elevation. Like a golf swing, it is the kinetic energy at the point of contact: the lesser tuberosity of the humerus that allows elevation.
The next stage is not very difficult; it consists of freshening the tuberosity. It is easier to do it without cannula. If the bone is fragile, we can turn the round burr upside down. Otherwise, in case of sclerotic bone, we can be helped by a curette or punch micro fractures to be sure to have healthy living bone, which will improve healing thanks to stem cells.
It is sometimes difficult to position the implants after having freshened the tuberosity.
For your first cuff repairs, it is better to perform a single-row technique. We can quickly perform double points combining vertical and horizontal points so that the implants are mounted in double suture (Figs. 5.23 and 5.24).

Fig. 5.25
Fig. 5.26
For the single row, we must put the implant in the middle of the tuberosity. Placing the arm in light adduction and directing the scope downward facilitate the exposure (Fig. 5.25).
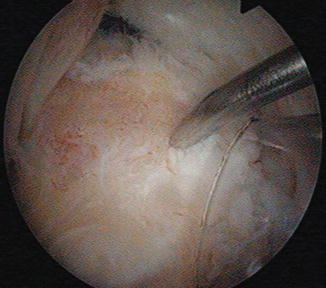
Fig. 5.27
To locate oneself, use a long OL needle. It also helps to choose the incidence of 45°, like a tent peg. To save time, if we are using a cannula, it is possible to use it as a viewfinder to find the correct position of the implant. We must look at our hands rather than fight while watching TV (Figs. 5.26, 5.27, and 5.28).
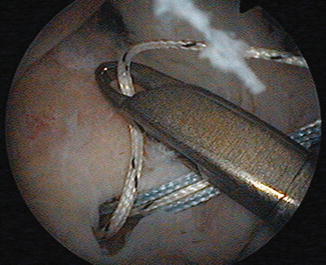
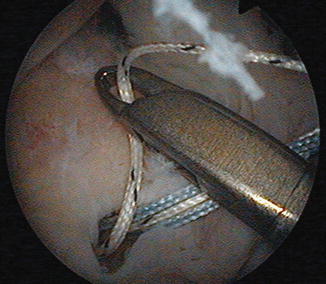
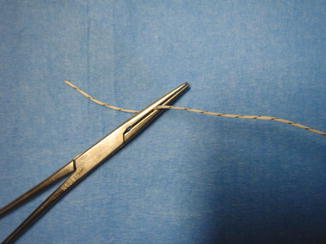
Fig. 5.28
Fig. 5.29
Fig. 5.30
You can end up mistaking the wire when catching the sutures and even removing them from the implant.
Before making a suture, you need a short time of concentration (especially when it is late).
A good rule of thumb is to see three elements: tear, implant and sutures, and the cannula or the opening. Do not pull too fast if you do not see clearly (Fig. 5.29).
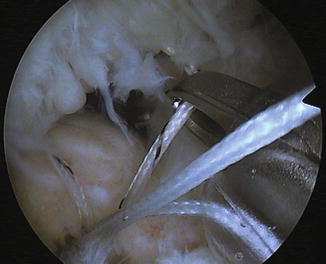
Fig. 5.31
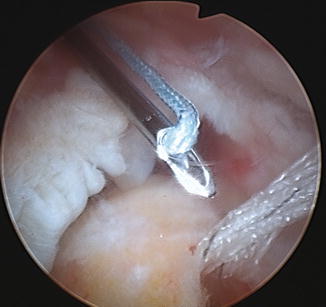
A suture already placed in the cuff can be identified by a small forceps. Do not pull on a blocked suture in the cannula or in the valves of the scope; do not force and once again remember to look at your hands. To see and avoid mistakes, we must know how to take care of the preparation and, when you decide to pull out a suture, how to control the implant with the scope (Figs. 5.30, 5.31, and 5.32).
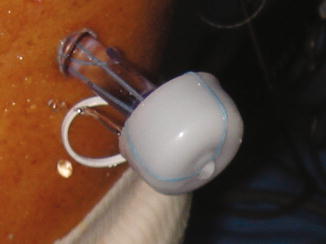
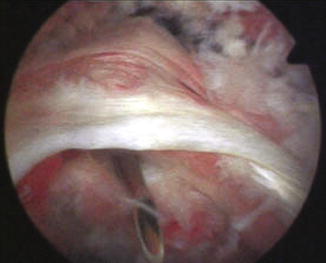
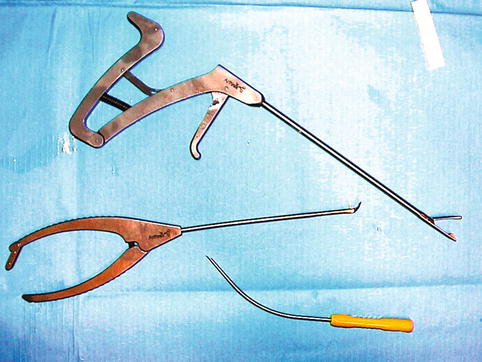
Fig. 5.32
Fig. 5.33
Fig. 5.34
With forceps, tissue clamping is sometimes insufficient, but with the curved needle (Banana Lasso® Arthrex), we decide on the width of the tissue to be loaded (Figs. 5.33, 5.34, 5.35, and 5.36).
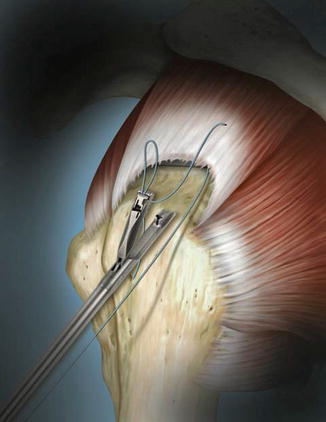
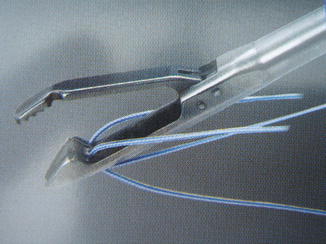
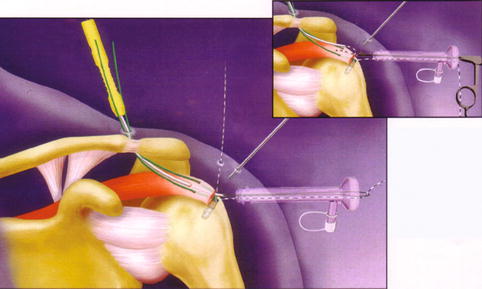

Fig. 5.35
Fig. 5.36
Fig. 5.37
Fig. 5.38
You must do it simply and pass the sutures one by one; this prevents them from becoming tangled. The Banana Lasso must be used as follows (Figs. 5.37, 5.38, 5.39, and 5.40).
On a small distal supraspinatus tear:

You use the upper surgical approach of Neviaser; do not hesitate to use the index finger of the other hand as a viewfinder to find the direction and the correct space.
Then you have to “mimic” the procedure above the cuff to accustom your hand to the correct direction.
You can transfix the cuff at the determined distance.
Then after the suture, you can capture the relay in the cannula. A large tissue clamping is the guarantee of a good coverage of the insertion zone.
Fig. 5.39
Fig. 5.40
Fig. 5.41
Fig. 5.42
Once the suture or the relay is passed, rather than “fighting” to find a suture, it is best to position it in an easy access zone; like in football, we have to bring the ball back. When a suture is passed, it must be placed into a waiting area where it is clearly visible (called the garage or waiting room). The easiest way is to use the surgical approach we used for placing the implants (Figs. 5.41, 5.42, and 5.43).
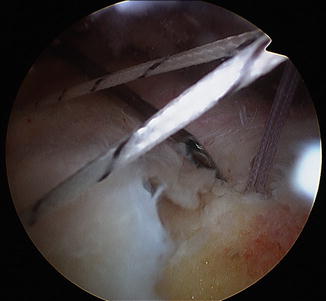
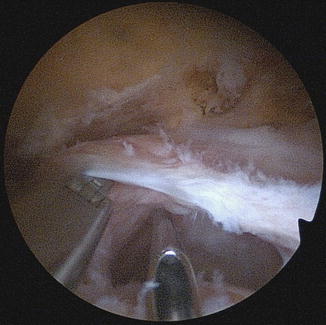
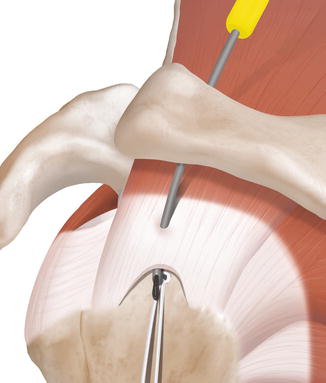
Fig. 5.43
Fig. 5.44
Fig. 5.45
The sutures are waiting in an easily visible area.
In the case of delaminated cuff with two layers, we can reduce the lower sheet with the wire catch and pass with the needle at the same time. This is the “knife and fork” technique. This is not possible with a forceps for suturing the cuff.
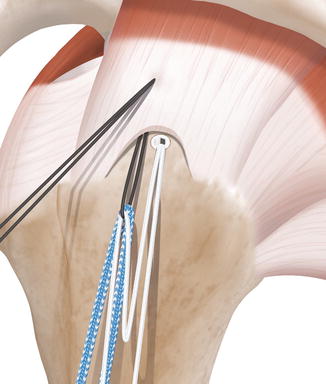
Fig. 5.46
For a small tear in a young patient, the double row is indicated.
For a proper tissue clamping, an analogy must be made with the closure of the skin. We correctly load the tissue by being perpendicular. This is a reason not to hesitate to vary surgical approaches. In this sense, the upper approach of Neviaser for damage to the supraspinatus is logical. The use of a simple curved needle is in line with this.
The second row is made with lateral sutures using impacted implants, which limits the number of sutures involved.
For small tears in young patients, we have evolved toward a technique that combines a median screwed implant with a suture and a lateral braided band forming a cerclage. The median suture ensures a compression on the first implant (Figs. 5.45, 5.46, 5.47, 5.48, and 5.49).
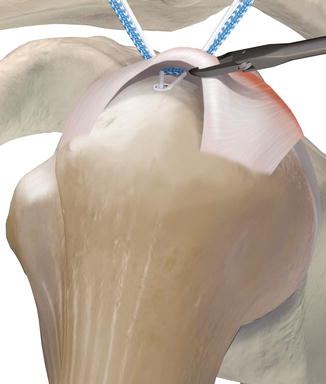
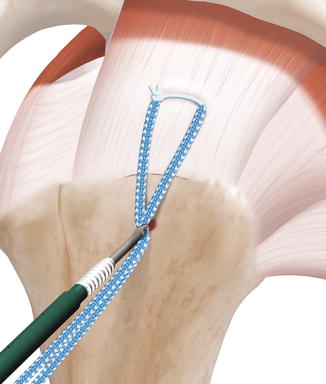
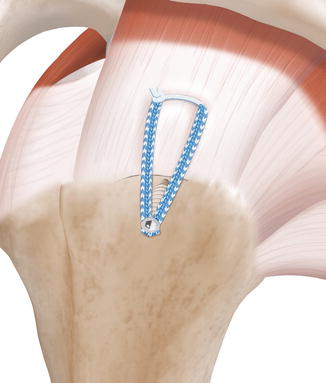
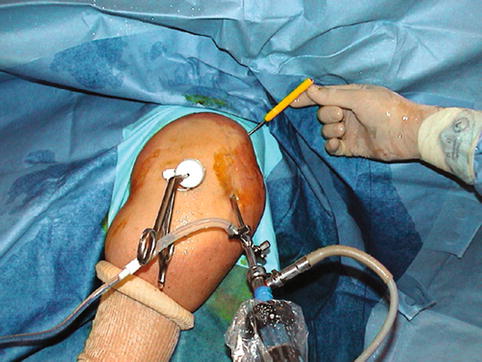
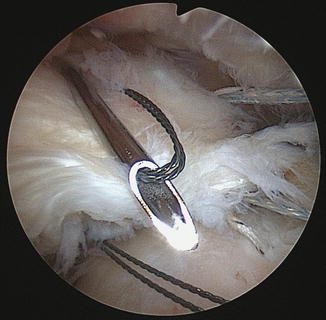
Fig. 5.47
Fig. 5.48
Fig. 5.49
Fig. 5.50
Fig. 5.51
This technique allows a double row to be made by only performing two passages through the cuff (it’s the row and a half). Using a relay cable allows the suture and the “tape” to be passed simultaneously and without difficulty. Do not try to pass them in the needle, as they will block.
Here is how it actually appears; it is fast and effective because the initial decision to use the Banana allows a skillful tissue clamping. This technique is visible in the subscapularis video (Figs. 5.50, 5.51, 5.52, 5.53, and 5.54).
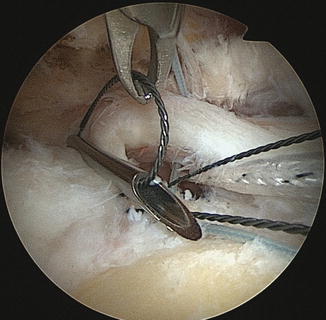
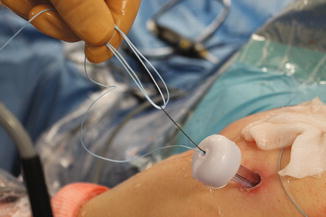
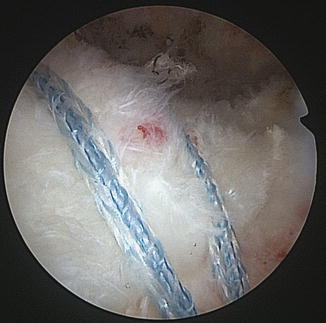
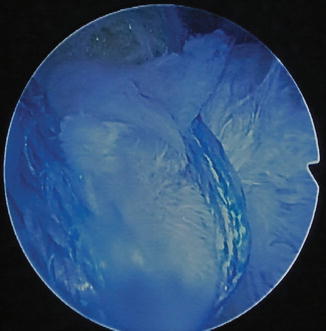
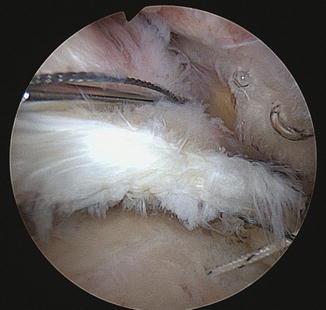
Fig. 5.52
Fig. 5.53
Fig. 5.54
Fig. 5.55
Fig. 5.56
A tape can also be passed alone like a strapping, and this is the “SpeedFix” technique. But in this case, the absence of compression of the first row on the tuberosity creates a risk of unealing (Fig. 5.55).
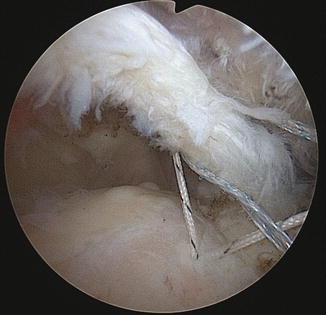
Fig. 5.57
For small- or medium-sized L-shaped tears, the simplified double-row technique can be used. But the orientation of the implants and the choice of work approach will depend on the initial analysis. Here is an example of L-shape at anterior corner. After surgery, a simple small point allows full closure of the vertical leg of the L-shape (Figs. 5.56, 5.57, 5.58, 5.59, 5.60, and 5.61).
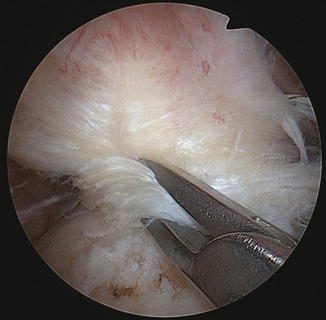
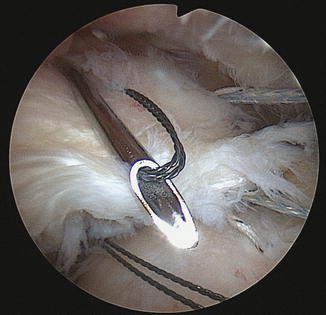

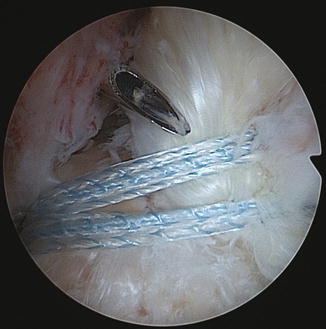
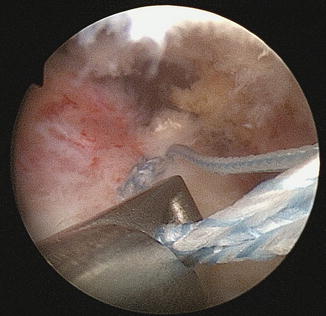
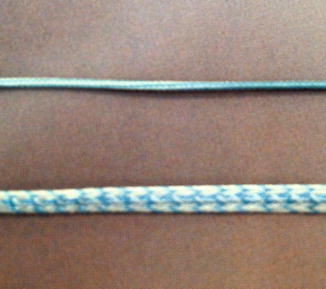
Fig. 5.58
Fig. 5.59
Fig. 5.60
Fig. 5.61
Fig. 5.62
Fig. 5.63
For intermediate tears, the bridge technique is excellent. It can be carried out using wire or tape.
The tape has the advantage of reducing the shear effect, but its handling is more difficult and requires dedicated instrumentation (Figs. 5.62, 5.63, 5.64, 5.65, 5.66, and 5.67).