28 Percutaneous Screw Fixation of Scaphoid Fractures
Indications
- Acute nondisplaced and displaced fractures of the scaphoid
- Fractures in competitive athletes or laborers or other individuals who wish to avoid prolonged periods of immobilization and a faster return to activity
- Fractures with delayed treatment
Technique
- The patient is positioned supine with the arm extended and the elbow flexed 90 degrees.
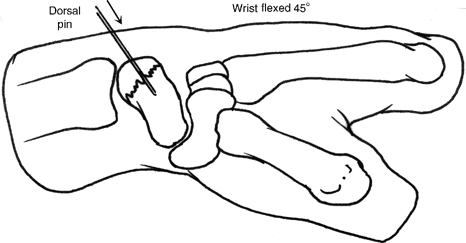
- The forearm is pronated and the wrist is flexed
- 5 degrees of flexion placing the scaphoid in 90 degrees of flexion (Fig. 28-1).
- The guide wire is inserted into the proximal pole from the dorsal aspect of the wrist. The wire is advanced across the fracture and into the proximal pole. The centered position of the wire is confirmed using anteroposterior, lateral, and oblique projections with intraoperative imaging.
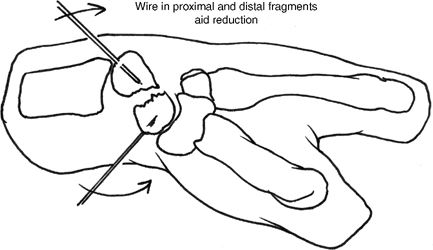
- For displaced fractures of the scaphoid, two Kirschner wires can be used as joysticks to reduce the fragments. One of the wires can be advanced to capture the reduction (Fig. 28-2).
- Fluoroscopy or arthroscopy can be utilized to confirm acceptable reduction.
Figure 28-1
Figure 28-2
Dorsal Screw Placement (Proximal Pole and Waist Fractures)
- The dorsal entry site over the guide wire can be enlarged with a small longitudinal skin incision and blunt dissection down to the capsule to avoid injury to the extensor tendons.
- The scaphoid is prepared with a hand reamer, reaming no more than 2 mm from the distal cortex.
- A headless, cannulated screw 4 mm shorter than the length of the scaphoid is advanced over the guide wire from proximal to distal.
- The wire is removed and the reduction and screw position is confirmed with fluoroscopy.
Palmar Screw Placement (Distal Third Fractures)
- The guide wire is placed as above.
- A palmar incision is made over the palmar site of wire penetration.
- The scaphoid is prepared with the hand reamer, which is advanced through the palmar edge of the trapezium and then into the scaphoid no more than 2 mm from the proximal cortex.
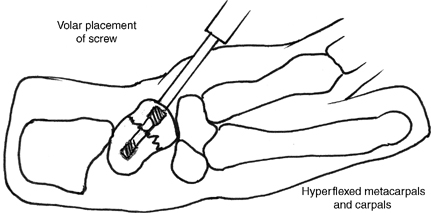
- A headless, cannulated screw 4 mm shorter than the length of the scaphoid is advanced over the guide wire from distal to proximal (Fig. 28-3).
- The wire is removed and the reduction and screw position are confirmed with fluoroscopy.
Pearls
Accurate determination of scaphoid length using parallel guide wires and downsizing the screw by 4 mm avoids the complications of oversized screws, including distraction of the fragments and screw penetration of the cortex.
For the palmar approach, reaming the edge of the trapezium and then the scaphoid ensures a starting point that will achieve center-center screw placement.
Pitfall
Reaming into the opposite cortex compromises the compressive capacity of the screw.
Alternative Techniques
- Arthroscopically assisted percutaneous screw fixation
- Open reduction and internal fixation through either a dorsal or a palmar approach
Postoperative Care
- A bulky hand dressing and splint are applied. These will be exchanged with a customized, removable palmar splint.
- The patient may remove the splint for gentle motion and strengthening.
- Postoperative radiographs are taken every 2 weeks to assess fracture healing.
- Athletes and laborers are restricted until union is confirmed.


