Fixation
Michael J. Gardner
M. Bradford Henley
Sterile Instruments/Equipment
- Large external fixation system
- Open compressor-distractor device
- 4.0-mm partially threaded pins for midfoot pin
- Towel bumps
Positioning
- Supine on a cantilever-type table.
- Bring patient to the end of the table.
- Place a small bump under ipsilateral hip and torso.
- Elevate leg on a soft ramp cushion to facilitate lateral radiographs.
Indications
- Staged treatment of complex periarticular fractures about the knee.
- Damage control orthopedic surgery.
- It is suggested not to obtain CT scans to plan definitive fixation prior to the application of a spanning external fixator, unless the external fixator will be used for definitive fracture management.
- It is best to obtain CT scans after a spanning external fixator is applied.
- An external fixator can maintain limb length, alignment, and the improvements in fracture reduction achieved through ligamentotaxis.
- Thus, it is cost-effective and often more efficient to obtain advanced imaging studies, such as CT, prior to definitive fixation, if used as a preoperative tool for planning surgical tactics after external fixation.
- An external fixator can maintain limb length, alignment, and the improvements in fracture reduction achieved through ligamentotaxis.
Reduction and Implant Techniques
- Assess the fracture pattern on the AP view to determine where the distraction forces will effect the best reduction.
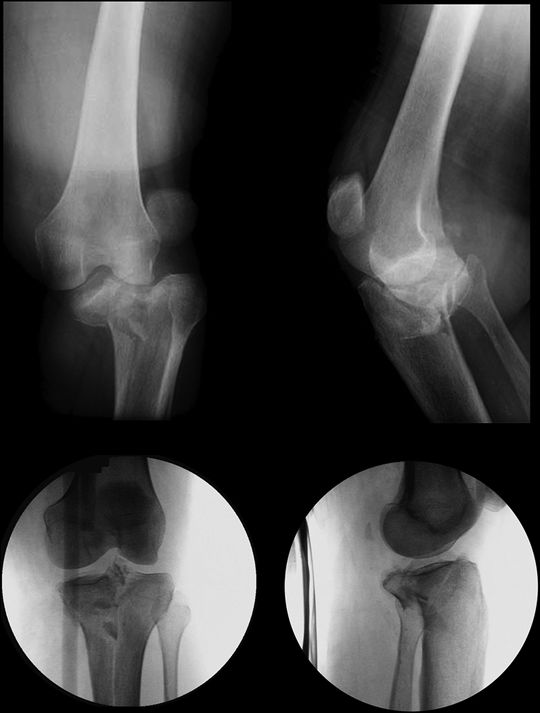
- Varus deformities will respond to distraction across the joint if the force vector is collinear with the mechanical axis of the limb or just medial to this on an AP image (Fig. 27-1).
Figure 27-1. Following fracture-dislocation of the knee, ligamentotaxis through the initial two pin construct provided accurate length and alignment. Note the initial varus deformity and the position of the external fixator bars medial to the mechanical axis of the extremity.
![]()
- Similarly, valgus deformities will respond to distraction across the joint if the force vector is collinear with the mechanical axis of the limb or just lateral to this on an AP image.
- Place pins and pin-bar clamps so as to achieve the above by moving bar to one side of a pin or the other.
- Place one pin in proximal third of femur (5.0 mm × ~200 mm), and one pin distally in distal tibia (5.0 mm × ~170 mm) using soft tissue protection sleeves (triple guide) for soft tissue protection.
- Both pins in the sagittal plane, anterior to posterior.
- Correct rotational alignment to “near anatomical” before inserting the first two pins in same orientations, orthogonal to proximal femur and distal tibia.
- If the orientation of these first two pins differs (e.g., the distal tibial pin is not in the same sagittal plane as the proximal femoral pin, but rotationally misaligned) using the external fixator to effect a change in limb length will necessarily effect limb rotation, when the bars are connected to the pins directly.

Stay updated, free articles. Join our Telegram channel
- If the orientation of these first two pins differs (e.g., the distal tibial pin is not in the same sagittal plane as the proximal femoral pin, but rotationally misaligned) using the external fixator to effect a change in limb length will necessarily effect limb rotation, when the bars are connected to the pins directly.
- Both pins in the sagittal plane, anterior to posterior.

Full access? Get Clinical Tree


