Intramedullary Nailing of Diaphyseal Tibial Fractures
Patient Selection
Indications
Can treat most tibial diaphyseal fractures with intramedullary (IM) nail
Nailing more beneficial than casting; earlier return to function, alignment maintenance
Contraindications
Preexisting osseous deformity, preexisting implants
Relative contraindications—Total knee arthroplasty, morbid obesity (hinders knee flexion)
In open fractures with gross contamination requiring repeat excisional débridements, delay with staged IM nailing until débridements complete
Preoperative Imaging
AP, lateral radiographs of tibia/fibula, ankle, knee to determine fracture pattern, comminution, bone loss, potential intra-articular extension
With bone loss, imaging contralateral tibia can help predict symmetric length
CT helpful if radiographs inconclusive for intra-articular extension or pattern unclear
Procedure
Room Setup/Patient Positioning
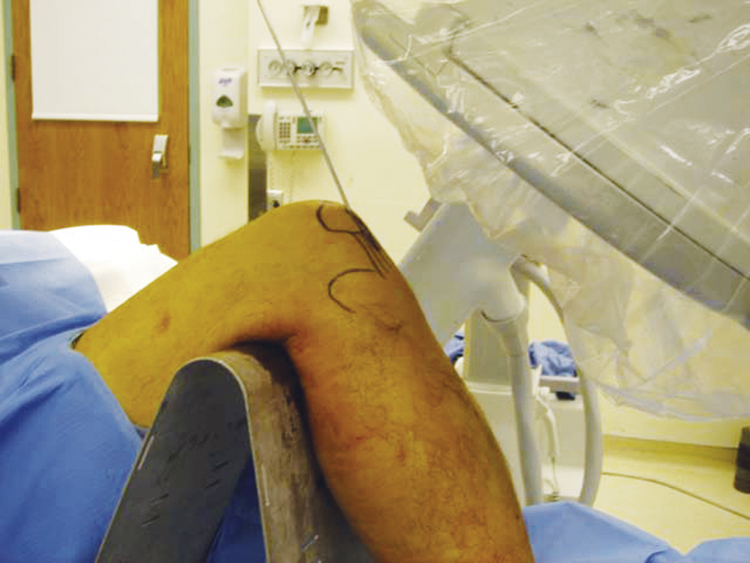
Figure 1Photograph shows fluoroscopic imaging setup for intramedullary nailing of the tibia. For AP imaging, the C-arm is positioned parallel to the tibial diaphysis.
(Courtesy of Eben Carroll, MD.)
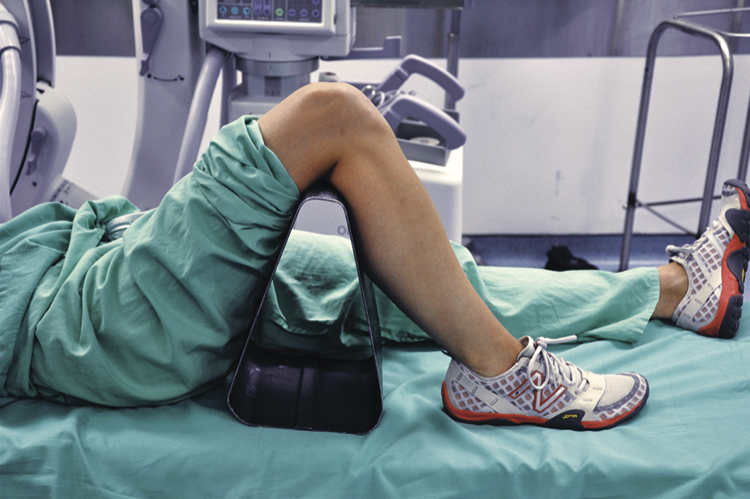
Figure 2Photograph shows incorrect positioning of the foot over the radiolucent triangle. It should be suspended, not impinging or lying on the table.
(Courtesy of Eben Carroll, MD, Winston-Salem, NC.)
Supine position on radiolucent table with radiolucent bump under hip
Avoid tourniquet use if possible
Prepare and drape to midthigh
C-arm fluoroscopy on contralateral side, monitor at end of bed
For AP imaging, position C-arm parallel to tibial diaphysis (Figure 1)
Achieve true AP imaging when proximal tibia overlays 50% of fibular head; true lateral imaging occurs when femoral condyles and tibial plateau are collinear
Position injured leg flexed over radiolucent triangle; should allow knee flexion of 100° to 120°; suspend foot, do not rest on table (Figure 2)
Special Instruments/Equipment/Implants
Complete IM nail set of choice including reamers and ball-tipped guidewire
Large, medium, small radiolucent triangles for limb positioning
Multiple small and large retractors
Multiple large and small Weber bone reduction clamps
Dental picks
Large universal distractor in room, unopened
Multiple 2.5- and 5.0-mm Schanz pins
Small-fragment plate and screw set (in room, unopened) for provisional stabilization of open fractures and/or blocking screws
Additional large drapes to cover fluoroscopy machine during lateral visualization and to cover end of table when knee flexed
Surgical Technique
Approach and Start Site
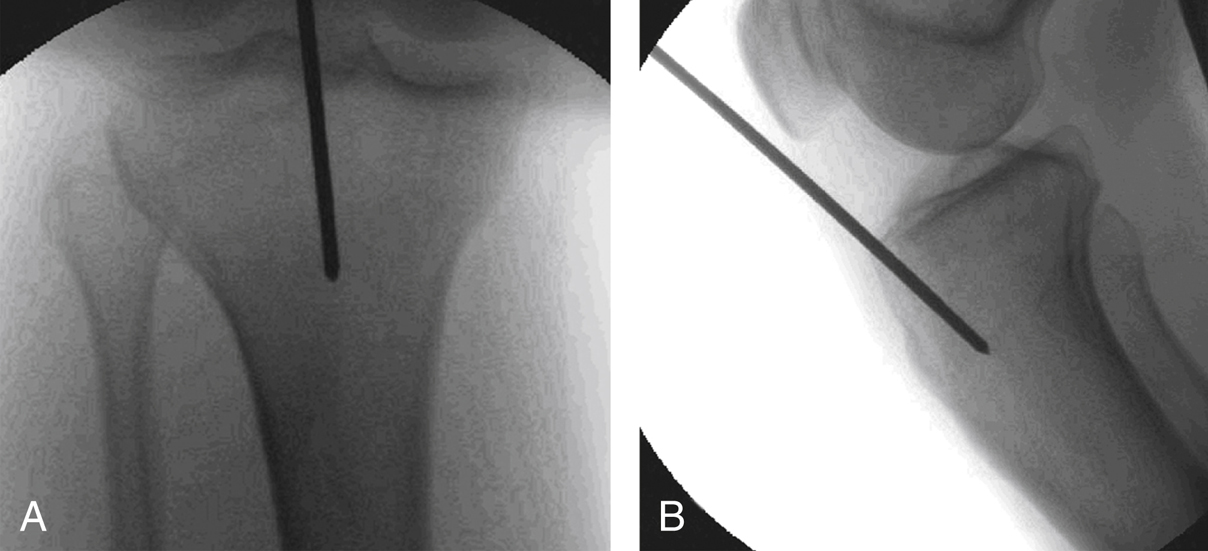
Figure 3Fluoroscopic images show the start site for an intramedullary nail. A, AP image demonstrates alignment of the nail with the tibial diaphysis, with a start site just medial to the lateral tibial spine. B, Lateral image shows a start site at the apex of the tibial metaphysis and collinear with the tibial diaphysis.
(Courtesy of Eben Carroll, MD.)
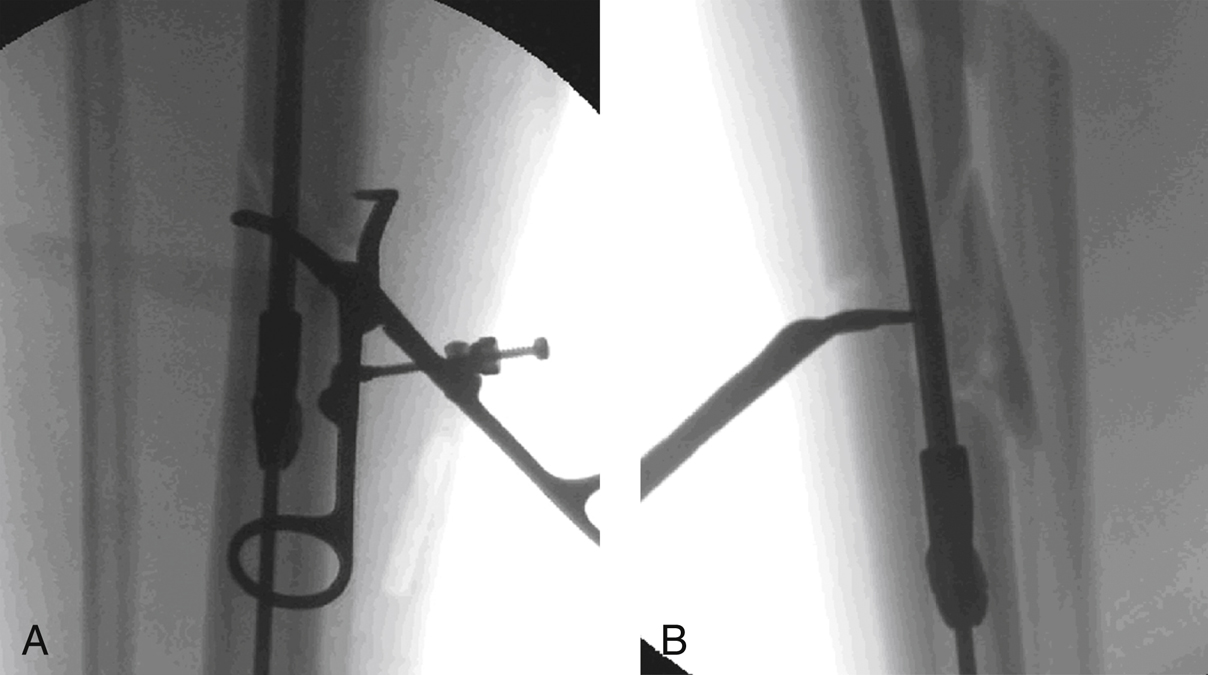
Figure 4AP (A) and lateral (B) fluoroscopic images demonstrate a percutaneous clamp reducing the fracture and facilitating concentric reaming.
With knee in flexion, determine start site fluoroscopically
Best anatomic start site is along medial aspect of lateral tibial spine on AP view and on apex of anterior tibial slope on lateral view (Figure 3)
To determine start site, place guide pin on skin, confirm position with fluoroscopy (Figure 4)
Medial parapatellar approach
Make 3- to 4-cm incision along medial border of patellar tendon
Reflect paratenon; separate patellar fat pad from posterior aspect of patella; avoid entrapping medial meniscus, coronary ligament
Lateral parapatellar approach
Useful for proximal third fractures
Make 3- to 4-cm incision along lateral border of patellar tendon
Reflect paratenon; separate patellar fat pad from posterior aspect of patella; avoid entrapping lateral meniscus, coronary ligament
Patellar tendon–splitting approach
Make 3- to 4-cm incision on middle portion of patellar tendon
Split paratenon; separate patellar fat pad from posterior aspect of patella; avoid entrapping coronary ligament
Percutaneous patellar tendon–splitting approach
Make 2-cm incision over distal third of patella
Split patellar tendon in proximal-to-distal direction, starting at inferior pole of patella
Place guide pin along posterior aspect of patella
Stay updated, free articles. Join our Telegram channel

Full access? Get Clinical Tree


