Fig. 10.1
Pronation (left) and Supination (right)
Dorsi and Palmar Flexions
Dorsiflexion and Palmar flexion are one joint motor activities of the hand (Fig. 10.2). The wrist is the used joint. While exercising Dorsiflexion or/and Palmar flexion, the forearm lays on a table. In basic position one, the forearm is in position 0° without gravity. Dorsiflexion is the activity in the back of the hand direction. Palmar flexion is the activity in the palm of the hand direction. Basic position two with forearm on a pack allows to train movements over a wider range of motions.
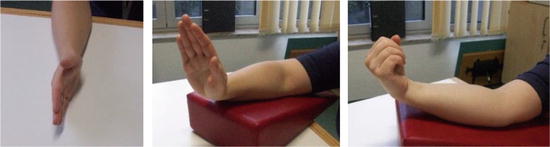
Fig. 10.2
Position 0° (left), Dorsiflexion (middle) and Palmar flexion (right)
Radial and Ulnar Abductions
Radial abduction and ulnar abduction are one joint motor activities of the hand. The wrist is the used joint. Radial abduction goes in thumb direction. Ulnar abduction goes in cubital direction. While exercising radial abduction and/or ulnar abduction, the forearm mostly lays with the palm on the table, basic position one shown in Fig. 10.3 without gravity. Basic position two: forearm on a pack, position of the wrist in pronation/supination direction 0° and in Dorsiflexion/Palmar flexion 0°, shown in Fig. 10.4 with gravity.
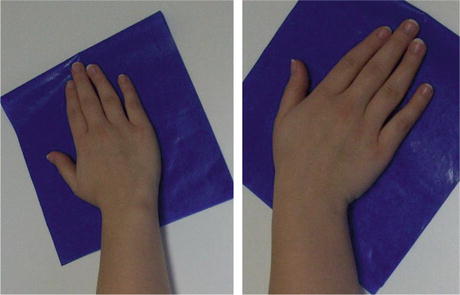
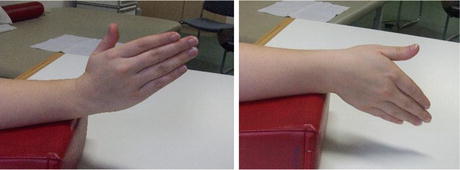
Fig. 10.3
Radial (left) and Ulnar (right) abduction
Fig. 10.4
Radial (left) and ulnar (right) abduction against gravity
Finger Flexion and Extension
Finger flexion and finger extension are simple motor activities of the hand using multiple joints. All small finger joints are the used joints. Needed joints are metacarpophalangeal joints (knuckle joints), proximal interphalangeal joints and distal interphalangeal joints. Finger flexion is making a fist. Finger extension is to open the fist. While exercising finger flexion or/and finger extension, the forearm lays on a table. Basic position one (supination/pronation 0°, dorsiflexion/palmar flexion of the wrist 0°) and basic position two (palm of the hand on a pack and finger extension with gravity) are shown in Fig. 10.5.
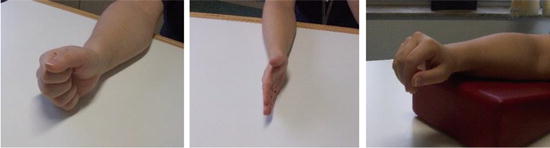
Fig. 10.5
Finger flexion (left), extension (middle) and with gravity (right)
Thumb Abduction and Adduction
Thumb abduction and thumb adduction are one joint motor activities of the thumb. The metacarpophalangeal joint of the thumb is the used joint. Thumb abduction direction goes away from hand. Finger adduction direction goes close to hand. While exercising thumb abduction or/and thumb adduction, the forearms and the palm of the hand lay flat on a table (Basic position one, without gravity). Basic position two: forearm and ulnar side of the hand lay on the table (shown in Fig. 10.6 without gravity and in Fig. 10.7 with gravity).
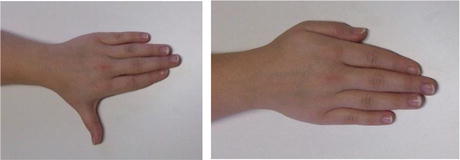
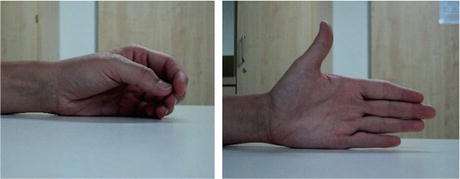
Fig. 10.6
Thumb abduction (left) and adduction (right)
Fig. 10.7
Starting position (left) and thumb abduction against gravity (right)
Finger Spread (Finger Abduction and Adduction)
Finger abduction and finger adduction, also called “finger spread”, are motor activities of the metacarpophalangeal joints of all five fingers. Basic position one, forearm and palm of the hand lay flat on a table, as shown in Fig. 10.8 without gravity.
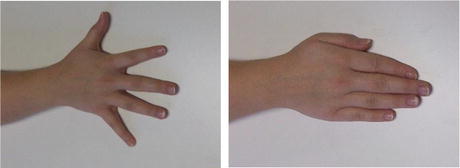
Fig. 10.8
Finger abduction (left) and adduction (right)
Pinch Grip
Pinch grip (shown in Fig. 10.9) is a motor activity of the hand using different fingers selectively. Two fingers are used. The thumb is in opposition to one of the other fingers (digit II to digit V). The finger pulps need to contact. Used joints are all small finger joints (metacarpophalangeal joints, proximal interphalangeal joints and distal interphalangeal joints). While exercising pinch grip, the forearm and the ulnar side of the hand lay on a table (Basic position one).
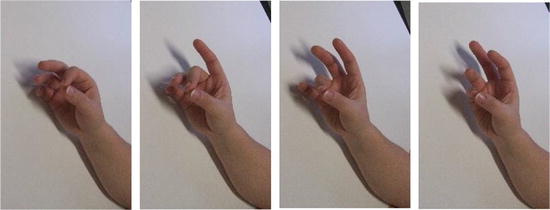
Fig. 10.9
Thumb to index-middle-ring-small finger (from left to right)
Possible Options for SRM
Repetitive training of simple movements is monotonous. Even increasing success will not keep the motivation of the patient on a high level. Serious gaming may increase the attention and motivation of the patient. Each “level” of a game is reached when specific tasks are fulfilled. In our context, fulfilling of tasks is defined by moving in a certain direction, with a minimal movement speed, with a specific number of repetitions and so on. In other words, we can define the sequence of tasks by modifying the shaping variables of the trained movements. For each movement, a sequence of shaping variables needs to be developed. In the following sections, we describe the principle shaping possibilities for each movement.
Pronation and Supination
Shaping possibilities include movement speed, training duration (per exercise), use of weights and use of limits or checkmarks. Figure 10.10 shows a shaping example for use of weights, a training possibility with a dumb-bell.

Fig. 10.10
Pronation (left), Position 0° (middle) and Supination (right)
Shaping examples for use of checkmark are shown in Fig. 10.11. The patient is advised to reach a checkmark. After enlarging the range of motion to the first checkmark, the next checkmark is the next target.
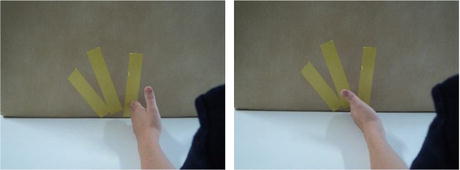
Fig. 10.11
Position 0° (left) and Supination to a given checkmark (right)
Dorsiflexion
Shaping possibilities include gravity, movement speed, training duration (per exercise), use of weight and use of limits or checkmarks. Some shaping examples for working against gravity are shown in Fig. 10.12. Shaping examples for using weights and training with a dumb-bell are presented in Fig. 10.13. Shaping examples for use of checkmarks are demonstrated in Fig. 10.14.
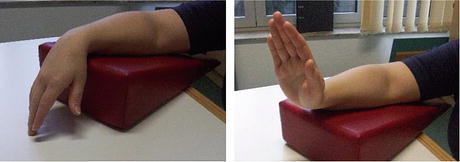
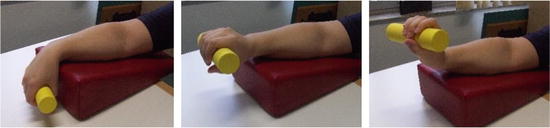
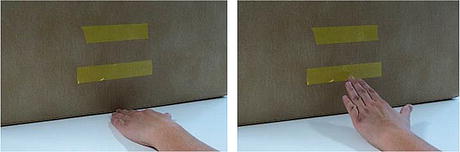
Fig. 10.12
Starting position (left) and Dorsiflexion against gravity (right)
Fig. 10.13
Starting position (left), position 0° (middle) and Dorsiflexion with dumb-bell (right)
Fig. 10.14
Starting position (left) and Dorsiflexion with a checkmark (right)
Palmar Flexion
Shaping possibilities include gravity, movement speed, training duration (per exercise), use of weight and use of limits or checkmarks. Shaping examples for use of weight, training with a dumb-bell are shown in Fig. 10.15. More basic position and shaping example to train against a resistance are presented in Fig. 10.16, for example, a flexible ball has to be squeezed.
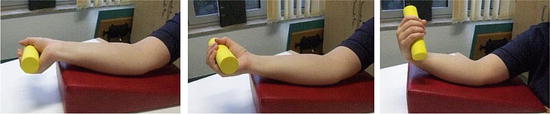

Fig. 10.15
Starting position (left), position 0° (middle) and P-flex against resistance (right)
Fig. 10.16
Starting (left) and end (right) positions
Ulnar Abduction
Shaping possibilities include: movement speed, training duration (per exercise), use of weight and use of limits or checkmarks. Shaping examples for use of weight and training against resistance are shown in Fig. 10.17 with anti-slip foil that increases the resistance. Similarly, shaping examples for use of checkmark are shown in Fig. 10.18.
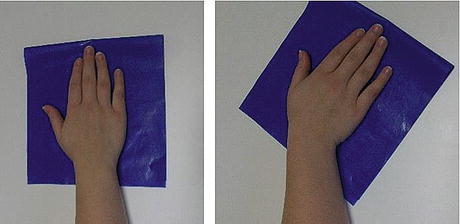
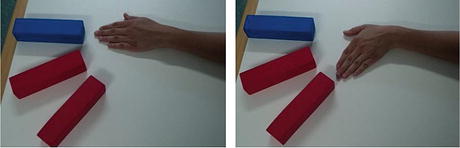
Fig. 10.17
Starting position (left) and Ulnar abduction against resistance (right)
Fig. 10.18
Starting position (left) and Ulnar abduction with checkmarks (right)
Radial Abduction
Shaping possibilities include gravity, movement speed, training duration (per exercise), use of weights and use of limit or checkmark. Shaping examples for working against gravity are shown in Fig. 10.19. Similarly, shaping examples for use of weights, training with a dumb-bell are presented in Fig. 10.20.
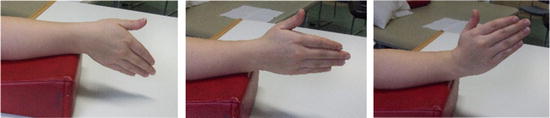
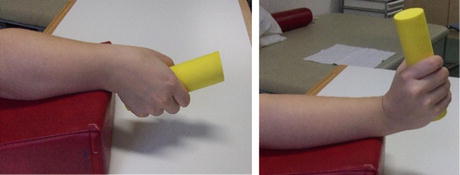
Fig. 10.19
Starting position (left), Position 0° (middle) and radial abduction against gravity (right)
Fig. 10.20
Starting position (left) and radial abduction with a dumb-bell (right)
Finger Extension
Shaping possibilities include gravity, movement speed, training duration (per exercise), use of weight or resistance and use of limit or checkmark. Shaping examples for working against gravity are shown in Fig. 10.21. Similar shaping examples for use of checkmark are presented in Fig. 10.22. More shaping examples for working against gravity by using single or selective fingers are demonstrated in Fig. 10.23.
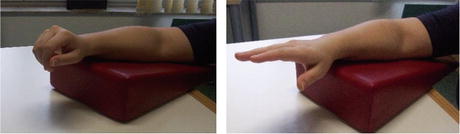
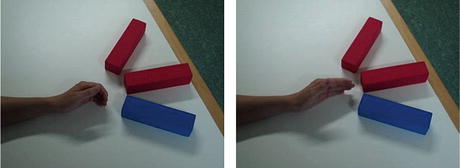
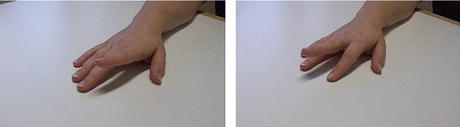
Fig. 10.21
Starting position (left) and finger extension against gravity (right)
Fig. 10.22
Starting position (left) and finger extension by a checkmark (right)
Fig. 10.23
Finger extension: index finger (left) and middle finger (right)
Finger Flexion
Shaping possibilities include movement speed, training duration (per exercise) and the use of weight or resistance. Shaping examples for working with resistance using a fist and fingers are shown in Fig. 10.24 for few selective fingers.
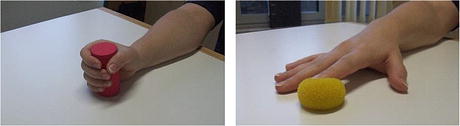
Fig. 10.24
Flexion with resistance: for five fingers (left) and index one (right)
Finger Abduction and Adduction
Shaping possibilities include movement speed, training duration (per exercise) and use of weight or resistance. Shaping examples for use of resistance are shown in Fig. 10.25.
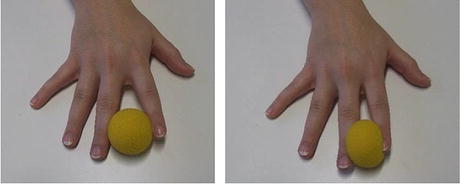
Fig. 10.25
Starting position (left) and finger adduction against resistance (right)
Thumb Abduction/Adduction
Shaping possibilities include gravity, movement speed, training duration (per exercise) and use of limit or checkmark. Shaping examples for working against gravity are shown in Fig. 10.26. Additional shaping examples for use of checkmarks are presented in Fig. 10.27.
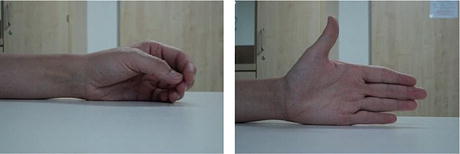
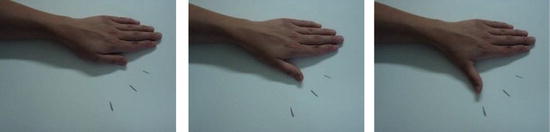
Fig. 10.26
Starting position (left) and thumb abduction against gravity (right)
Fig. 10.27
Starting position (left), thumb abduction (middle) and abduction by a given checkmark (right)
Pinch Grip
Shaping possibilities include movement speed, training duration (per exercise) and use of weight or resistance. Shaping examples for use of resistance are shown in Fig. 10.28.
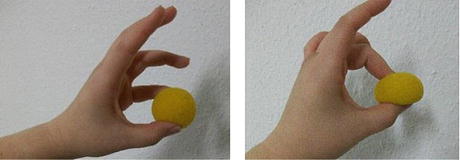
Fig. 10.28
Pinch grip without (left) and against resistance (right)
10.1.1.4 “Using Objects” According to Arm Ability Training
This subset of training intervention is employable for patients with mild to moderate impairments. It is advisable to exercise highly repetitive (many repetitions during a training session) and often (many training sessions during a week). We proposed seven objects and their correlating tasks.
The goal of each task is to get better grip force, steadiness, coordination, dexterity, aiming, strength endurance and speed of hand and finger movements. Training should stimulate the patient to involve the paretic upper limb more extensively in the activities of daily living. See the described distal movements below for further details. Each exercise needs to be adapted to the rising performance limit as well. Shaping possibilities will be described for each object in detail. General shaping possibilities include: speed, weight and level of difficulty.
Coins
The goal is to improve grasping, dexterity, coordination, speed and aiming.
The structure
Material: marked base and the objects to turn (coins, glass nuggets, buttons, flat washer)
Options: sizes, numbers and kinds of objects like coins to turn are given
Arrangement: objects are located in a row of ten
Procedure: there are four of these rows one below the other. At the beginning of the exercise, the first row is at the top. The first object is located opposite to the affected arm. An exercise takes 1 min, turned objects are counted. Each “one-minute exercise” is repeated four times (Fig. 10.29)
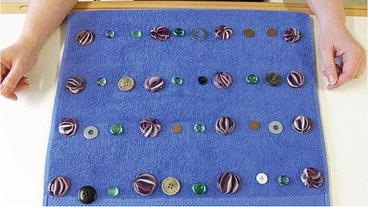
Fig. 10.29
Example of “Coins”
Options
Use small objects (small coins, flat washers, …)
Use bigger objects (buttons, big coins, glass nuggets, …)
Use many different sizes or few different sizes
Shaping example using small and smaller objects is shown in Fig. 10.30.

Fig. 10.30
Buttons (left), glass nuggets (middle) and coins (right)
Nuts and Bolts
The goal of the “Nuts and Bolts” (Fig. 10.31) is to improve grasping, dexterity, coordination, speed, aiming and bimanual activities.
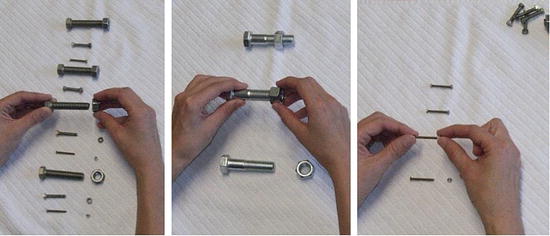
Fig. 10.31
“Bolts & Nuts” (left): low (middle) and high (right) difficulty
The structure
Materials: bolts and nuts in different sizes.
Options: sizes and numbers of bolts and nuts to screw are given.
Arrangement: objects are in columns arranged by size with nuts towards the affected side.
Objective: the unaffected hand holds a bolt. Screws and bolts need to be assembled. They are at the top at the beginning of the exercise. Each “one-minute exercise” is repeated four times.
Options
Low level of difficulty:
Medium and big bolts and nuts (2–3 different sizes)
Use of few bolts and nuts (8–12 kinds/pieces)
A non-paretic hand may assist
High level of difficulty:
Medium and small bolts and nuts (3–5 different sizes)
Many bolts and nuts (12–18 kinds)
Only screw with the paretic hand (healthy hand uses a bolt)
Construction Blocks
The goal is to improve grasping, dexterity, arm moves, bimanual activities, coordination and endurance
The structure
Material: blocks in three different sizes (e.g. mega blocks™, Duplo™, Lego™) and different colour profiles.
Objective: the task is to build up a given construction out of single pieces and blocks. Time is measured and given as a feedback. Different settings are used to differentiate between levels.
Options
Different number of blocks (less/10 to many/75)
Lower level, e.g. “build a tower”/build a small tower of ten pieces
Higher level, e.g. “build a high tower” of 50 pieces or build a tower, house or car by instructionRelated posts:

Stay updated, free articles. Join our Telegram channel

Full access? Get Clinical Tree


