Chapter 8 A one-and-a-half-hour routine
| CHAPTER CONTENTS | |
| Introduction | 74 |
| Begin with the end in mind | 75 |
| Working the feet | 77 |
| Working the legs | 83 |
| Working the hands and arms | 103 |
| Working with the patient lying on their side | 113 |
| Working with the patient prone | 120 |
| Working with the patient sitting | 125 |
| Working the neck and head | 128 |
Introduction
Thai Massage includes a vast repertoire of moves. If all were used the massage could go on for more than three hours. In the context of a modern massage practice even a two-hour massage is impractical. For me, both as a giver and as a receiver of massage one and a half hours is ideal. It is not too long and it is not too rushed. The following routine can be completed in just under an hour and a half and offers a complete massage from the toes to the top of the head. The routine is designed for efficiency. In massage terms this means maximum relaxation for the patient with minimum effort from the massage therapist.
Begin with the end in mind
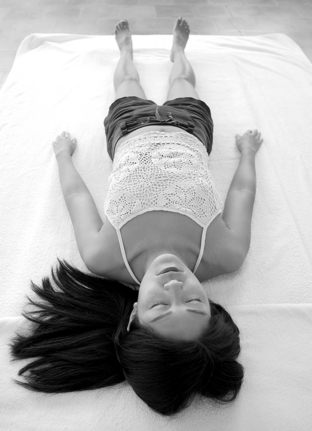
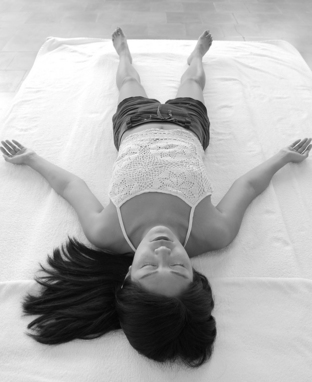
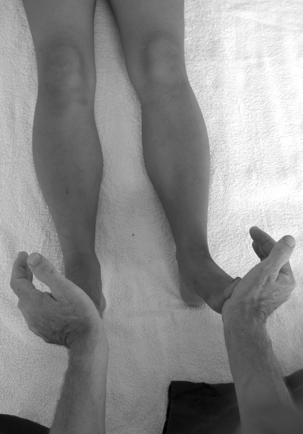
The last position of a Thai Massage is the yoga posture known as the ‘corpse pose’ or ‘shavasana’. In this posture we lie on our back with our arms open at 45° to our body, palms facing up. Our legs are apart and our hips and buttocks relaxed so that our feet fall naturally outwards. One of my yoga teachers insisted that ‘shavasana’ was the most difficult yoga posture. I used to think he was joking. Now when I see the difference in my patient’s body before and after the massage I understand what he means (Figs 8.1 and 8.2).
We do not need to organise our patient’s body to begin with. We just observe how they naturally lie. We observe the relationship of their ankles, their knees, their hips, and their shoulders. We look to see if the legs turn out equally, if their hips rest evenly on the floor. We look to see how their head lies in relation to their shoulders. We do not need to comment on any of this. This is simply curiosity. We are gathering information for the development of our craft. As we work we will aim to keep active this soft and curious observation of our patient. We will also listen for changes in their breathing and for any belly gurgles that give a hint to their relaxation. Sometimes we will be touched by waves of emotions. Again there is no need to comment on this. We are learning to appreciate how our patient’s body changes as we work.
Working the feet
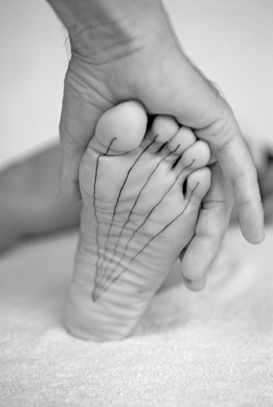
The Thais suggest five lines on the underside of the foot. We can think of these as the five toes extending as metatarsals deep inside the flesh of the foot. We can think of the plantar fascia on the underside of the foot and of the deeper tendons within (Fig. 8.3).
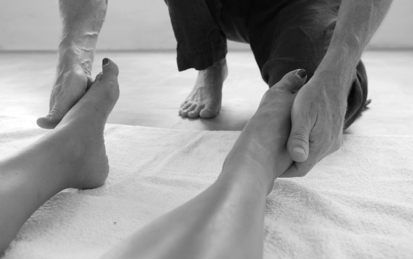
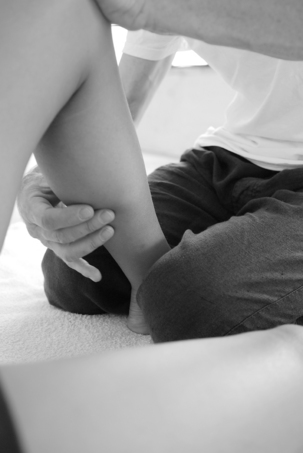
We gently wrap our palms around the top of our patient’s feet. This is the first contact. Our touch is open and receptive. We let our patient’s body come to us. We wait for a moment, listening to their feet, listening to their body through their feet. We allow ourselves the sense of continuity from the feet, through the legs to the hips and on up to the diaphragm. We position the feet so they are in line with the ankles; so that the ankles are in line with the knees; so that the knees are in line with the hips. We let our patient’s heels rest like fulcra on the floor. We use the long metatarsal bones of the feet as levers. We lean our body weight slowly down through the front of our patient’s feet. We watch and feel as the lengthening extends all the way through the front of the legs to the hips (Fig. 8.4).
Now we wrap our hands around the underside of our patient’s feet so they rest against the balls of their toes. We lean our bodyweight slowly into the underside of the feet. We feel the way in which this long stretch continues all the way up the back of our patient’s legs to their hips and beyond into the lower back (Fig. 8.5).
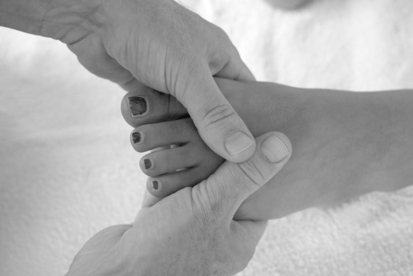
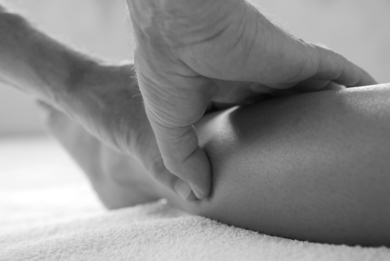
We move both hands to the active foot. We let our thumbs rest on the upper surface of the foot. The upper surface is bony and with little flesh. We do not press hard against it. We use our fingers to work the underside of the foot, softening the plantar fascia and moving all the little joints between the toe bones (Fig. 8.6).
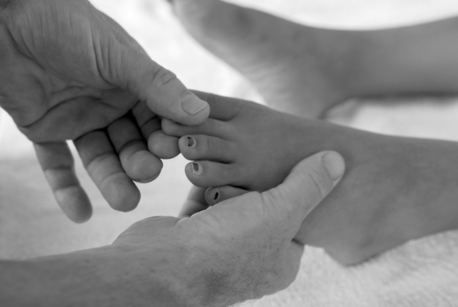
We now move in between the little toe and the next. With the same contact as before we ease through the tissues, pushing the toe bones apart within the foot. We close gently, squeezing through the webbing between the toes. We continue this sequence; toe-by-toe, webbing-by-webbing, changing our working hand as needs be until we finish with the big toe. Our other hand can assist by mobilising our patient’s foot to smooth the journey of our working hand (Fig. 8.7).
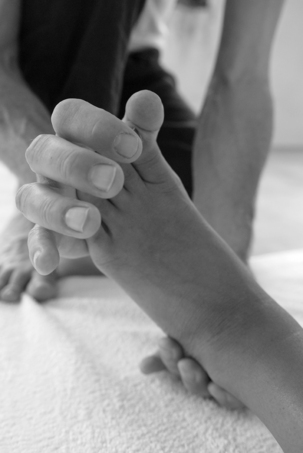
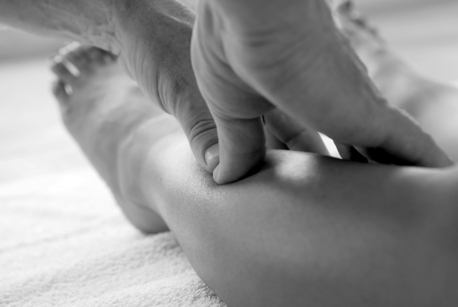
Now that the plantar fascia is softened and the foot bones have been mobilised we slide one hand under the heel of the foot. We use the other hand to grasp the long levers of the metatarsal bones from above. We slowly push the heel up towards the hips while using the toe levers to encourage a lengthening throughout the front of the leg to the hip (Fig. 8.8).

We reverse the movement to lengthen the back of our patient’s leg. As we bring the foot back to the floor we suggest a slight external rotation at the hip (Fig. 8.9).
Working the legs
A colleague studied with Pichet Boonthume, a well-known massage master in Thailand. He insisted that the most important part of the massage was the work on the legs. He told his students to work the legs until they became like jelly.
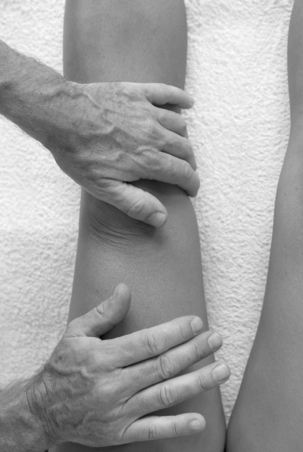
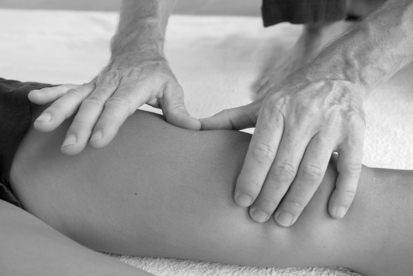
Starting at the patient’s heel we feel for the beginning of the 2nd outside leg line. Using both thumbs side by side we lean our bodyweight into the myofascial channel. We feel for the softening of the tissues that lets our thumbs sink deeper. We feel for the movement of the fascia and follow that movement as we sink deeper (Fig. 8.11).
We now move to the 1st outside leg line. We feel for the outer edge of the shinbone just above the ankle. We let our thumbs rest on the bone and then drop off, drawing the tissue into the myofascial channel beside the bone. As before, we move up the leg towards the knee. Each time we sink into the channel we feel for the softening of the tissue and the natural movement of the fascia. We let our thumbs follow this movement into its preferred direction. We release our pressure slowly, leaving the body in the same way in which we entered (Fig. 8.12).
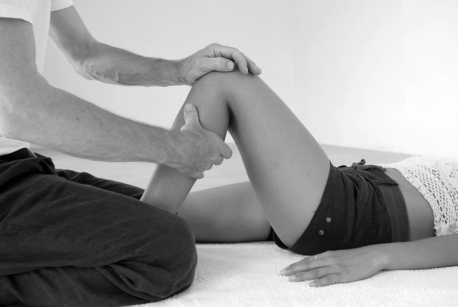
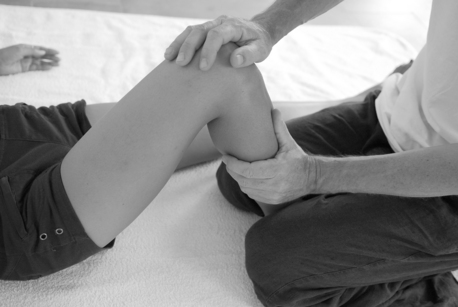
Resting one hand on our patient’s leg we move position so that we sit mid-way along our patient’s thigh. We feel for the route of the 1st outside leg line on the upper leg. We begin by feeling for the little dip at the superior lateral border of the patella. We then feel for the anterior superior iliac spine (ASIS) of the pelvis. The line is not where we would like it to be so we must keep these two landmarks in mind and visualise the line between them. It is best to start with palming.
Once we have a sense of where the line runs we continue to work it with our thumbs side by side. At each position we use the line to introduce a bend in the muscle. At the point of resistance we allow the muscle to push us back out. In this way a rhythm develops – the rhythm of our technique responding to the movement of the muscle. We work the line in four passes, finishing back at our patient’s knee (Fig. 8.14).
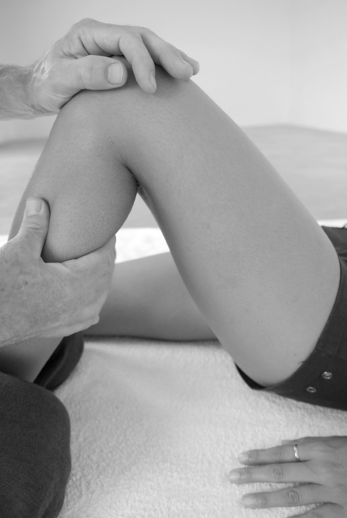
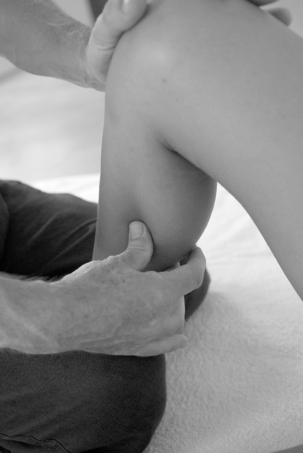
We now turn our attention to the 2nd outside leg line. We feel with our thumbs for the anterior edge of the iliotibial band. We press downwards, bending the fascia as if we could roll it under the femur. As before, we follow the movement until we feel resistance and then we allow the elasticity in the tissues to push us out. We continue along this line until the tissue hardens around the hip. We then reverse direction back down towards the knee. We work this line four times, finishing at the knee (Fig. 8.15).
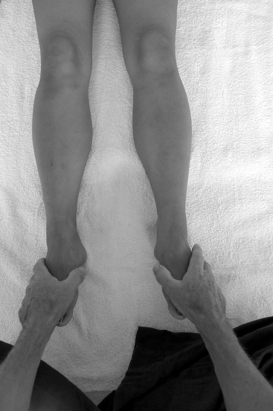
While holding onto our patient’s leg for support we move position so we are kneeling with our knees either side of our patient’s foot. We keep hold of our patient’s leg at the knee so that they do not need to support it themselves. We arrange our knees so that our patient’s ankle bones are held firmly in the soft creases of our knees (Fig. 8.16).
We are kneeling low. In this position we can do more work on the leg lines of our patient’s lower leg. Now we have some advantages in this work. In response to gravity the muscles are hanging from the leg and because of the position they have less need for tension.
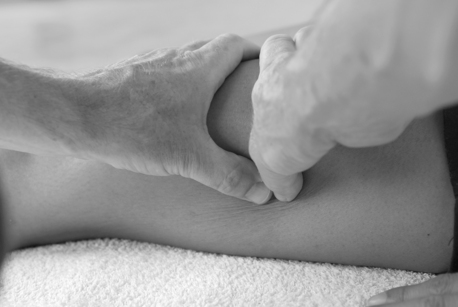
We begin by using the thumb of our lateral hand to work a little deeper into the 2nd outside leg line. We travel downwards from the knee working the line only where it is comfortable for our hand to work (Fig. 8.17).
We then let out fingers find the 3rd outside leg line at the back of our patient’s lower leg. This is the channel in between the two heads of the gastrocnemius. We use the channel to pull the lateral head of the gastrocnemius out from the mid-line. We will find that there is a natural tendency to lift the muscle as we draw it out. We then combine our movements, pushing in with our thumb on the 2nd outside leg line and pulling out with our fingers in the 3rd outside leg line. When we find the natural rhythm of the muscle it becomes more fluid than solid and, under the effect of gravity, begins to hang like liquid from the bones (Fig. 8.18).
We can at this point revisit the 1st outside leg line using our thumb to push into the channel between the muscle and bone (Fig. 8.19).
We now turn our attention to the inside leg lines. Although it is possible to work these lines with the leg straight, when we work with the leg bent we can achieve more effect more quickly. We support our patient’s knee with our lateral hand and work the lines with our medial hand. On the inside of our patient’s leg we use our thumb to feel for the 1st inside leg line between the medial edge of the tibia and the muscle (Fig. 8.20).


Stay updated, free articles. Join our Telegram channel

Full access? Get Clinical Tree


