PROCEDURE 28 Proximal Tibia Fractures
Indications
 Relative indications
• Lateral plateau fractures with associated joint instability or displacement of the articular surface that is not submeniscal
• Any fracture in the metaphysis and epiphysis of the tibia should be evaluated for evidence of vascular injury, as well as for signs and symptoms of compartment syndrome.
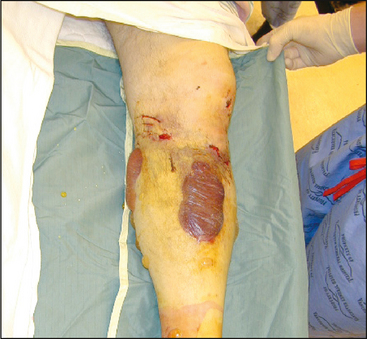
• Many authors would consider severe soft tissue injury as a temporary contraindication to open reduction and internal fixation (ORIF), and advocate the use of temporary external fixation in that setting. Special attention should be paid to the anteromedial skin in this setting, as it is most susceptible to injury.
Examination/Imaging
PHYSICAL EXAMINATION
 Examination of affected extremity
• A vascular examination, including ankle-brachial index compared to contralateral side, is performed.
• Re-examination at regular intervals is required, as compartment syndrome can occur 24 hours or more after injury.
IMAGING STUDIES
 Radiographs
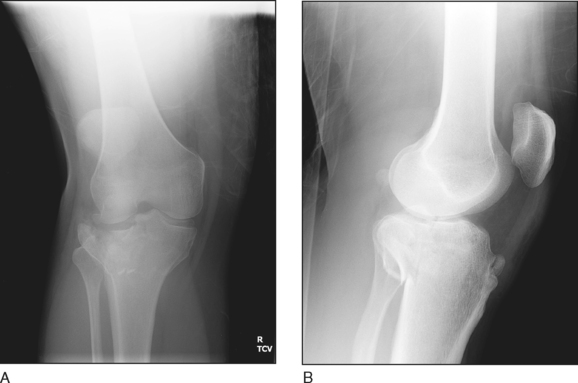
• Anteroposterior (AP) (Fig. 1A) and lateral (Fig. 1B) views of the knee
♦ Focused images allow evaluation of fracture anatomy and planes, comminution, and displacement. Other injuries around the knee are also evaluated (patella, distal femur).
• AP and lateral views of the tibia: Long-leg images allow assessment of alignment of the extremity, and distal extent of the injury and angulation through the fracture.
• Plateau view: A film shot 10° caudad is in plane with the normal slope of the tibia, and can be helpful in delineating hidden extension into the plateau or tibial spine.
• Oblique views of the knee: Although these have been largely replaced by computed tomography (CT) scans, additional views can be helpful in characterizing the extension of the fracture lines into the plateau.
 Computed tomography
• Periarticular injuries require thin-cut CT images in order to best delineate articular components, and are a standard part of evaluation of proximal tibia fractures.
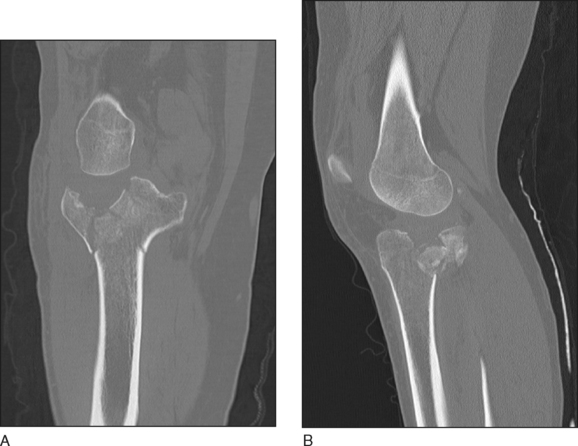
• Sagittal and coronal reformats are best for characterizing articular injuries, as the axial cuts are in plane with the injury (Fig. 2A and 2B).
• CT scanning provides three-dimensional information, and is very helpful in planning reduction and fixation techniques (Karunakar et al., 2002).
 Magnetic resonance imaging (MRI)
• MRI allows identification of meniscal and ligamentous injuries associated with the tibial plateau fracture.
Surgical Anatomy
 Fracture/tibial anatomy
• The lateral plateau is slightly higher than the medial plateau, forming a varus angle of 3° with the tibial shaft.
• The weight-bearing axis is such that ≥60% of weight passes through the medial tibial plateau, which leads to denser subchondral bone on the medial side.
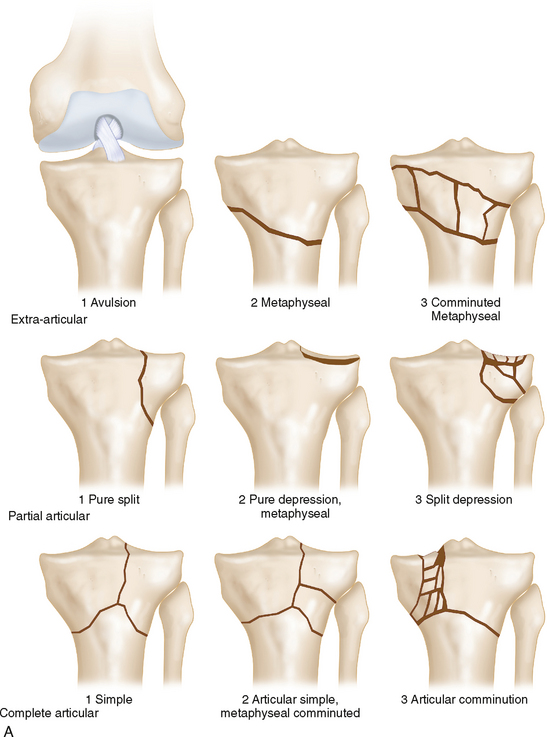
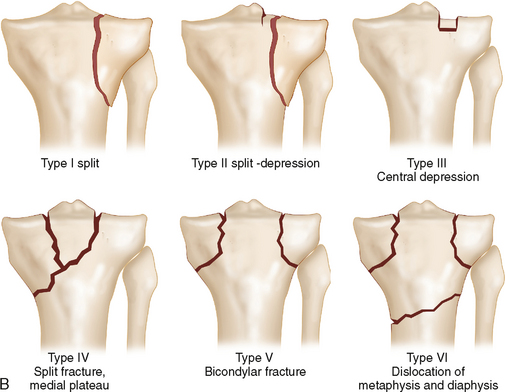
• The AO/ASIF/OTA classification distinguishes between nonarticular (or extra-articular), partial articular, and complete articular fractures, then subdivides these classifications based on the amount of comminution (Fig. 3A).
 Skin anatomy
• The soft tissue examination is very important for planning timing of surgery, and placement of the incisions.
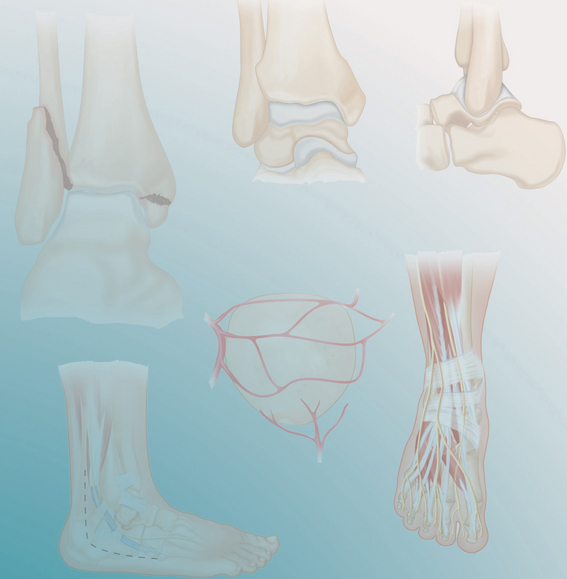
• The anteromedial soft tissue envelope (Fig. 4), which is directly subcutaneous, is at highest risk.
 Meniscus
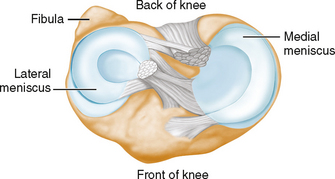
• The meniscus is likely to be involved in displaced plateau fractures, and needs to be addressed in the approach.
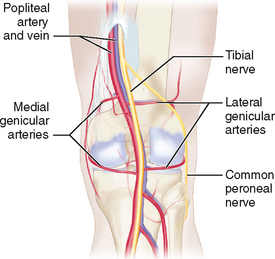
 Popliteal artery (Fig. 6)
• The popliteal artery is anchored proximally by the tendinous insertion of the adductor magnus, and distally by the tendon of the soleus as it descends from the tibial plateau.
 Common peroneal and tibial nerves (see Fig. 6)
• These nerves separate in the upper popliteal fossa, and the tibial nerve runs into the deep posterior compartment.
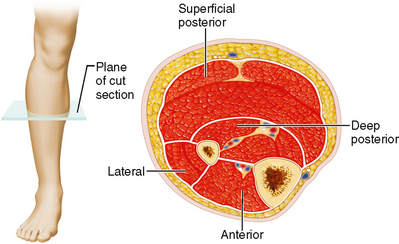
 Muscular anatomy (Fig. 7)
• The anterior compartment covers the anterolateral tibia, with the anteromedial tibia lying directly subcutaneous.
• When used, a positioning triangle should be placed on the distal thigh, not in the popliteal fossa, allowing the soft tissue posteriorly to “fall away.”
Positioning
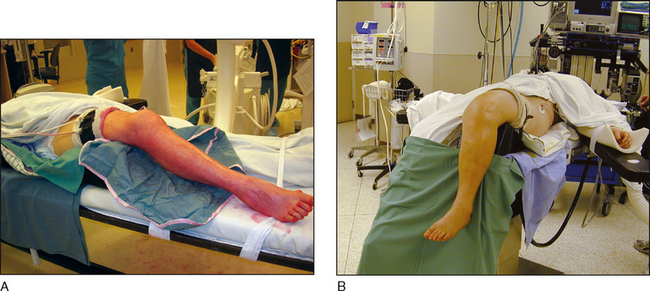
 Most often the patient is placed supine on a radiolucent table (Fig. 8A).
• The use of a sterile knee flexion bolster will allow positioning of the limb in flexion or extension.
 Alternatively, positioning may be done with flexion of the bed to allow the lower leg to hang free (Fig. 8B).
Portals/Exposures
 Anterolateral approach to proximal tibia
• An S-shaped incision is made from the posterior aspect of the lateral condyle of the femur, across at the level of the joint, and extends distally about 1 fingerbreadth lateral to the crest of the tibia over the appropriate length to expose the fracture (Fig. 9).
♦ The proximal end of the incision should be used only when needed, as the distal ⅔ of the incision (similar to a hockey stick incision) is often sufficient.
♦ Care should be taken to stay lateral to the anterior border of the tibia (∼1 cm), to avoid an incision directly over subcutaneous bone.
 Posteromedial approach to the tibia
• This can be performed with the patient supine, either over a bolster or in a figure-of-4 position.
• The skin incision is made over the posteromedial tibia, posterior to the pes anserinus and its tendons, and anterior to the gastrocnemius (Fig. 11A).
