Casting
Richard B. Birrer
Physicians who manage fractures need to know how to apply a cast and splint. Plaster does not produce allergies. It is inexpensive in comparison with fiberglass and is most adaptable to the part being splinted. It is applied with or without gloves. Its disadvantage is that it is slow to dry and gain full strength. It can be seriously weakened if it becomes wet once it is dry. Plaster is very heavy when wet but becomes lighter when dry. Because it is partially radioopaque, bone details on radiographs can be obscured.
Fiberglass is light, waterproof, and durable but requires airtight packaging. It must be applied while wearing gloves. It does not splash like plaster and hardens rapidly by exposure to water over a period of 10 minutes. It is three times more expensive than plaster, but because of its strength, fewer rolls are required. Fiberglass is radiolucent and lighter weight.
CAST APPLICATION
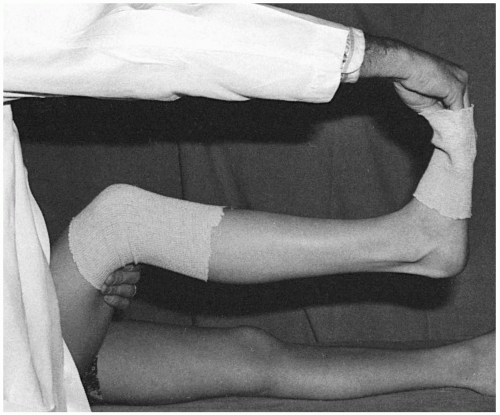
Tubular stockinette (Figs. 1 and 2) can be used to cover the skin. Extra layers of Webril should be placed over bony prominences. The appropriate size of plaster roll is then chosen—for the lower extremities, 4-in. and 6-in. widths and 2-in. to 4-in. on upper extremity injuries. For children, choose 2 in. and 4 in. for the lower and 2 in. for the upper extremity, depending on the size of the child. The plaster bandage is then unwound for approximately 10 cm (4 in.), and both the roll and the free end are held under the water for 30 seconds until bubbles cease to rise.
Cold water is used to extend the setting time and warm water to shorten it. The plaster splint is then carefully lifted out of the water and gently squeezed with the bandage drawn through both finger and thumb to wring out the water (Fig. 3). It can then be wrapped around the part to be casted. The wet plaster bandage is always applied distally, proceeding proximally, thus diminishing venous congestion and allowing smoother application of the bandage. A thick layer of Webril 3 cm long should be left to protrude beyond the margins of the plaster. The circles of wet plaster bandage are tucked (Figs. 4 and 5) where a limb circumference enlarges (proximal forearm or calf of the leg). A 50% overlap of width gives a double layer of plaster, and 60% overlap gives a triple layer. At the proximal and distal edge, the Webril is folded back to give a smooth edge with full movement for the fingers and toes (Fig. 6). To fit the limb accurately, the plaster is then smoothed and molded (Fig. 7).
The injured limb should be elevated on folded blankets with the hip and knee each flexed at 90 degrees. The neurovascular status is checked regularly. The patient should return the next day for inspection of the limb and the cast. A set of cast instructions should be given to the patient to identify danger signs. Information about care of the cast and exercises for the leg is included.
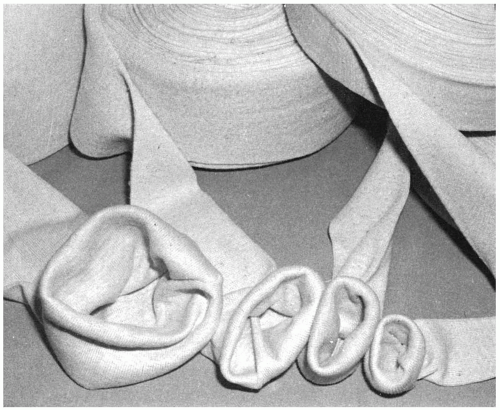 Figure 1 Tubular stockinette is used to line and trim the end of casts, and it has many other uses. It is available in widths from 2 to 12 in. |
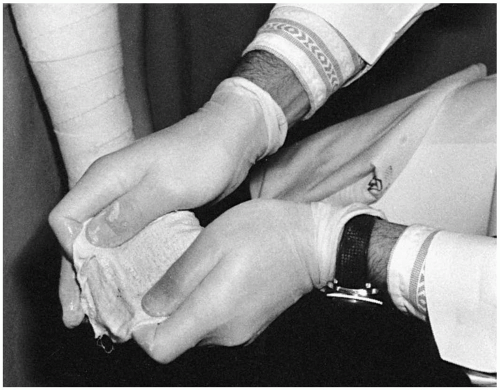 Figure 3 Gently squeeze the water out of the roll by accordioning it from either side. Twisting or manipulating the roll results in excessive loss of plaster. |
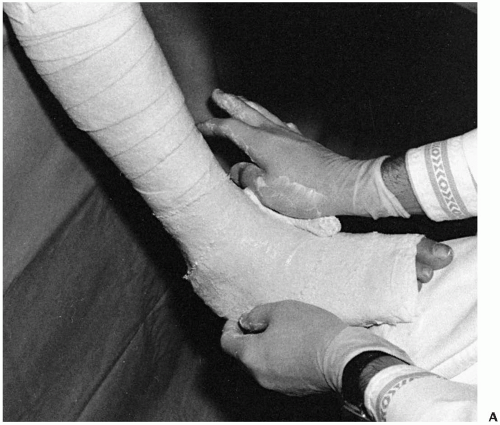 Figure 4 A: Begin with a 4-in. roll at the metatarsal heads; use this roll on the foot and ankle. Notice that the plaster roll is pushed, not pulled. (continues) |
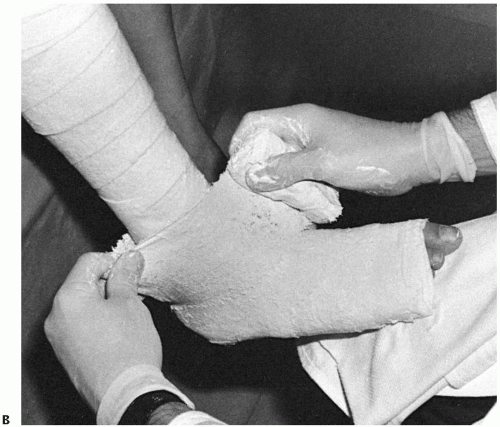 Figure 4 Continued. B: To change the direction of the roll, place the leading edge in the direction you want the roll to go. This maneuver produces a loose corner of plaster, seen here in the surgeon’s left hand. Take a tuck with the left hand and smooth it down on the posterior aspect of the leg. For sharp changes of direction, pick up the roll with the right hand, but in general leave the roll on the extremity.
Stay updated, free articles. Join our Telegram channel
Full access? Get Clinical Tree
 Get Clinical Tree app for offline access

|
